Sunday, December 7, 2014

Breakfast Tacodillas

Breakfast Tacodillas, originally uploaded by michele wynne.
Breakfast is and always has been my favorite meal, long before it became a regular in my kitchen, it's always been my favorite meal for dining out.
This is a pretty typical breakfast when I can remember to do it and it's super simple. All you need are some corn tortillas, eggs, cheese and fresh herbs. I also include caramelized onions, roasted peppers and tomatoes when I have them on hand or some corn salsa.
The inspiration for my taco-quesadilla hybrid came about one morning whilst I was noodling around the blogosphere and other time-leeching internet diversions. That day, the hours I spent elsewhere, some how led me to these two recipes that changed the little kitchen for the greater good.  This is a mash-up from my two favorite foodie blogs. I've been making some version of this at least once a week since this taco recipe from Smitten Kitchen caught my eye...then something directed me to this quesadilla recipe from 101 Cookbooks.
Breakfast for one~3 tacodillas:

Assemble whatever assortment of ingredients you have on hand: 2 eggs, 3 corn tortillas, salsa, cheese, herbs etc. I'll usually use whatever cheese I have on hand, but I find fresh goat cheese, feta, or blue cheese or Brie (used here) to be my cheeses of choice.
For this one I used Brie and the last crumbles of some Pt. Reyes Original Blue, caramelized onions, and thyme.
In a small bowl beat the eggs with some salt and pepper. Heat up a little oil in a small non-stick skillet. When the oil is hot, pour in about one third of the eggs, enough to spread to the size of your tortilla. Let the egg set for about 30 seconds and then lay the tortilla over the egg and let that set for another 30 seconds or so until the egg is fused to the tortilla. Carefully flip the whole thing over. Sprinkle some cheese on top of the egg and let it begin to melt. Add any other layers of ingredients. Slide the tortilla onto a plate, folding it in half as you lay it down. Repeat with the remaining tortillas.

Thursday, October 30, 2014

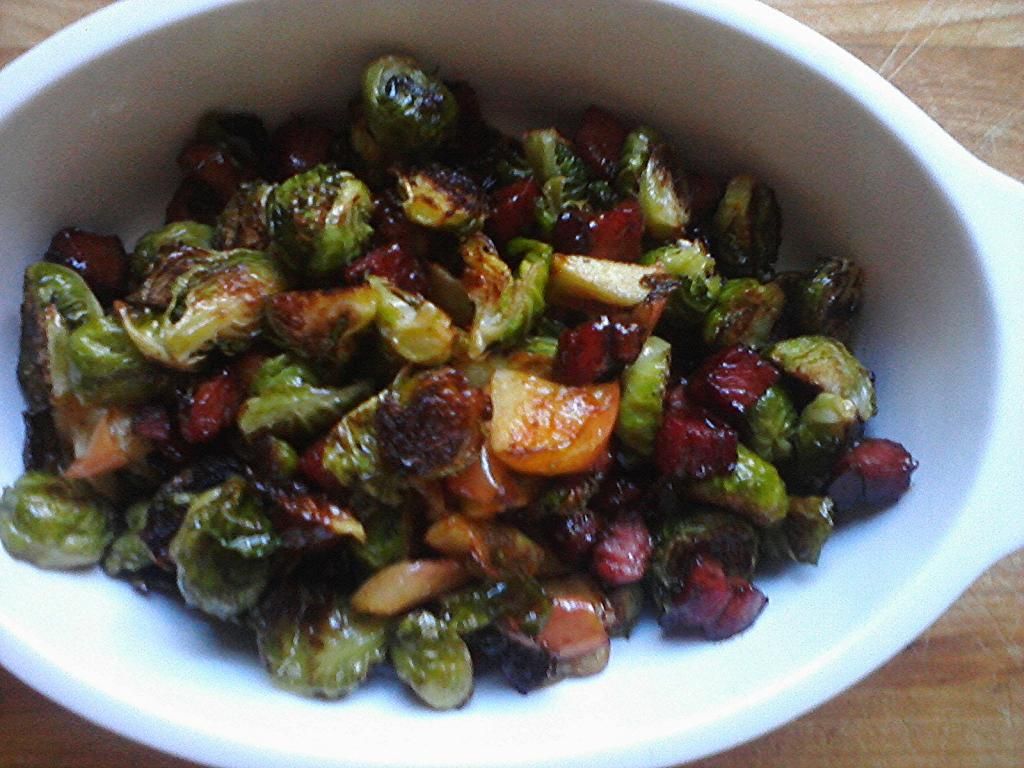
Roasted Brussels Sprouts, Apples & Bacon

I'm auditioning brussels sprouts for a potential role in my Thanksgiving contribution this year. Brussels sprouts are a relatively uncharted territory for me as I was one of those haters for most of my life. I began my conversion a couple of years ago when I came across a very simple recipe in one of Gwyneth Paltrow's cookbooks. The photograph was delicious and I'd been trying to broaden my veggie horizons by focusing specifically on vegetables that I'd thought I hated (eggplant and squash rounded out the top 3 vegetables I've managed to avoid all my life). The brussels sprouts were pretty darned good. I felt accomplished, adventurous, and virtuous. Then I moved on.
In preparation for the upcoming holidays, I was asked if I'd be up to bringing a home made holiday dish to a staff meeting at the market and talk about how to shop for it and how to prepare it, providing printed copies of the recipe. This is an example of how we live Bi-Rite's mission statement: Creating Community Through Food.
The first thing that came to mind were brussels sprouts. I don't know why, because I've never prepared them since that first time but it seemed like the perfect occasion to revisit.

So, as usual, I embarked on a recipe Google-thon and landed on two recipes that morphed into this:

Roasted Brussels Sprouts with Apples & Bacon
adapted from Michael Symon at cookingchanneltv.com
and backtoherroots.com

1 ½ pounds brussels sprouts-trimmed and halved*
1  large tart apple, such as a Granny Smith or Pippin-cut the same size as the brussels sprouts
8 ounces slab bacon-cut into ¼ “ lardons (cubes)
Olive oil
Salt & pepper
¼ cup balsamic vinegar
2 tablespoons maple syrup

Pre heat the oven to 450 degrees.
In a large bowl, toss the brussels sprouts and apples in 2 tablespoons of olive oil using your fingers to get all of the pieces coated. Transfer onto however many sheet pans you'll need so you can spread the pieces out so they are in one layer and not touching each other. You may need to roast in batches to achieve this. Sprinkle generously with salt and pepper.
When roasting vegetables it’s important not to crowd the pan or else everything will just steam and not brown.
Roast for 20 minutes** or until the vegetables start to blacken. Halfway through the roasting time, remove the pans, toss the vegetables around and switch places on the racks if you have more than one pan going,
Cook the bacon until crispy. Drain onto a paper towel and drain the fat into a small Pyrex type bowl.
Turn the heat back on under your now empty, but brown bottomed bacon skillet and deglaze with balsamic vinegar scraping up that great stuff stuck to the bottom of the pan and let the balsamic cook down a little and thicken. Turn off the heat and whisk in the maple syrup and a couple of tablespoons (or more) of bacon fat. Toss the cooked bacon back into the pan and stir. Add your roasted vegetables and toss those around a bit to coat.
If you want to get fancy you can add toasted nuts or dried cranberries or top with crispy fried onions or shallots.
*I bought bagged brussels sprouts which contained a variety of sizes. To achieve uniformity, cut the large ones in quarters, the medium ones in half and keep the tiny ones whole. You can also buy them loose and choose ones that are uniform in size. I like the variation of crispiness you get from the differences in shapes and sizes. Save the loose leaves and roast those last. They're like kale chips and add another dimension to the dish. Keep an eye on them so they don't burn like mine did.

**cooking time will vary depending on how large your brussels sprouts are.

I'm gonna go all out and do a big batch of these. The leftovers make a great fritatta the next morning and a nice garnish for soup.

Monday, October 27, 2014

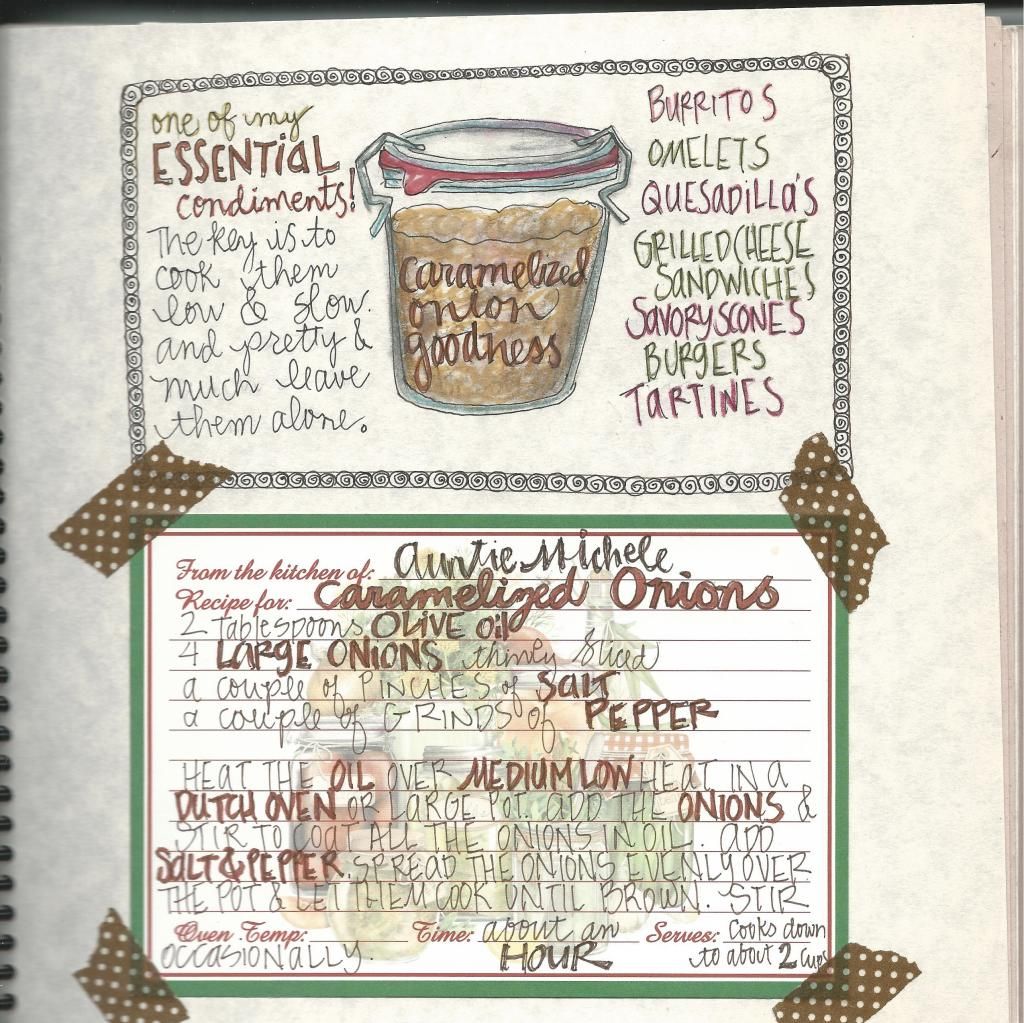
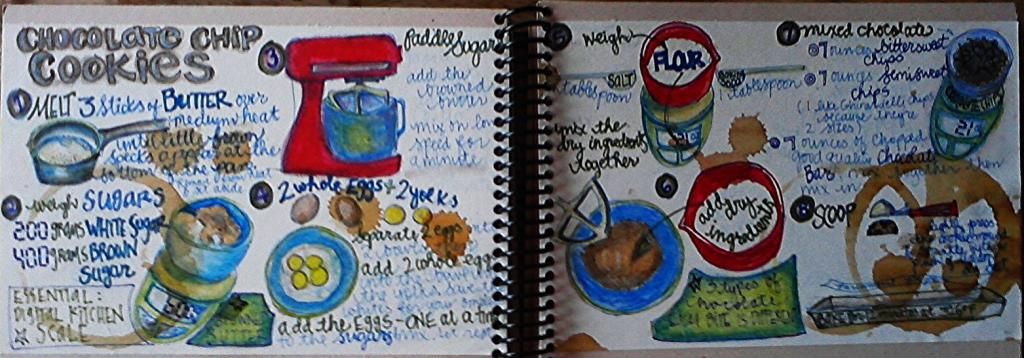
A Page from my Book...


... and  one of my favorite things.  This is a super simple and amazingly delicious way to start a morning. I created an illustrated cookbook for my niece's bridal shower gift last year, a compilation of my little kitchen faves. 
This quesadilla eventually morphed into what I call a tacodilla (a hybrid of these two recipes) inspired by my two favorite blogs 101 cookbooks and smitten kitchen.

Tuesday, October 14, 2014

Raspberry Lemon Drop

This is a little project I've been working on since handing off my collection of illustrated recipes to my niece for her bridal shower gift.
Yet again, there's been a sad lack of cooking content here, but that is not to say the little kitchen has been inactive but I've been having a lot of fun with the illustrating and cooking and spending way too much time lost in the vortex of Pinterest. Computer issues are also an issue when you're at the mercy of the sloooowwwness of free public wifi and library computers with a mind of their own. I get really impatient.
Anyhoo, I'm going to share some of my illustrations here to keep the blog active.
Some notes about this recipe:
My simple syrup recipe is a cup of water and 1 1/2 cups of sugar, heated in a sauce pan until the sugar is dissolved. Let it cool. It doesn't have to be refrigerated.
My favorite raspberry liqueur is St. George. I find Chambord to be too sweet and cough syrupy. That's just me though. I also just realized that I neglected to note on the illustration that fresh raspberries add a nice touch.

Sunday, August 31, 2014

Kuri Curry Coconut Soup & A Day on the Farm

This pretty pumpkiny thing is a Kuri squash. I picked it right out of the patch with my own two hands along with the butternut and a whole bunch of onions. I'll get back to this.
Photographing pureed soups is just best left to the experts. I lacked the werewithal to come up with photo friendly garnish strategies because this soup was so damn good that I couldn't bear to let it sit around while I noodled around with what?...chives? fried shallots? squeeze bottle drizzle art? No. None of that because I realized that this soup was not about that particular destination. It's the farm to table journey that bears note.
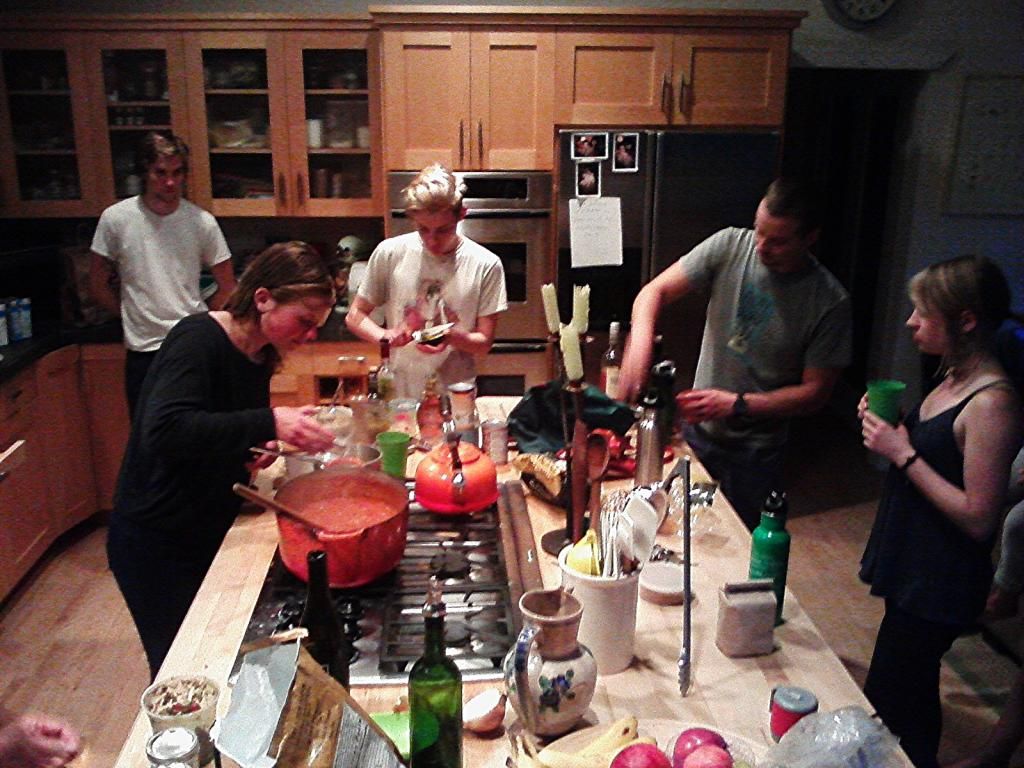
I went to Sonoma last week to get my first gander at the Bi-Rite Farm. I did more than gander. I harvested. I traveled up the afternoon before with a small caravan of co-workers. We spent the night at my boss Sam's gorgeous weekend home, cooking a lovely meal together in a true chef's kitchen around a ginormous island. 
After our meal of chili & cornbread, a few beers and a round of Cards Against Humanity, we hit the sleeping bags and got out to the farm early the next morning.

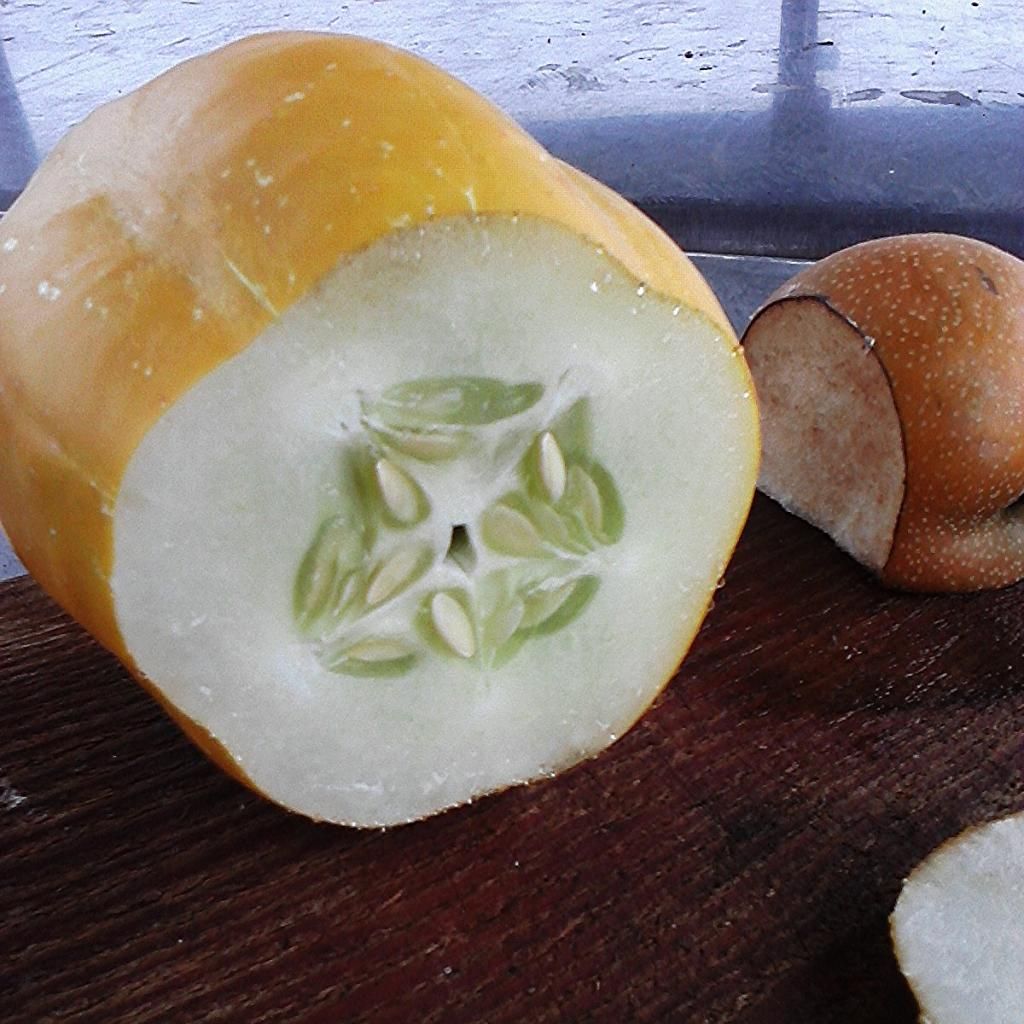
I picked this crazy lemon cucumber.
This was really overgrown, at first I thought a melon snuck it's way into the cucumber patch. I'd never seen a lemon cucumber until last year when I started working at Bi-Rite. They are ready to harvest when they are the size of a fat lemon, speckly pale green with a blush of yellow. 

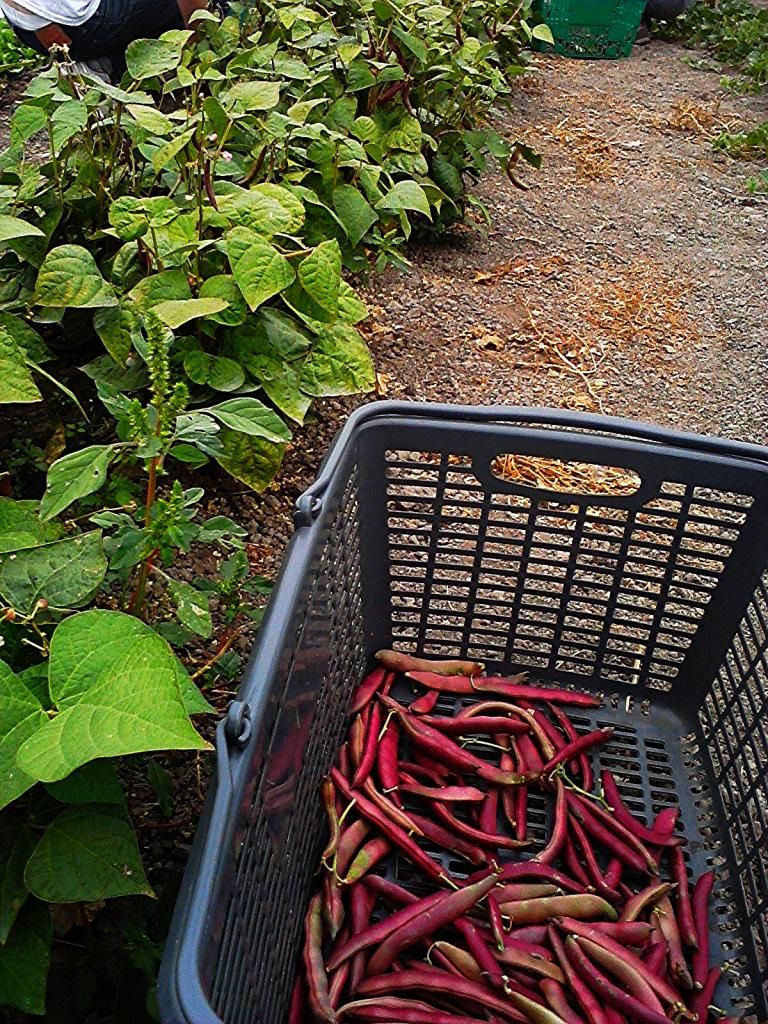
We picked the last of the red beans, then pulled up the plants and mashed them into the compost heap. Amaranth weeds were yanked and  fed to the cows next door, one of which was destined for our market shortly and carrot tops were fed through the fence to the donkeys at the other next door farm. There is virtually no waste here. The pretty stuff goes to the markets and the rest goes to the kitchens.

A new crop to the farm... hops. I was invited to tear into one of these buds and rub it around in my hands. It was like perfume. These are destined for a limited edition Bi-rite brew. I've renewed my love of beer since working at the market. I've had the opportunity and great good fortune to be able to taste a vast array of amazing small craft brews and after 15 years of bloaty beer banishment, I am back and truly in love with all manner of hoppy beers. IPA all the way.
I came home with a couple of squashes, a bunch of red torpedo spring onions and fistful of rosemary. I didn't want to get greedy, thinking of what I was capable of using soon and carrying along with my sleeping bag and other gear once we got back to the city.

The very next day I got this going:

I caramelized most of the onions & roasted up the kuri squash. The great thing about the kuri squash is that you can eat the skin. Here's how this all went down:

Kuri Curry Coconut Soup

1 medium Kuri squash cut into 1" cubes
3 spring onions-caramelized
1 teaspoon of Penzey's Sweet Curry Powder
1 teaspoon cumin
olive oil
salt & pepper
2 large cloves of garlic
4 cups water
1 heaped tablespoon Better than Bouillion Chicken broth base
1 can coconut milk

Cook down the onions first. In general it takes about an hour to get a good caramelization if you go with the low and slow method. These farm fresh onions took even longer because they were so juicy...not like the drier supermarket/produce market onions I'm used to that have been sitting around for god-knows-how-long. It took me a while to figure that out. I cooked the first batch within 8 hours of picking. I was seriously thinking "What is wrong with these onions? Why are they taking so long?" City girl. It was really hard to resist turning up the heat to get them to go faster. I refrained. I'm not sure what difference it would have made to the soup, but I like to think a world of...


Pre-heat the oven to 425 degrees.
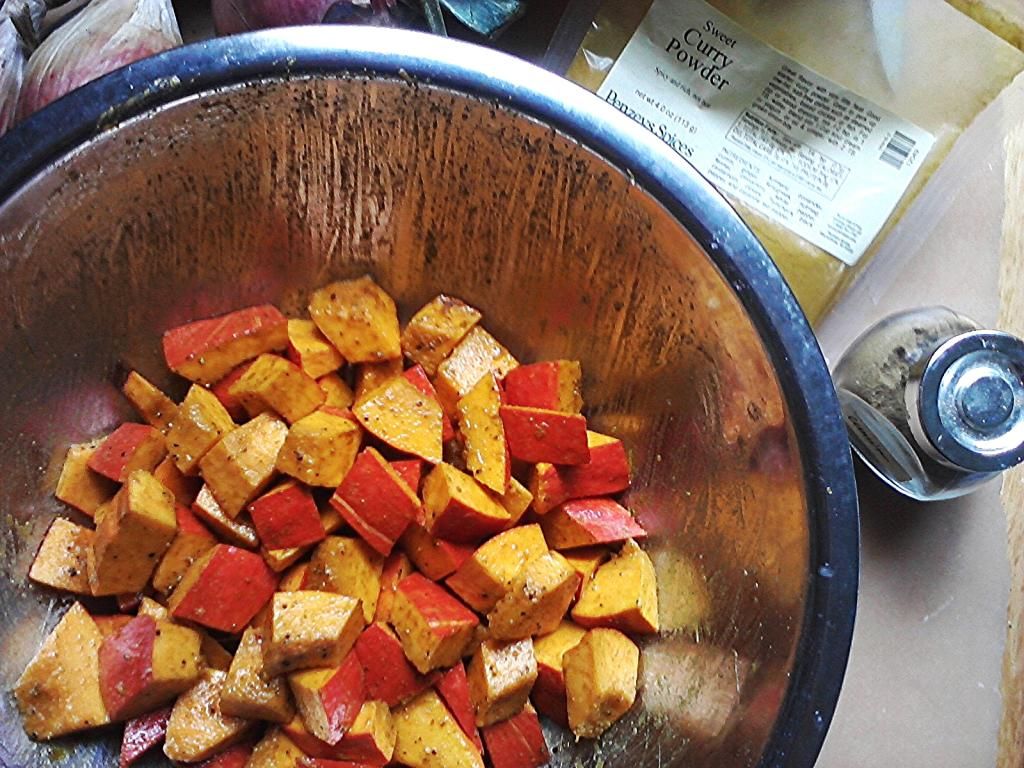
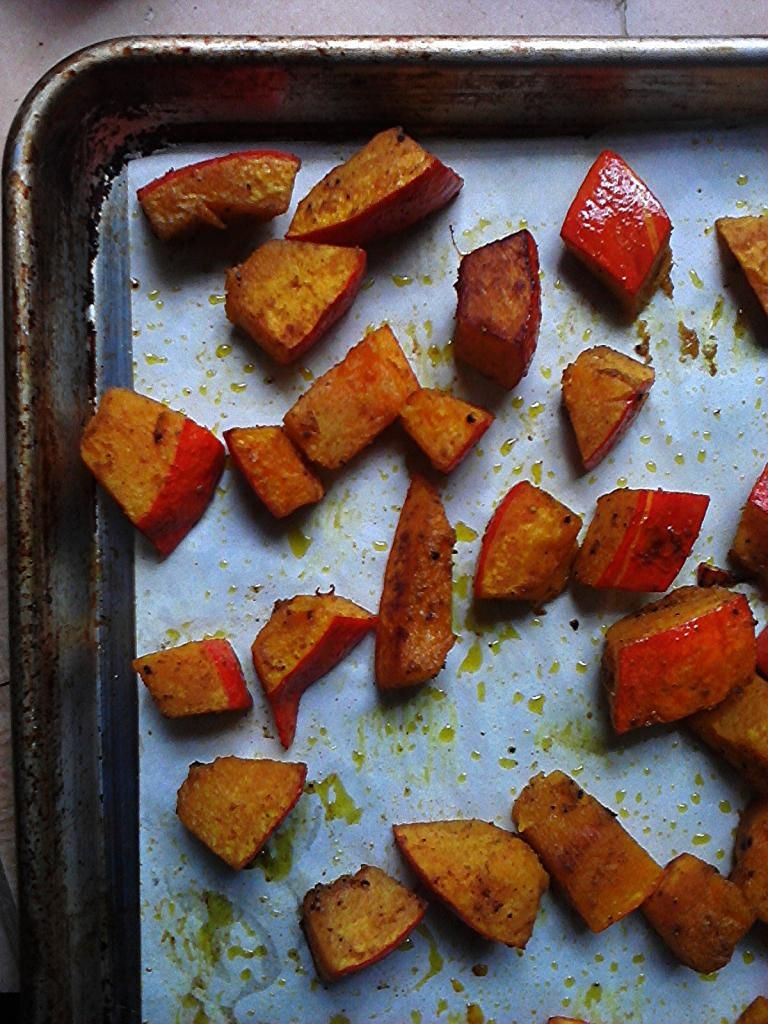
Toss the squash with big glug of olive oil, curry, cumin, salt and pepper. Spread onto parchment lined sheet pans, using as many as needed so as not to crowd the pan. Roast for 15 minutes, toss and roast for another 15 minutes.
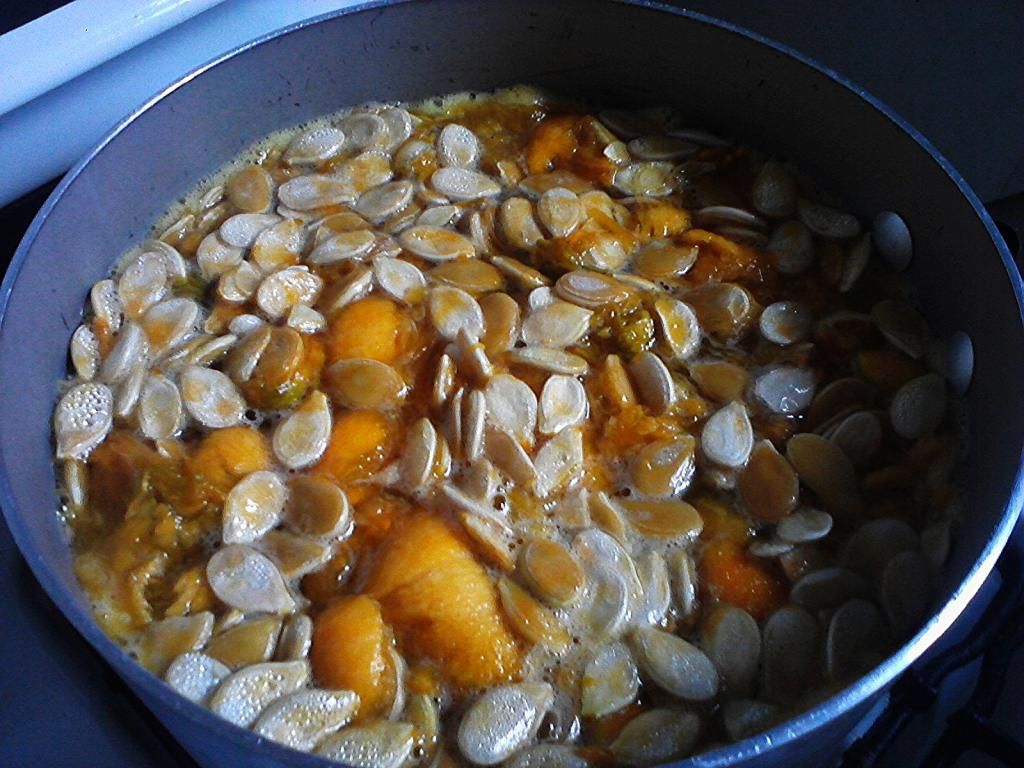
I had caramelized the onions the night before, so I reheated them in the bottom of the pot with some chopped garlic. Heat up a pot of water and start a broth with the innards of the squash, cooking for about 30 minutes. Strain and add the chicken broth base and dissolve. Add more water if needed to reach 4 cups of broth. Bring to a boil. Add the roasted squash and...it wasn't until this moment that I realized I could have roasted a bunch of garlic with the squash...next time. Maybe. This soup turned out so great that I seriously had to resist over thinking it.
Anyhoo...let the soup simmer for 30 minutes. Puree (carefully-it's super hot). Return to the pot and stir in the coconut milk. Done and Delish!
This soup is killer with a grilled cheese sandwich to dunk into it.


Monday, August 11, 2014

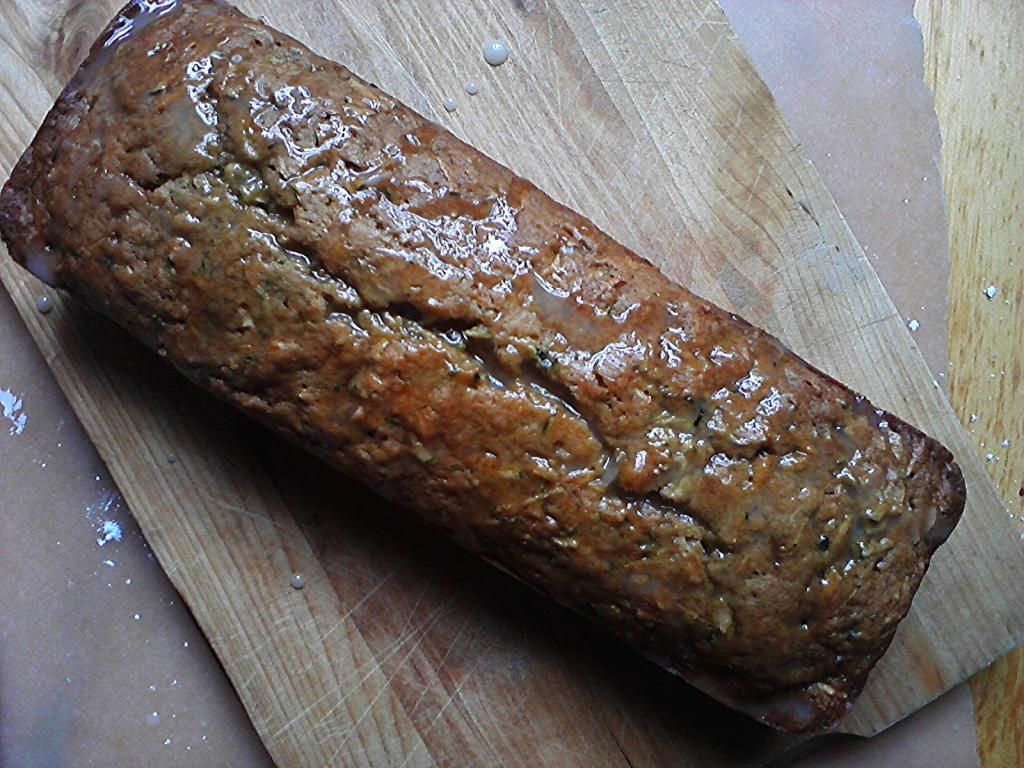
Lemon Zucchini Bread

There's been a sad lack of content here these days but that doesn't mean the little kitchen has been inert. In fact, productivity is at an all time high, thanks to the little sister kitchen joining forces with me for a while. It's usually technical difficulties or just plain laziness that inhibits post production. I can't manage to get from the kitchen to the computer, well that's a lie. I get to the computer just fine. Here I enjoy my favorite OCD/ADD procrastination activities along with homemade baked goods. I came home from work last night to a batch of biscotti.
I'm way too easily sucked into that vortex known as Pinterest...not that there's anything wrong with that because that's where I found this little gem at one of my faves, My Baking Addiction. I saw the words lemon & zucchini in the same recipe title and well...the brain went into overdrive thinking about two ginormous lemons one of my co-workers brought me from his tree and that zucchini sitting in the veggie drawer ready for my next round of fritters.
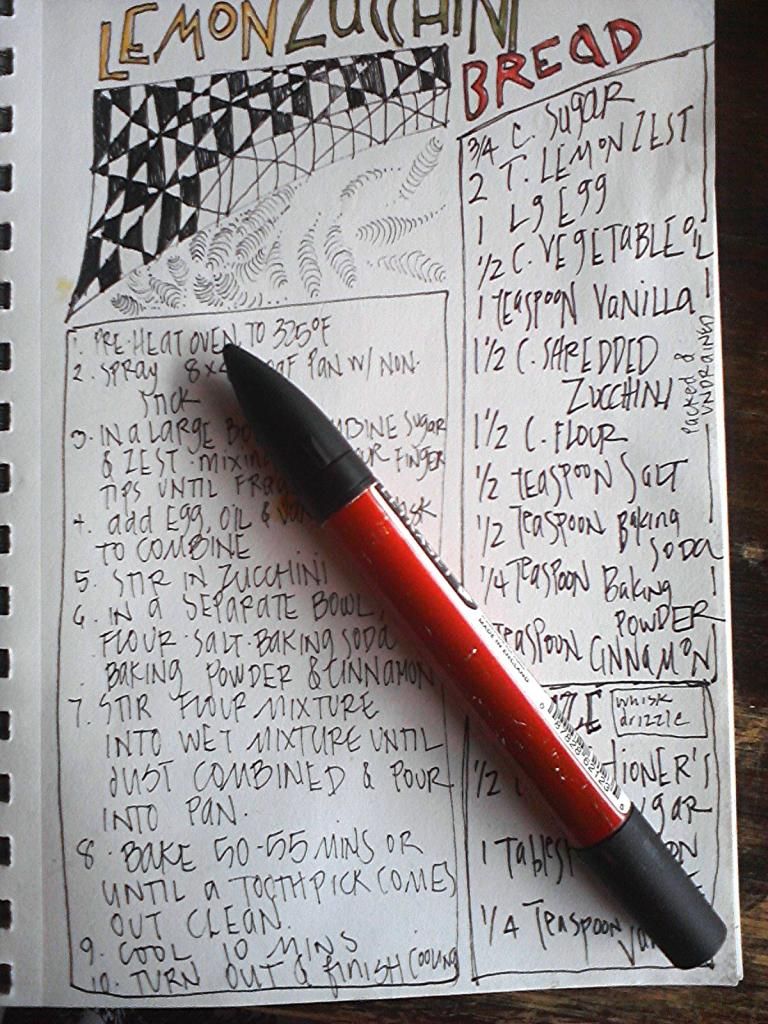
I managed to make it home and make this beautiful bread and it blew me away because it's a rare, rare occasion when I get my mitts on lemons this fresh. I've always been a city girl and small apartment renter. Lemon trees? When was the last time I saw one of those? I don't get out much-but when I come across a recipe that inspires me to commit it to paper right then and there-then it manages to exceed my expectations AND teach me a lesson...well, in my little world, it doesn't get any better.

I learned a lesson about lemons-well, more of a heightened awareness because of course I know that fresh is best. I have this weird thing about lemons. I love them and I always want to have them because I never know when I'm going to be in the mood for popcorn or salad dressing or a spritz in my sparkly water, but every now and then-sad to say-I'll wind up with a lemon or two teetering on the edge of petrification. I've been known to zest up some sad, sad lemons even though they're dry as dirt. 

This was the polar opposite of that.

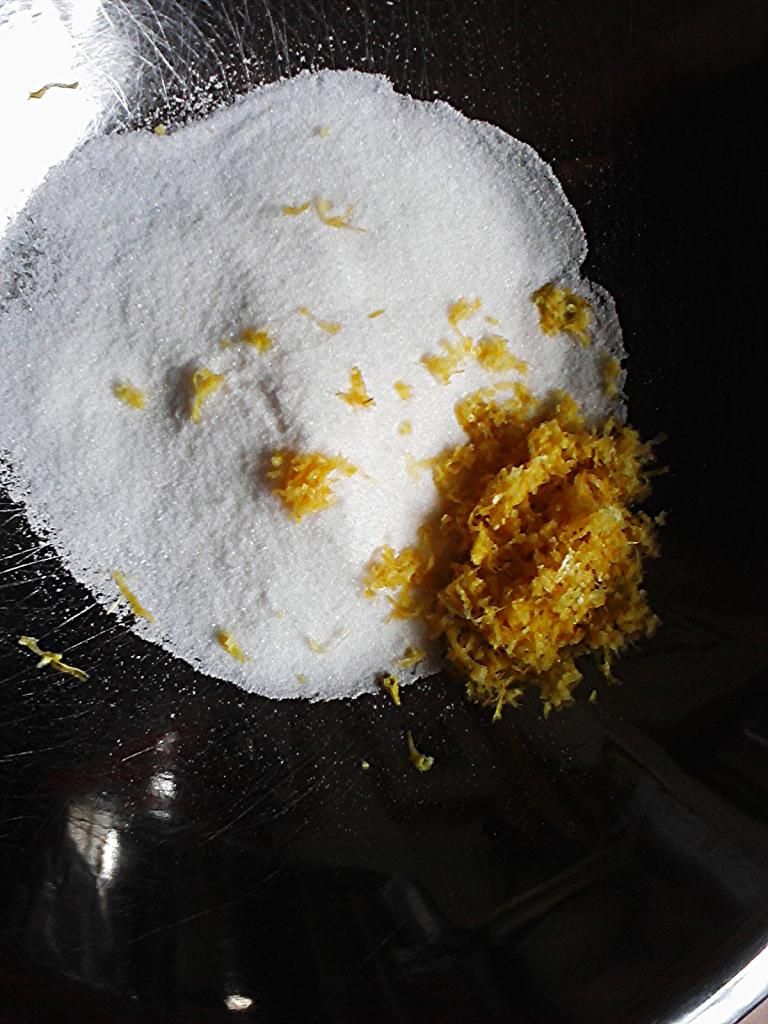
one ginormous lemon=2 tablespoons zest.

The AHA moment: working the zest into the sugar with my fingertips. The fragrance was out of this world.


Lemon Zucchini Bread
Adapted from allrecipes via My Baking Addiction

Yield: 1 loaf
Prep Time: 15 minutes
Cook Time: 50 minutes
Ingredients:
3/4 cup granulated sugar
2 tablespoons lemon zest (about 2 medium lemons)
1 large egg
1/2 cup vegetable oil
1 teaspoon pure vanilla extract
1 1/2 cups shredded zucchini (packed and undrained)
1 1/2 cups all-purpose flour
1/2 teaspoon salt
1/2 teaspoon baking soda
1/4 teaspoon baking powder
1 teaspoon ground cinnamon
Glaze:
½ cup confectioners’ sugar
1 tablespoon fresh lemon juice
¼ teaspoon pure vanilla extract
Method:
1. Preheat oven to 325 degrees F. Spray an 8x4 inch loaf pan with nonstick cooking spray.
2. In a large bowl, combine the sugar and lemon zest, mixing with your fingertips until fragrant. Add the egg, vegetable oil and vanilla and whisk to combine. Stir in zucchini. In a separate bowl, whisk together the flour, salt, baking soda, and baking powder and cinnamon. Stir the flour mixture into the zucchini mixture until just combined. Pour the batter into the prepared pan.
3. Bake 50-55 minutes in the preheated oven, or until a toothpick inserted in the center of the bread comes out clean. Remove pan to wire rack and cool in pan for about 10 minutes before turning out onto the wire rack to cool completely.
4. Once bread is cooled, prepare the glaze. In a medium bowl, whisk together the confectioners' sugar, lemon juice and vanilla. Drizzle the glaze over the bread.
Notes:
Bread will store in an airtight container in the fridge for 3 days-if it even lasts that long.


Make this ASAP!! You'll be so glad you did.


Tuesday, July 29, 2014

Zucchini Fritters

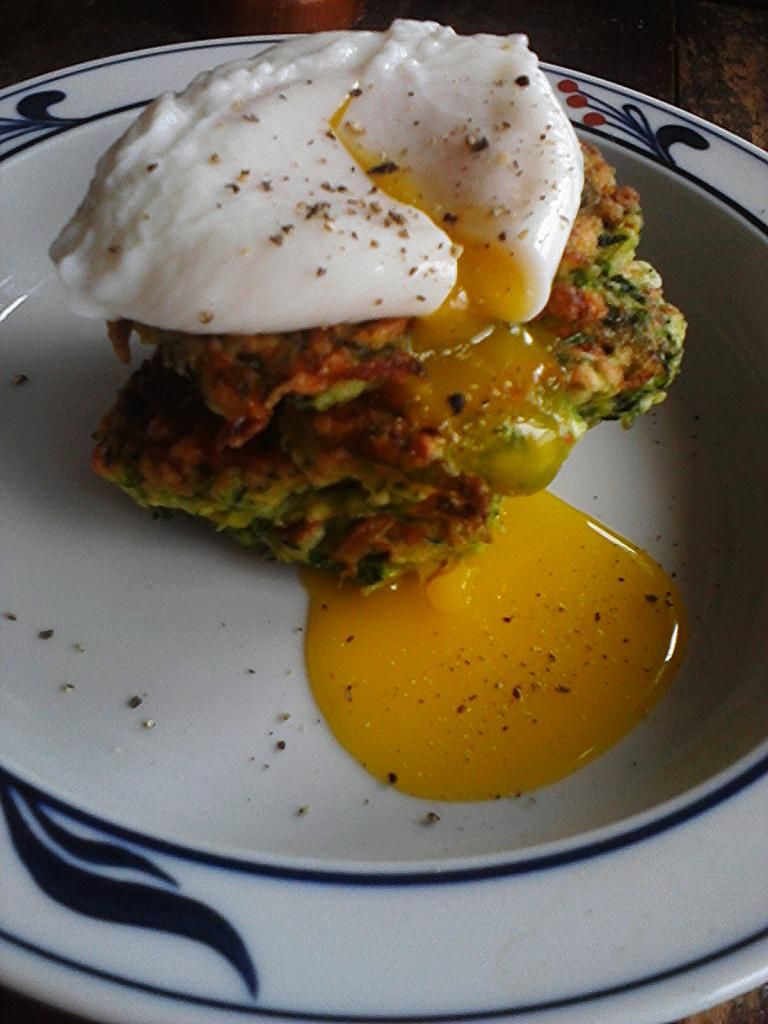
I can't get enough of these tasty little fritters-so simple and they're a great do-ahead. Topped with a poached egg...well, they are just the thing.
This recipe is a mash-up of two recipes I love. One from Smitten Kitchen and the other from The Longevity Kitchen Cookbook.

I've made these several times over the last two weeks. I've been playing around with spices. I like to add several grinds of Trader Joe's Everyday Spice Blend to the egg mix. I didn't put it in the recipe because it's not really necessary-I just like using those grinders.  The parsley, cilantro, mint medley came to mind as a really nice herb combo, one I had gleaned from the zucchini burgers I made from Jerusalem. I didn't have any mint though.


Zucchini & Sweet Potato Fritters
inspired by smitten kitchen and The Longevity Kitchen Cookbook

2 medium zucchini
1 small sweet potato-about the same size as the zucchini
1 small yellow onion
1 finely chopped scallion-green part only
1 heaped teaspoon coarse or Kosher salt, plus extra to taste
2 medium eggs, lightly beaten
Freshly ground black pepper
¼ cup chopped fresh herbs (I used parsley & cilantro-mint would be good here too)
1/2 cup all-purpose flour
1/2 teaspoon baking powder
sunflower oil for frying

Preheat oven to 200 degrees and place a sheet pan inside.
Trim ends off zucchini, peel the sweet potato, slice the onion in half and peel.  Grate everything either on the large holes of a box grater or in the food processor.
In a large bowl, toss the shredded vegetables with 1+ teaspoon coarse salt and set aside for 10 minutes. Line a colander with a clean tea towel and transfer the grated vegetables into the middle of the tea towel. Gather the ends and twist and squeeze out as much liquid as you can-there will be a lot.
Return the grated vegetables to a large bowl and loosen the compact ball with two forks and stir in your chopped herbs. Taste to see if you need more salt. To the beaten egg add stir in some freshly ground black pepper, then add to the shredded vegetables. In another small bowl, stir together flour and baking powder, then stir the mixture into the veg mix as well.
In a large heavy skillet, heat 2 tablespoons of oil over medium-high heat until shimmering. I like to use two forks to form small dollops of the veg mix into the skillet so there’s space between each pattie. Lightly press them flatter with the back of the fork. Cook the fritters over moderately high heat until the edges underneath are golden, about 3 to 4 minutes. If you find this happening too quickly, reduce the heat to medium. Flip the fritters and fry them on the other side until browned underneath again, about 2 to 3 minutes more. Drain briefly on paper towels then transfer to baking sheet and then into the warm oven until needed. Repeat process, keeping the pan well-oiled, with remaining batter. The fritters should continue to cook in the warm oven for another 10 minutes to finish setting and get a little more crisp.
Stack them up and top with a poached egg.
These fritters keep well, chilled in the fridge for a couple of days though they never last that long.They can also be frozen-place a sheet pan in the freezer, place the cooked fritters on the chilled sheet pan and freeze until solid, about an hour. Transfer the frozen fritters into a freezer bag and drawing or pressing out as much air as possible.
When you’re ready, bake them on a sheet pan, in a 325 degree oven until they’re hot and crisp.


Monday, July 28, 2014

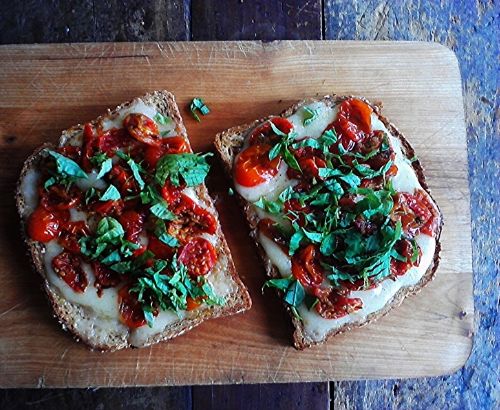
Roasted Tomato & Basil Grilled Cheese

These are a few of my favorite things:

Cheese~my favorite food in the whole wide world. Truly. This particular spur of the moment concoction uses my everyday go-to cheese, Cabot Vintage Cheddar. I have the great good fortune to spend my 40 hour work week in the most amazing and inspiring foodie mecca's in San Francisco, Bi-Rite Market, where my exposure to cheese has opened up a whole new world. Gone are the days of supermarket block mild cheddar and jack. I've ventured into the world of stinky cheese and haven't looked back.

Slooowww Roasted Tomatoes~my little kitchen staple.


Basil-nothing..well, almost ...makes me happier than getting basil to grow on my window sill for more than a week. I've got one going now that's lasted over a month.


Slow Roasted Tomatoes
Pre-heat the oven to 275 degrees.
a pint or two of any small tomato you like-sliced in half lengthwise. In large bowl toss the tomatoes with a good glug of olive oil, sea salt, fresh ground pepper and if you want, some dried herbs such as rosemary, thyme or tarragon.
lay a sheet of parchment paper onto sheet pan and spread the tomatoes out evenly, cut side up. Spoon the liquid left in the bowl back into the cut halves that appear hollow. Use two pans if you need to so the tomatoes aren't crowded.
Bake for 45 minutes.


My approach to the grilled cheese:
Turn on the broiler.
In a small ramekin, start with 2 tablespoons of softened butter & stir in a dollop of Dijon mustard and 2 tablespoons of grated parmesan.
Slather on one side of two thick slices of country loaf bread.
Grate one cup of your favorite cheddar.
In another small ramekin, spoon up some of those slow roasted tomatoes you've got in the fridge, along with the olive oil it's been encased in. Microwave that for about 30 seconds, just to liquefy the oil. Strain this oil into a non-stick skillet and heat on medium. It's going to start spattering, that's the water from the tomatoes-wait until that stops, then place the slices of bread butter side down and let that get all toasty brown.
Transfer the toasty grilled bread, toasty side down on a small sheet pan or broiler pan. Pile on the grated cheese and place it under the broiler for a minute then spread the tomatoes over the melty cheese and broil for another minute. I sprinkled this with za'atar, but fresh ground pepper works just fine.
Remove and let it rest for about a minute and top with some slivered basil.

Friday, July 25, 2014

chicken breasts poached in butter...


...with wine & cream sauce + other recipes from Julia Child.
It may not have been the prettiest girl at the dance but it was pretty damn delicious.

For the last several weeks I’ve been working on a labor of love for my niece’s bridal shower, an illustrated collection of recipes, photos and other kitchen anecdotes which boiled all down to family, friends and food.

Simultaneously, I had returned to “Dearie” the biography of Julia Child I’d started last year, then ADD’d elsewhere. I resumed it at the point she gets to France and the germ of Mastering the Art of French Cooking sprouts. She was relentless in getting each recipe perfect, persevering through battles with her co-authors and the rejections from her first publisher. Her determination and goal-oriented stubbornness paralleled  and motivated my drive to finish my project.
She was obsessed. I was curious. Oddly enough, I've never read Mastering the Art of French Cooking, though I had, somewhere,  The French Chef Cookbook I'd picked up a library book sale years ago. I dug it out and I bookmarked a few things.

First up: Supremes de Volaille a Blanc or Chicken breasts poached in butter, with wine and cream sauce. A supreme is the skinless, boneless, breast of a chicken removed raw from the whole bird. The recipe calls for 4 "supremes", I cooked 2 fairly large breasts.
The chicken breasts, rubbed with lemon juice, salt & pepper (white pepper-Julia only used white pepper) are oven poached in butter, then a sauce is made from that same chicken juice infused butter by adding broth, wine and cream-I mean seriously what’s not to love about that?

Julia was first and foremost, a teacher and the recipes are fairly idiot proof, even though I bought half and half instead of cream. I thought it was cream, so my sauce never quite emulsified due to the water in the half in half I’m thinking. I whisked really well and it looked beautiful for about 3 minutes then tiny oily globules started to form…well…live and learn. It tasted amazing though. I’m thinking, in part, because I didn’t skimp on the vermouth. By that I mean quality. I used this:
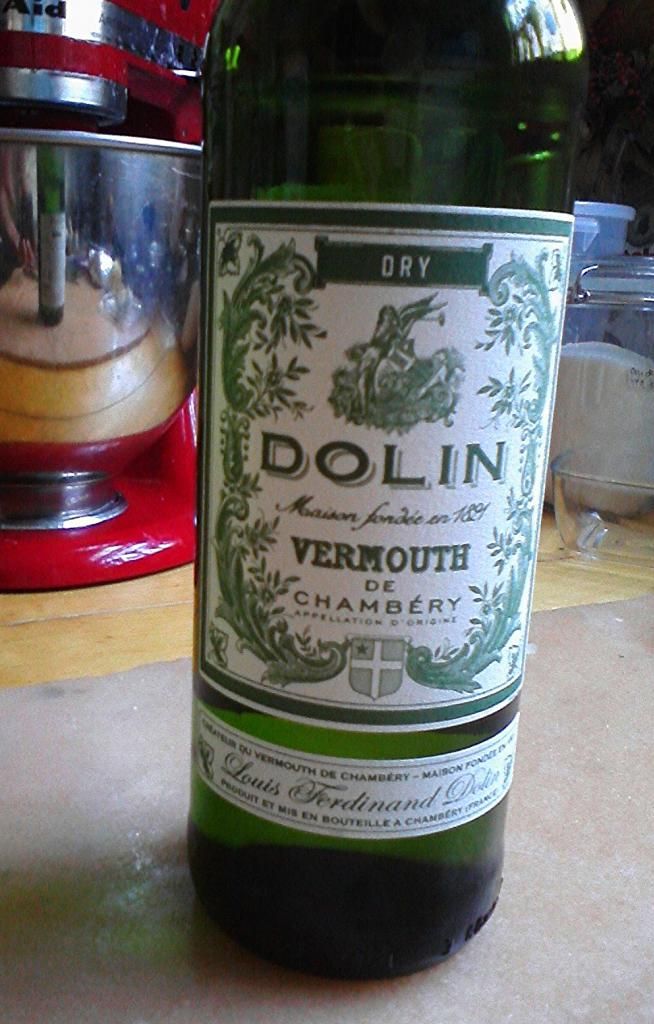
I cooked two breasts that were rather large so they took longer to cook. I may have over cooked them the teeeensiest bit. I guess I could have cut them in half or even sliced them since that’s what I did after they were cooked, but I think leaving them whole produces more juice which in turn flavors the sauce. I used Smart & Final brand beef bouillion-yeah I know-it’s all I had (I'm a huge fan of the Better Than Bouillion brand). Whatever. They were delicious! The sauce, in spite of my half and half debacle was rich and flavorful.

I also made a delicious risotto from the book. It's finished in the oven-- super low-maintenance. You  need to start it in some kind of casserole dish that can go from stove top to oven. Julia’s recipe calls for plain white rice. I had some Arborio left so I used it. Super simple. Dice onion, sauté in butter, stir in rice and cook for a minute, pour in bouillion, an herb bag or a bouquet garni of parsley thyme & bay leaf and pop in the oven for 18 minutes. Fluff. Done & delish.

Recipe #3 was Haricots Verts au Maitre D’hotel-or fresh green beans tossed with butter, lemon juice and parsley.

The green beans are blanched then tossed in a dry pan to remove the moisture then seasoned with salt & pepper, tossed with butter and then a splash of lemon juice and chopped parsley. Great recipe. A great way to cook green vegetables-broccoli, asparagus etc.


Cooking the Chicken Breasts

4 supremes
 ½ teaspoon lemon juice
¼ teaspoon salt
Big pinch white pepper
4 tablespoons butter
A heavy, covered casserole dish that can go from stovetop to oven
A round of parchment paper cut to fit the casserole
A hot serving dish

Preheat the oven to 400 degrees.


Method:
Rub the chicken breasts with drops of lemon juice, and sprinkle lightly with salt and pepper. Heat butter in the casserole until foaming. Quickly roll the chicken breasts in the butter, lay the paper over them, cover the casserole, and place in hot oven. After 6 minutes, press tops of suprêmes with your finger; if still soft and squashy, return to the oven for a minute or two more. They are done when they feel lightly springy and resilient; do not overcook them. Remove the suprêmes to a hot serving dish; cover and keep warm while making the sauce, which will take 2 to 3 minutes.

Wine & Cream Sauce:
1/4 cup white or brown stock or canned beef bouillon
1/4 cup port, Madeira, or dry white vermouth
1 cup heavy cream
Salt, white pepper, and lemon juice
2 tablespoons fresh minced parsley

Pour the stock or bouillon and the wine into the casserole with the cooking butter, and boil down rapidly over high heat until the liquid is syrupy. Then pour in the cream, and boil rapidly until lightly thickened. Season carefully with salt, pepper, and drops of lemon juice. Pour the sauce over the suprêmes, sprinkle with parsley, and serve immediately.


Risotto


1/3 cup finely minced onions
2 tablespoons butter
1 cup unwashed raw white rice
¼ cup dry white French vermouth, optional
2 cups light chicken stock heated in a small saucepan
Salt and freshly ground pepper
1 bay leaf (or a small herb bouquet—l small bay leaf, 1/8 tsp thyme, and 3 parsley sprigs tied in washed cheesecloth)

Method:

Sauté the onions slowly in the butter for several minutes until soft and translucent. Stir in the rice and sauté, slowly stirring, for several minutes more until the grains, which first become translucent, turn a milky white. This step cooks the starchy coating and prevents the grains from sticking.
Braising. If you are using vermouth, stir it in now and let it boil down for a moment. Blend in the chicken stock, correct seasoning, and add the bay leaf or herb bouquet. Bring to the boil, stir thoroughly, then cover tightly and finish in the oven, baking for 18 minutes. Do not stir it at all during this time. Check to see if there's any liquid at the bottom and return to the oven for another 2 minutes if necessary. Remove the bay leaf or herb bouquet, fluff the rice with a fork, taste & adjust seasoning if needed.


Green Beans


2 pounds of green beans
6-7 quarts boiling water
2 tablespoons salt
3-4 tablespoons butter cut into 3-4 pieces
salt
pepper
2-3 teaspoons lemon juice
2 tablespoons of minced parsley


Trim the ends off the beans and plunge them into the boiling, salted water. Boil for about 6-8 minutes- I used the skinny French green beans from Trader Joes so they only took 6 minutes to get to a place I like- or until the larger of the beans is tender but still has a slight crunch. This really depends on  the size & quality of your beans. Farm fresh beans will take much less time than beans that have been sitting in the supermarket for a week or whatever. Pluck out a bean, taste it and stop when you like the bite.

Drain immediately and rinse well in cold water. This can be done ahead of time.
When ready to cook, toss the beans in the dry pot over medium heat until any remaining moisture has evaporated. Season with salt and pepper and stir in one piece of butter. Alternate additions of butter and lemon juice. Top with parsley just before serving.

I actually watched that episode on You Tube after and learned that it's important to use a big pot of boiling water because it will return to the boil much faster once you've plunged the beans in. The rapid boil and chill is the key to keeping the vegetables al dente and thusly-PERFECTLY cooked!


Old Dog. New Tricks.


Thursday, July 24, 2014

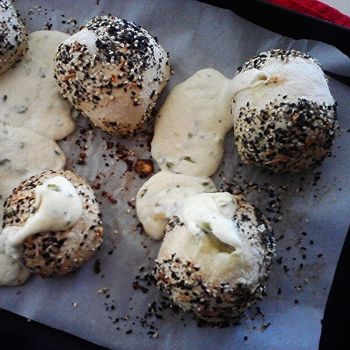
Everything Bagel Bombs

These are wicked. A flavorful scallion cream cheese filling is scooped into little balls and frozen, then wrapped in yeasty dough, washed with beaten egg and coated with an everything bagel mix. As the dough bakes and rises the cream cheese explodes.


I came upon this recipe awhile back at The Amateur Gourmet and became quite obsessed with them. Then, as is habit in the little kitchen, I move on, continuously in search of "the next best thing".
Recently I went back over some of my kitchen faves to compile into an illustrated kitchen journal as a gift for my niece's bridal shower. The bagel bombs were re-tested on the family and all agreed this was a keeper. The link to the recipe has some great step photos.


Bagel Bombs
from the Momofuku Milk Bar Cookbook by Christina Tosi via The Amateur Gourmet
 
Ingredients:
 8 ounces cream cheese (plain, not low-fat)
 One bunch of scallions, green part thinly sliced
 1 teaspoon sugar
 1/2 teaspoon kosher salt + 1/2 tablespoon (for dough) + 3/4 teaspoon for the bagel mix coating
 1 3/4 cups (or 225 grams) flour
 1/4 packet (or 1/2 teaspoon) active dry yeast
 7/8 cups (or 185 g) lukewarm water
 Neutral oil
 1 tablespoon white sesame seeds
 2 teaspoons black sesame seeds
 2 teaspoons poppy seeds
 1 tablespoon dried onions
 1/2 teaspoon onion powder
 1/4 teaspoon garlic powder
 1 egg
 
Method:
Put the cream cheese in the bowl of a stand mixer fitted with the paddle attachment and cream it on medium speed, until fluffy. Scrape down the sides of the bowl and add the scallions, sugar, and salt and mix briefly to incorporate. Taste and add a pinch more salt if you like. Scoop the cream cheese on to a parchment-lined cookie sheet in 8 even lumps and freeze until solid, 1 to 3 hours.

To make the dough, stir together the flour, salt and yeast in the bowl of your stand mixer. Hold the dough hook in your hand and combine the dry ingredients, add the water and continue mixing by hand for 1 minute, until the mixture has come together into a shaggy mess.

Attach the bowl and hook to the mixer and have the machine mix the dough on the lowest speed for 3 minutes, or until the ball of dough is smoother and more cohesive. If the dough is sticky sprinkle in more flour one tablespoon at a time, until the dough releases from the bottom of the bowl.  Knead for 4 more minutes on the lowest speed. The dough should look like a wet ball and should bounce back when lightly poked.

Brush a large bowl with oil and dump the dough into it. Cover with plastic wrap and let the dough proof at room temperature for 45 minutes.

Make the bagel mix by mixing together the salt, sesame seeds, poppy seeds, dried onions, onion powder, and garlic powder. What

Preheat the oven to 325.

Punchdown and flatten the dough on a smooth, dry countertop. Use a bench scraper to divide the dough into 8 equal pieces. Use your fingers to gently stretch each piece of dough out into a flat disc between 2 and 3 inches wide.

Put a frozen cream cheese ball in the center of each dough circle. Bring up the edges of each round and pinch to seal so that the cream cheese ball is completely encased in dough. Gently roll the ball between the palms of your hands to ensure the bomb has a nice, round shape. Arrange the bombs 4 inches apart on a parchment lined cookie sheet.


Whisk the egg and 1/2 teaspoon water together and brush a generous coat of egg wash on the buns. Sprinkle a heavy even coating of the bagel mix all over the bagel bombs~every possible inch, except for the bottoms, should be coated.

Bake the bagel bombs for 20 to 30 minutes. While in the oven, the bombs will become a deep golden brown and a few may have cream cheese explosions. Continue baking until you see this happen! Not to worry–serve them as is or use a small teaspoon to tuck the cream cheese back inside the bagel bomb. Bagel bombs are best served warm out of the oven. Store any leftovers <HA!> wrapped well in plastic wrap, in the fridge for up to 3 days.

 *Make ahead up until baking. Freeze them on a sheet pan then transfer to a freezer bag. They can go straight from the freezer into the oven.


Monday, July 14, 2014

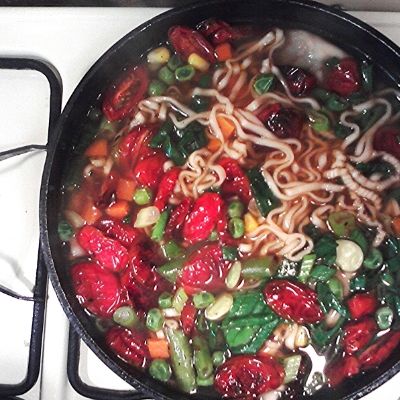
Rescue Ramen

It started as soup.
This was a refrigerator rescue I concocted whilst house sitting awhile back. I was a stones throw away from my favorite Asian market, New May Wah on Clement Street & 8th Avenue. I love their amazing assortment of frozen dumplings and other potsticker type bites. Along with the array of sauces and the lure of DirectTV back at the house, I was a hermit for close to 3 days, resurrecting my old New Years Eve tradition of an enormous dumpling appetizer dinner, Cosmopolitans and a Sex & the City marathon. Good times.
The leftovers found their way into the pot.
I had also picked up a bag of ramen noodles, six curly compressed rounds packaged much like rice cakes.There was an unfortunate clamshell of grape tomatoes in my host refrigerator that begged to be rescued. Of course I slow roasted them. I also had a bag of mixed frozen vegetables at home. This was much more dense than my usual 3-1 broth-to-stuff ratio.

Method:

bring a big pot of water to a boil-this was 6 quart dutch oven with about 4 quarts of water, then reduce to a simmer.
Better Than Bouillon Vegetable Base-about 2 tablespoons- let it dissolve and taste.-just enough that the water takes on some flavor. Add some salt at this point if necessary. Seasoning at this point is more for flavoring the noodles that will cook in the broth.
a garlic clove or two finely chopped & smashed with coarse salt using the side of a knife
add potstickers if you have them-either your leftover cooked ones or frozen (let them cook through for about 7-8 minutes)
   *I used both ramen and potstickers just because I had them-but either one alone is fine
frozen vegetables
a bunch of scallions, thinly sliced, white parts in the pot first-hold off on the greens until the end
any raw vegetables you're trying to use up, diced
ramen noodles-I used one of the cake rounds
add the roasted tomatoes-THIS is what takes the soup up to a brilliant level!!
add salt & pepper to taste
finish with the scallion greens
you can also use up leftover cooked chicken-shred it or dice it.
leftover cooked vegetables work too-dice them up and add them at the end

This particular batch was big and dense. It lasted through the house-sit.  By the last day, most of the broth had been reduced away leaving behind the perfect nest for a couple of poached eggs.
I felt pretty smug whilst OCD'ing on all that foodTV.


Tuesday, June 17, 2014

Turkey Zucchini Burgers with Sour Cream Sumac Sauce


Another Jerusalem fave. I've made these tasty little sliders several times now and I just can't get enough-they are so flavorful and the sumac sauce just puts it over the top. I double the recipe so I can revel in the leftovers. The first time I made these & packed the leftovers for my office lunch, the aroma wafting from the microwave followed by the visual at my desk had my office mates & bakery peeps mesmerized and fairly disgusted with their $10 deli sandwiches. I made these with the Basmati & Wild Rice in the previous post. This morning I chopped up 3 burgers and tossed the colorful little bites in amongst the rice, nuked it for a minute and topped it off with a poached egg. Needless to say, bliss in a bowl.
The great thing about these burgers and the rice dish is that the flavors are at their best at room temperature or slightly warmed so you can make this ahead of time if you decide (and rightly so) you're gonna make this for guests.


Turkey & zucchini burgers with green onion & cumin
from Jerusalem the Cookbook

1 pound ground turkey

1 large zucchini coarsely grated -about 2 cups
3 green onions, thinly sliced
1 large free-range egg
2 tablespoon chopped mint
2 tablespoons chopped cilantro
2 cloves garlic, crushed
1 teaspoon ground cumin
1 teaspoon salt
½ teaspoon freshly ground black pepper
½ teaspoon cayenne pepper
About 6 ½ tbsp of sunflower oil, for searing


sour cream & sumac sauce


scant 1/2 cup sour cream
scant cup Greek yogurt

1 teaspoon lemon zest
1 small clove garlic, crushed
1 ½ tablespoon olive oil
1 tablespoon sumac
½ teaspoon salt
¼ teaspoon freshly ground pepper

Make the sour cream sauce by placing all the ingredients in a small bowl. Stir well and set aside or chill until needed.
Preheat the oven to 425°F. In a large bowl, combine all the ingredients for the meatballs except the sunflower oil. Mix with your hands and then shape into about 18 burgers, each weighing about 1 ½ oz.
Pour enough sunflower oil into a large frying pan to form a layer about inch thick on the pan bottom. Heat over medium heat until hot, then sear the meatballs in batches on all sides. Cook each batch for about 4 minutes, adding oil as needed, until golden brown.


Carefully transfer the seared meatballs to a baking sheet lined with a silpat or parchment paper and place them in the oven for 5-7 minutes, or until just cooked through. Serve warm or at room temperature, with the sauce spooned over or on the side.

Thursday, June 12, 2014

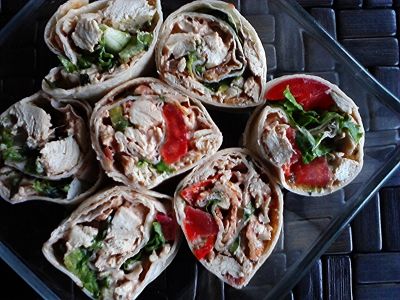
BLTCA pinwheels

This is another one of my office lunch go-to's, a super simple make ahead using either leftover chicken or grill up a chicken breast or two. I cooked up and crumbled some bacon and mixed it with my home made mayo. I added a little adobo sauce to the mayo for some kick, that's why its pink.
Bacon, lettuce, tomato, chicken & avocado.

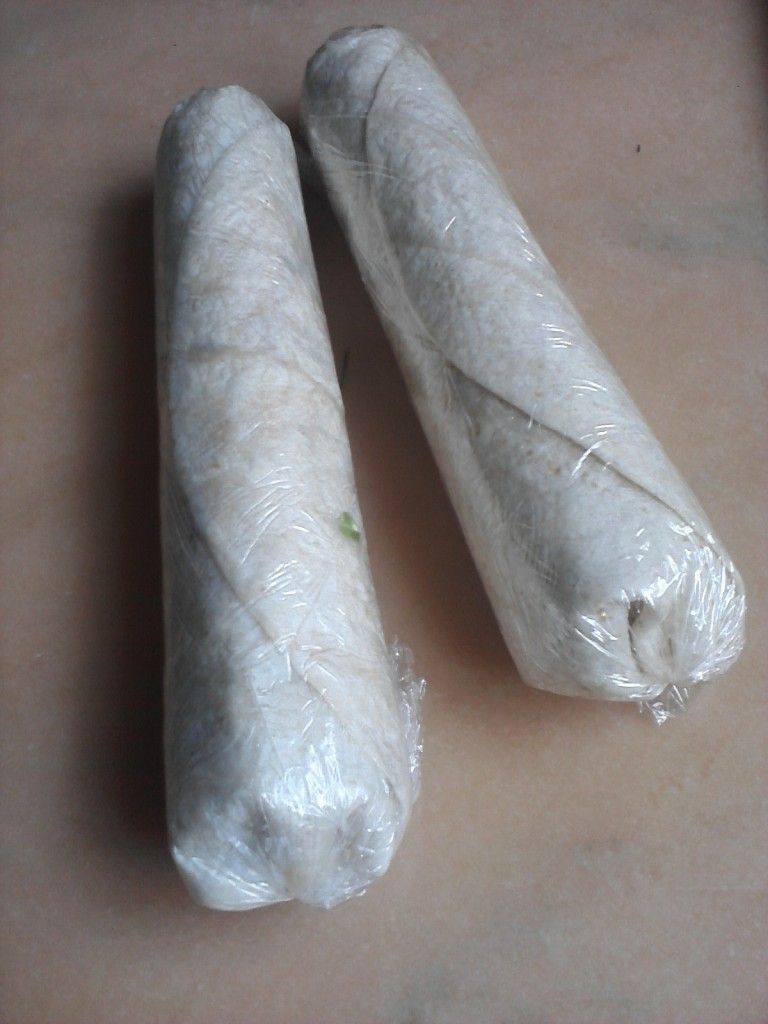
A great everyday lunch wrap or you can fancy it up by slicing it into pinwheels. Tightly roll, wrap with plastic  twisting the ends. Chill for at least an hour or overnight if you want to make several  up on a Sunday and have one for lunch the next day. This is also a great way to use up leftover salad that's gone wilty.
There's really no recipe for this but here are the components:


cooked chicken breast diced up
cooked bacon crumbled
mayonnaise
salt & pepper to taste

Mix everything together in a bowl and set aside.

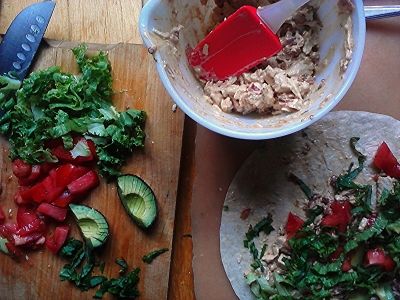
several leaves of lettuce, stacked and tightly rolled, then sliced into a chiffonade (thin strips)
one tomato-diced
several basil leaves, stacked and tightly rolled, then sliced into a chiffonade
one avocado halved, then quartered-make a bunch of diagonal cuts to, but not through the skin, scoop the  slices out of the skin with a spoon

On a large tortilla spread about a half cup of the chicken over two thirds of the tortilla. On the top third spread out just some of the mayonnaise so the tortilla will stick at the end.
Top the mix evenly with lettuce, tomato, basil and slices of avocado. Finish with a couple of turns of fresh cracked pepper. 
Beginning at the filling end, tightly roll up toward the plain end, you don't need to tuck the sides in.
Tear off a sheet of plastic wrap and lay it flat on your work surface. Place your roll on the bottom edge and center it. Roll it up and then twist the ends tightly. Refrigerate for at least an hour.

Enjoy!


Friday, June 6, 2014

Basmati & Wild Rice with Chickpeas, Herbs & Fried Onions

The latest from Jerusalem, the best cookbook I've never owned.
I have problems cooking rice. Seems so simple “follow package directions”. Never fails, it’s usually undercooked and burning to the bottom of the pan before it’s done…just a whisper of a flame and I still end up with scorched rice.
Add more water and I end up with clumpy moist rice. Not good either. Then I came across Jamie Oliver’s method of boiling, draining & steaming rice, now this is how I cook all my grains. This requires a little more attention & the use of a couple of tools but it results in more control and a grain that ideally suits it's final purpose.


The Jamie Oliver Method of cooking white rice:


Get a large pot of salted water boiling.
Add 1 1/2 cups of well-rinsed rice (in a mesh strainer-run it under cold water for about a minute-until the water runs clear)_
when the rice starts dancing around, boil for 5 minutes** from that point on.
Strain the rice in a colander and cover with aluminum foil, pressing it down onto the surface of the rice. Add an inch of water back into your original pot and bring that back to a boil.
Reduce the heat to a simmer and place your colander of foil-covered rice back into the pot and place the pot cover back on as well.
Let it simmer and steam for 10** minutes.


**These times will vary depending on the grain-white rice being the quickest cook and farro taking the longest. At the first point, you're looking for the grain to be chewy but still slightly underdone. The grain is finished when you think it's finished-the simmer & steam time can take up to 30 minutes depending on the grain. Taste it every 10 minutes & check that the water hasn't boiled away.


This dish has two different types of rice which require preparation separately. You can choose to go with one type if you want but what works here is the two different textures that are going on. Basmati is lighter & fluffier while the wild rice is firmer.
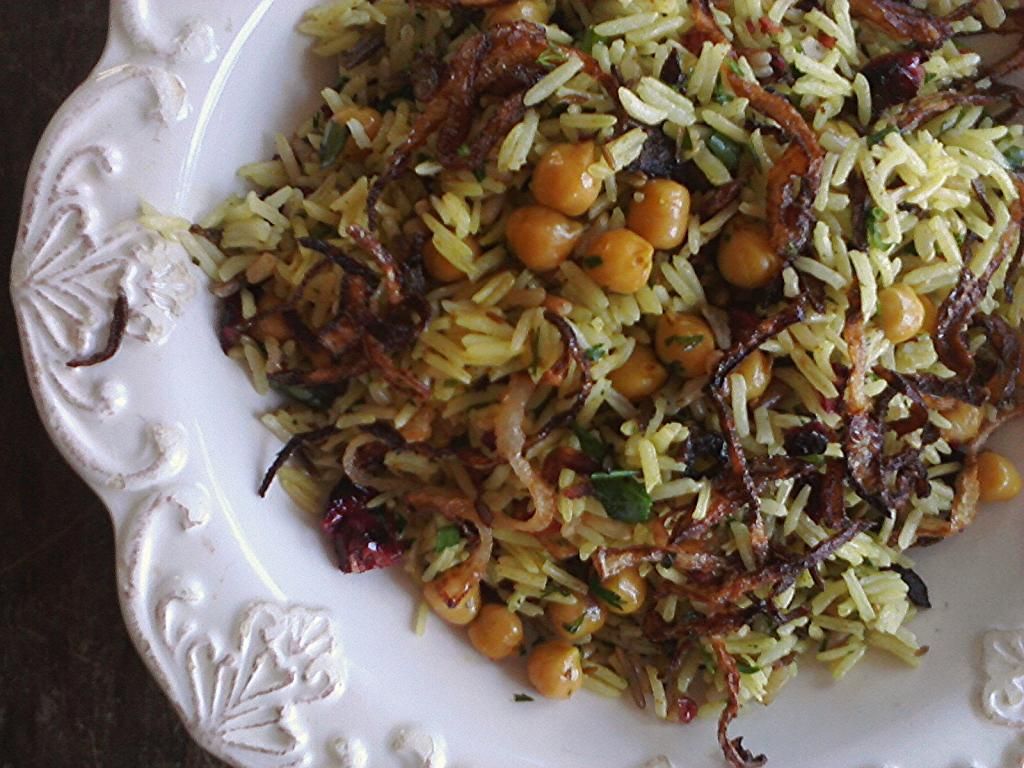
As I sit here and eat this I’m struck by two things: It’s beautiful to look at, I hope my pictures do it justice. The rice is yellowed from the curry and flecked with loads of fresh bright green herbs and the deep red from the dried cranberries and finally the crispy brown of the fried onions. Ottolenghi loves his fried onions for good reason. They add a level of crispiness and savory complexity. I added a bunch of chives I’d just trimmed the flower off. They were teetering on the edge of the compost bin.


Basmati & Wild Rice with Chickpeas, Herbs & Fried Onions
adapted from Jerusalem the Cookbook by Yotam Ottolenghi & Sami Tamimi

⅓ cup wild rice
2 ½ tablespoons olive oil
2 ¼ cups basmati rice
boiling water
2 teaspoon cumin seeds
1½ teaspoons curry powder
1 ½ cups cooked and drained chickpeas (canned are good)
¾ cup sunflower oil
1 medium onion, thinly sliced
1 ½ teaspoon all-purpose flour
⅔ cup currants
2 tablespoons chopped flat leaf parsley
1 tablespoons chopped cilantro
1 tablespoons chopped dill
I added about 2 tablespoons fresh chives-just what I had on hand and not be wasteful=)
Salt and freshly ground pepper


Method
Rinse the wild rice in a mesh strainer and place in small sauce pan. Fill with water and bring to a boil. Continue to boil until the rice is chewy then transfer to a mesh strainer or small colander and steam it (as directed above) to it's finish.
To cook the basmati rice, pour 1 tablespoon of the olive oil into a medium saucepan with a tightly fitting lid and place over high heat. Add the rice and ¼ teaspoon salt and stir as you warm up the rice. Carefully add the boiling water filling the saucepan about 3/4 full, once the rice is boiling and dancing around, continue to boil for 5 minutes, then transfer into a colander and simmer & steam to it's finish. Turn off the heat, remove the foil and place a clean tea towel over the pot and place the lid back on. Let it sit for 10 minutes.
While the rice is cooking, prepare the chickpeas. Heat the remaining 1 ½ tablespoons of olive oil in a small saucepan over high heat. Add the cumin seeds and curry powder. Wait for a couple of seconds, and then add the chickpeas and ¼ teaspoon salt; make sure you do this quickly or the spices may burn in the oil. Stir over the heat for a minute or two, just heat the chickpeas then transfer to a large mixing bowl.

Wipe the saucepan clean, pour in the sunflower oil, and place over high heat. Make sure the oil is hot by throwing a small piece of onion; it should sizzle vigorously. Use your hands to mix the onion with the flour to coat it slightly. Take some of the onion and carefully (it may split) place it in the oil. Fry for 2 to 3 minutes, until golden brown, then transfer to paper towels to drain and sprinkle with salt. Repeat in batches until all the onion is fried.
Finally, add both types of rice to the chickpeas and then add the currants, herbs, and fried onion. Stir, taste and add salt and pepper as you like. Serve warm or at room temperature.
This makes a lot of rice. Perfect for leftovers and cookin’ up for a morning fried rice.

This is really, really good.