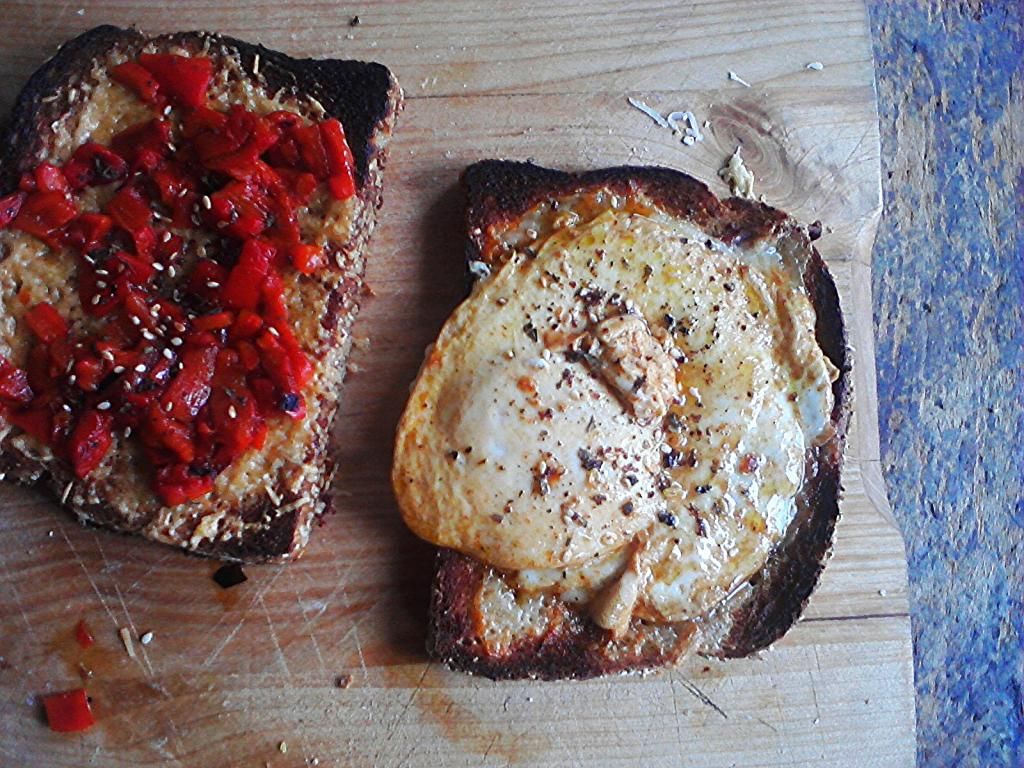
Showing posts with label cheese. Show all posts

Friday, May 29, 2015

The Road to Cheese Whizzery

These toasty li'l bites are a super simple snack or crowd pleasing party appetizer. I've made a meal out of these with a bowl of soup or a salad.  Toast + cheese + whatever is pretty much a daily thing in the little kitchen.
After two years working in this amazing market as a cashier and then supervisor I just this week moved into the cheese department. I can now add Cheesemonger to my resume.
After my first cheese shift a few weeks ago, I realized how ignorant I was of non-cow's milk cheeses. As I was offering samples of a beautiful little triple cream I became aware of how many people can't eat cow's milk cheeses so I begin by learning more about non-cow's milk cheeses starting with sheep.
A little curd nerdery:
Pecorino (or Pecora, actually) is the Italian word for sheep, so there are a whole lotta different pecorinos out there. Most are familiar with Pecorino Romano, a hard, grating cheese one can find in the super market and is used generally as an alternative to Parmigiano Reggiano.
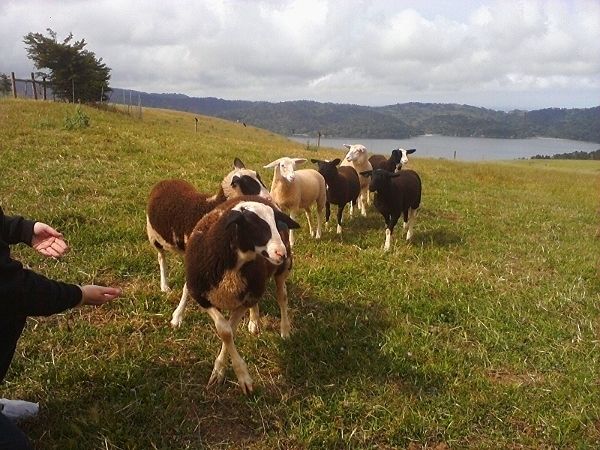
Sheep milk is richer in fat than cow's milk.  One cow puts out anywhere from 8-20 quarts of milk per day. One sheep puts out about 4 quarts a day, but sheep's milk has less water, more vitamins and minerals, more fat. A gallon of sheep's milk will make a slightly larger amount of cheese than a gallon of cow's milk. A herd of cows can give milk year round. Sheep don't do that. It takes a little more than a gallon of milk to produce one pound of cheese, then depending on how long that cheese ages, that pound will diminish in weight as the cheese loses moisture. Anyhoo, thus begins my cheese journey.
I brought home these three lovely little hunks of sheepy goodness. I wanted to start with semi-firm cheeses that would be good snackers and melters. These are all raw milk cheeses. In the U.S. raw milk cheeses must be aged for a minimum of 60 days, a time frame that would supposedly kill of any harmful bacteria yet leave the flavor enhancing bacteria in tact.
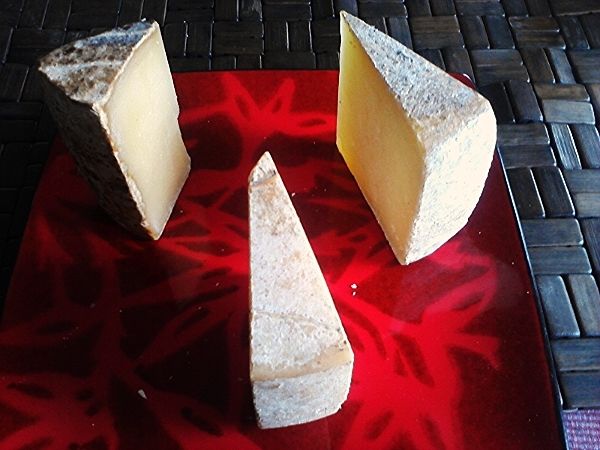
First up is the Tomme Brulee on the left. This is a firm, French raw milk cheese from the Basque country, distinguishable by the blackened mottled natural rind. A nice firm little cheese with smooth silky interior. As it melts on the tongue it's savoryness is mouthwatering. It's a perfect balance of sweet and salty with caramelly, nutty notes. It's a great snacker and would  be awesome on a cheese plate, warming up the taste buds before a dinner of broiled lamb chops.

Next up is Baserri Barinaga  (middle) a lovely raw milk cheese from Petaluma. I got a chance to visit Barinaga Ranch shortly after this sheep milk cheese tasting.
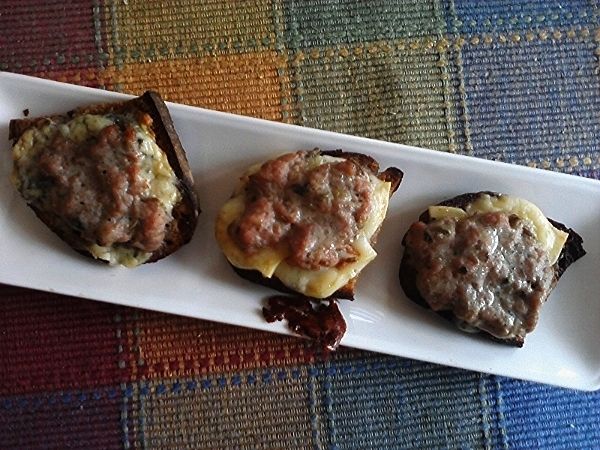
Marcia Barinaga models Baserri (the Basque word for farmhouse) after the Basque cheeses made by her family in Spain. Baserri is aged for 6 months, It's creamy, rich and nutty. It's a great table cheese and it melts beautifully. It was amazing toasted on slices of Marla Bakery Walnut Boule (pictured below).
Lastly is a classic Pecorino Toscano from Italy. It differs from Pecorino Romano which is aged longer resulting in a dryer and saltier cheese used primarily as a seasoning. Pecorino Toscano is  a great table cheese as it has a surprisingly flavorful bite. There's a grassy tang to it that I wasn't expecting. Not only was this a great melter on my toasties, it was most excellent shaved onto a layered salad of arugula, radishes and fennel.
I used the housemade sweet Italian sausage we sell at the market. I also had a bit of Pt. Reyes Original Blue to add to the mix.

Super Simple Toasties or Sausage & Pecorino Crostini

1/2 inch slices of a baguette or small boule
8 ounces of cheese
1/2 lb. Italian sausage

Preheat the oven to 400 degrees. Line a sheet pan with parchment paper and lay out the sliced bread, top with an even layer of cheese. With your fingers squeeze sausage out of the casing and place a large dollop on top of the cheese, pressing and spreading it right to the edges of the bread. Bake for 10 minutes and serve promptly.

Sunday, May 24, 2015

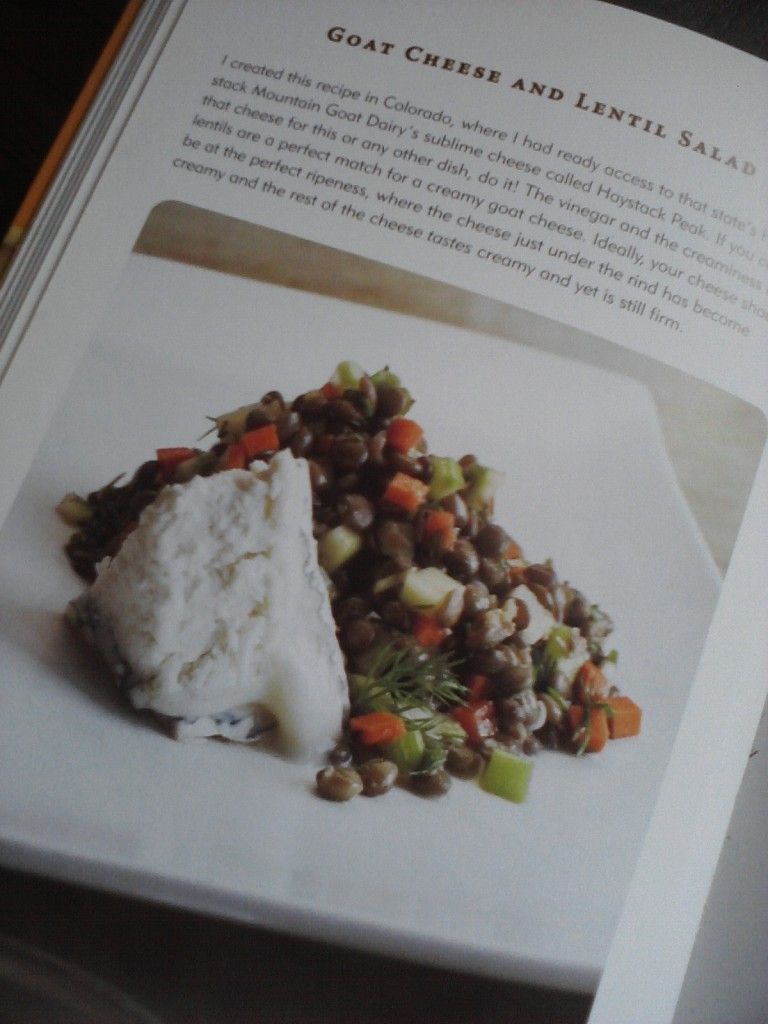
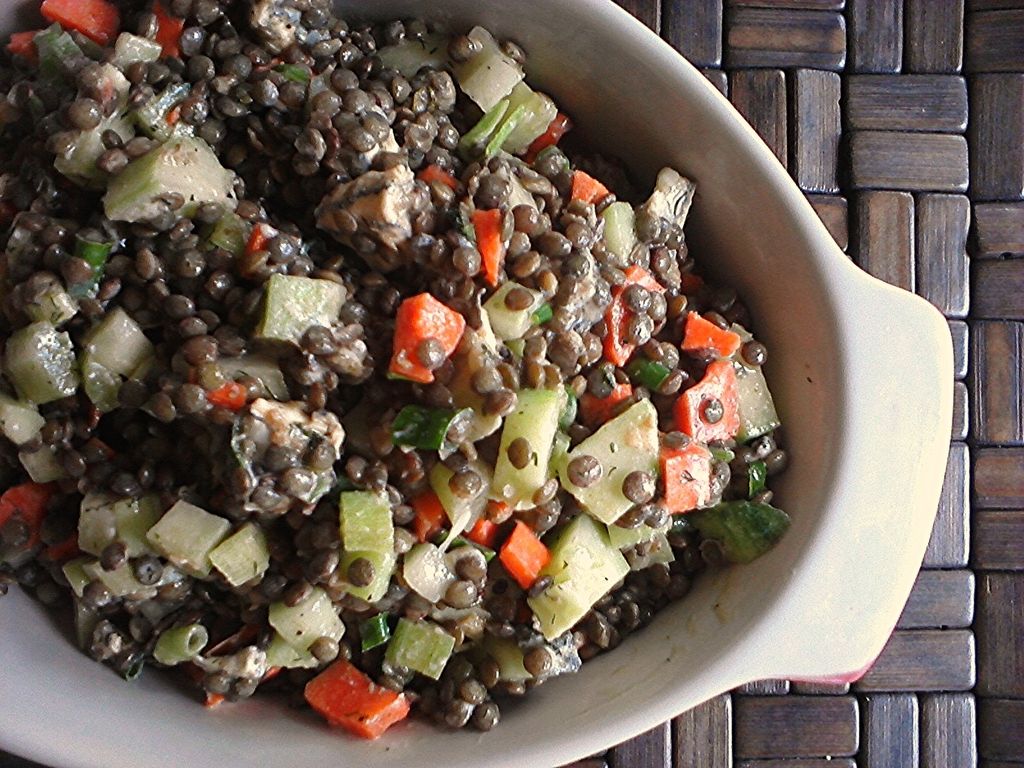
Warm Lentil & Goat Cheese Salad


I've had this recipe bookmarked for months. It's from Laura Werlin's Cheese Essentials, a book I found in the breakroom at work and borrowed for enhancing my study of all things cheese. I'm a big fan of warm lentil salads with goat cheese since trying something like this in one of the 18 Reasons cooking classes I took a while back focusing on the beauty of budget friendly meals revolving around lentils.
I made a few tweaks to the original recipe.  I prepared the salad while the lentils were still warm whereas the original recipe instructs for the lentils to be cooled to room temperature. I find the warm lentils absorb the flavors of the dressing and allow the cheese to soften a bit and adding a little creaminess to the salad. The other adjustment I made was to chop and crumble the goat cheese then stir it into the warm salad. The original recipe places a one ounce wedge of cheese onto the side of the plated salad. That makes for a lovely presentation when using a striking looking cheese like Humboldt Fog and if serving this salad to guests.

I'm much more pedestrian and make a big bowl of this all for myself so I can enjoy it for a few days. Humboldt Fog is a lovely lightly aged goat's milk cheese from Cypress Grove in Humboldt County here in California. It has a vegetable ash layer running through the middle and beneath the white bloomy surface. It ripens from the surface where it's soft and oozy. The center is firm and crumbly. One of the things I love about good goat cheese is that it changes as it ages. There's more complexity to aged goat cheeses like Humboldt Fog that develop a bloomy (the white fuzzy) rind. The crumbly center is mild and tangy, the oozy edge introduces a bit of goaty personality and the bloomy rind is a little bitter. I love the combination of all of these textures. This salad would be just fine using a more commercial log style goat cheese if you're going the pedestrian route.

Warm Lentil and Goat Cheese Salad
adapted from Laura Werlin’s Cheese Essentials

For the lentils:
1 cup dried lentils
1 large garlic clove, peeled

For the dressing:
2 tablespoons plus 2 teaspoons red wine vinegar
2 teaspoons balsamic vinegar
1 ½ teaspoons mustard
2 tablespoons chopped fresh dill plus whole sprigs for garnish
¼ teaspoon kosher salt
Freshly ground pepper
3 tablespoons plus 2 teaspoons extra-virgin olive oil

For the salad:
4 scallions, finely chopped
1 medium carrot, peeled and cut into 1/8 inch dice
1 large celery stalk cut into 1/8 inch dice
About 1 cup peeled, finely diced English cucumber
8 ounces Humboldt Fog goat cheese

To prepare the lentils: Fill a 2 quart sauce pan about half way with water. Add the lentils and garlic. Bring to a boil, then reduce to a simmer and cook the lentils until tender but not mushy. After 15 minutes taste to determine doneness and keep checking every 5 minutes until they reach the desired consistency. Drain well and toss into a large bowl.
Combine the dressing ingredients into a jam jar and shake until emulsified. Toss into the bowl of warm lentils.
For the leftovers: you can eat this cold from the fridge but I like to pop it in the microwave for 30 seconds to get the chill off.


Tuesday, May 12, 2015

Genius Kale Salad

Do we really need another kale salad recipe? Yes. This may just be the last kale salad recipe I will ever need. It came on my radar last week via Heidi Swanson at 101 Cookbooks ~ she got it from the new cookbook by Food 52~ Genius Recipes: 100 Recipes That Will Change the Way You Cook.
I'm going through another one of those phases where I really need to get off the carb train and make more produce driven meals.
The kale that we get at the market is so beautiful but I lack the inspiration to buy it and make something. The thing is, I love a good kale salad and every time I make one it disappears immediately. Yet, I rarely make them. I saw this on my news feed this week I was all over it. If Food 52 and Heidi make a big deal out of it then there's gotta be something to it.
The genius in this salad is the addition of not one, but two very different cheeses and it's not very often I see the words "good aged cheddar" as a salad ingredient (the other is Pecorino).
I got a little wedge of Mrs. Quicke's Traditional Cheddar from the market. It's an English clothbound aged cheddar just bursting with rich complex flavors. It's important to note that the cheddar should be chopped or crumbled rather than grated. The little nubs of savory, nutty, tangy, caramelly flavors that really good cheddars create within each bite is what makes this salad standout from any other kale salad recipe I've come across.
I couldn't pull this together fast enough. This salad includes roasted asparagus (or roasted winter squash) and almonds, finishing with shaved pecorino. I also added chopped dried cranberries.
I had a little bit of Pecorino Toscano left from my sheep milk cheese tasting last week. It's moister and less salty than Pecorino Romano (a dry grating cheese that's a common substitute for Parmigiano Reggiano) and has a surprisingly zippy flavor. It's a lovely table cheese especially served with sliced pears or peaches.
A little curd-nerdery: Pecorino just refers to an aged, Italian sheep's milk cheese (Pecora is the Italian word for sheep), so there are different types out there, depending on the region where they are made, but the Romano is more widely available. 

Genius Kale Salad                    
Food 52’s Genius Recipes via 101 Cookbooks

1/2 cup chopped asparagus
Extra-virgin olive oil
Salt and freshly ground pepper
1 bunch Lacinato kale, ribs removed, leaves finely sliced, about 2 1/2 cups
1/4 cup almonds cut roughly in half
1/4 cup crumbled or finely chopped good, aged cheddar
1/4 cup chopped dried cranberries (optional)
Fresh lemon juice
Pecorino or any other hard cheese, for shaving

Preheat the oven to 425F. Line a sheet pan with parchment paper.
Toss the asparagus in just enough oil to coat and season with salt and pepper. Spread on the sheet pan, leaving space between each piece. Roast in the oven until tender and caramelized, 20-30 minutes (I used small spears of asparagus which were done in 20 minutes) tossing with a spatula after 10 minutes. Toast the almonds on a baking sheet in the same oven until they start to smell nutty, tossing once, about 10 minutes. Let cool.
In a large mixing bowl, toss the kale with the almonds, cheddar, asparagus and cranberries if using. Season to taste with lemon juice and olive oil (using about 1 tablespoon lemon juice and 2 tablespoons oil). Season to taste with salt and pepper.
Divide onto two plates and finish with shaved pecorino.


Thursday, April 30, 2015

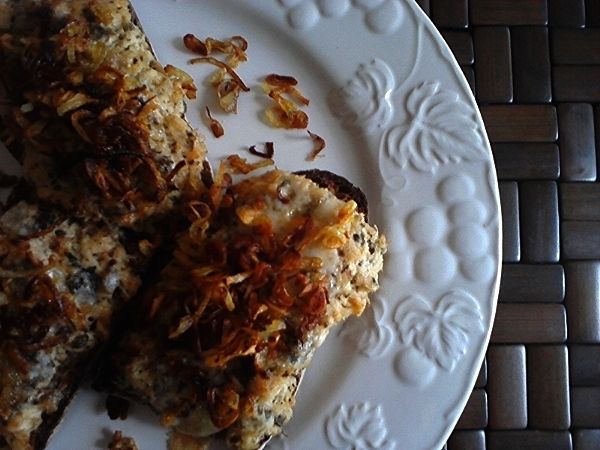
Tuna Melt Toasts with Blue Cheese & Crispy Fried Shallots

The little kitchen is currently enjoying the Love side of my love/hate relationship with tuna, since I stumbled upon the gob-smacking combo of tuna and blue cheese happily married on these Tuna Melt Toasts. The stars collided when tuna, blue cheese and crispy fried shallots just happened to be the few items on hand during a sparse pantry/fridge moment.
I've always loved a good tuna salad sandwich, but cans of tuna can conjure up a dark place, mostly reminding me of when I was poor, well poorer than I am now-back to those days when I scoured the weekly supermarket flyers ready to pounce on the 4 for $1.00 Bumble Bee sale at Albertson's. This probably coincided a time or two with my early Weight Watchers stints when I pretty much ate nothing but diet mayo, celery laden, tuna salad sandwiches on white diet bread, completely oblivious to the mercury/BPA/sustainability side of the coin that plague me now.
Anyhoo, if Weight Watcher's taught me one thing (and it taught me many)-It's about moderation.
Fast forward  to this past January: I was having a conversation with one of my neighbors who happened to come into the market and we got to talking about tuna. He's a chef and he shared what he called his  trick to a great tuna salad: squeeze out all of the water with your hands, then over a big bowl rub the tuna between your palms so it's broken down and fluffy, then mix in your favorite tuna salad mixers.   All I could think about for the rest of the day was getting home and making tuna salad remembering that fresh batch of mayo I had in the fridge.
I started making my own mayo couple of years ago after watching an America's Test Kitchen DVD I'd picked up from the library.
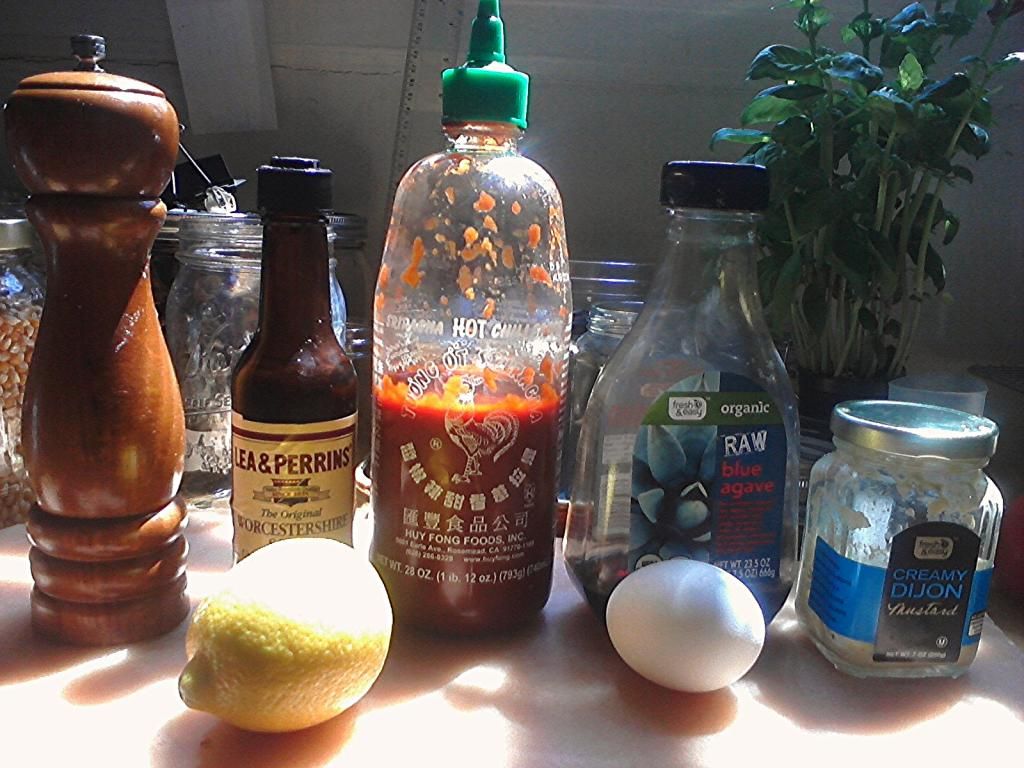
Mayonnaise
adapted from America's Test Kitchen TV

one egg
salt & pepper
2 teaspoons fresh lemon juice
dash of Worcestershire sauce
dash of Sriracha
2 teaspoons Dijon mustard
1 teaspoon agave nectar

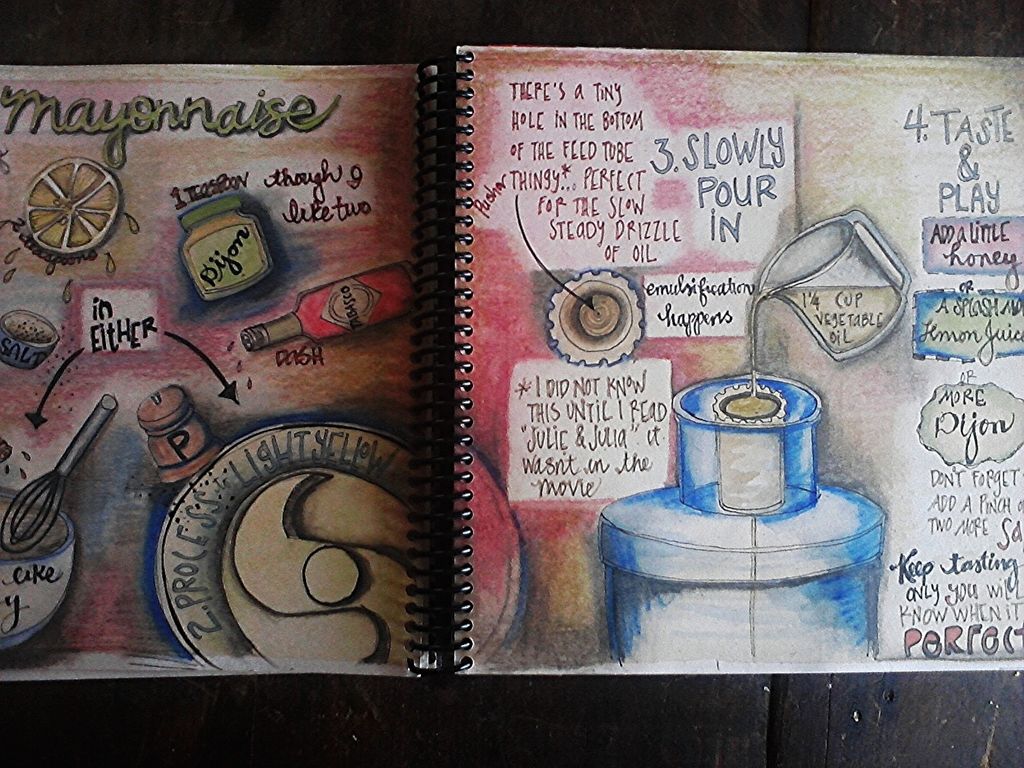
Process the above ingredients until light yellow and with the processor running, slowly drizzle in: 

1 1/4 cups neutral vegetable oil

Adjust salt, lemon juice & agave until you're happy.

This was the page I created for the cookbook I made for my niece's bridal shower last year.


I tend to go heavier on the Dijon for my everyday mayonnaise. I've made this tuna salad a few times since January and found that I like to amp up the lemon juice a bit in the mayo when I know I'll be making tuna and use the zest in there as well.

My tuna mixture is:

1 can of tuna, squeezed dry and palm shredded
a heaping tablespoon of home made mayo
the zest of one lemon
1 tablespoon capers roughly chopped
a handful of fresh herbs
salt & pepper to taste

Since first making these with Bayley Hazen Blue Cheese, I've used Stilton and Pt. Reyes Original Blue, all good but the Bayley Hazen is my fave. It's a raw cow's milk farmstead cheese from Jasper Hill Farms in Vermont. It's got a lush, fudgy texture and just the right balance of salt and tang so it's not super assertive. I was amazed by how good this was but it was the crispy fried shallots put this over the top.
I recently discovered crispy fried shallots when I attended a class at 18 Reasons, Bi-Rite Markets non-profit educational space. I used to buy one shallot at a time and only just to chop up for my vinaigrette. Now I purchase them by the pound at my local Chinese market.
Slice 4 or 5 big shallots, super thin on a mandolin. Heat up 2 inches of vegetable oil in a skillet and cook the shallots until golden and crispy, about 15 minutes. Drain on a paper towel lined sheet pan, sprinkle with salt, let cool complete and they will stay crispy in the refrigerator for about 2 days. I love them on salads, on sandwiches-especially grilled cheese, anything middle eastern and in grain bowls. I strain the oil and used it for cooking and in vinagrettes.

Tuesday, April 21, 2015

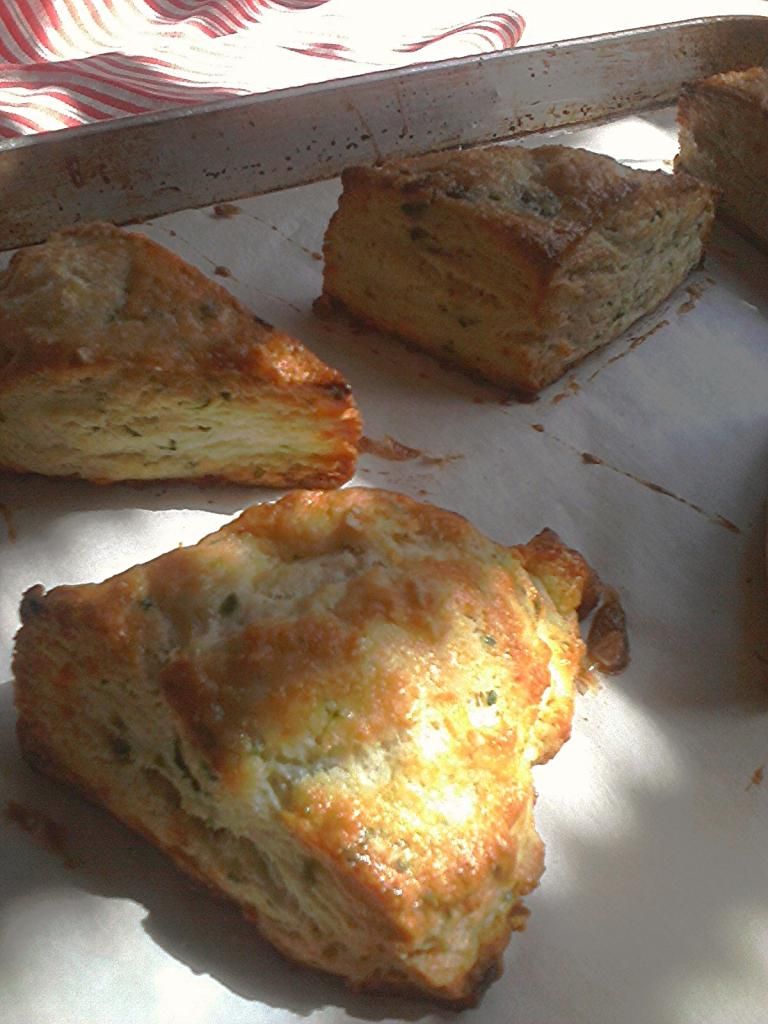
savory little scones


Are savory little scones just biscuits?

I got my mitts on a spectacularly delicious cheddar and spinach scone that was somehow left unsold at the market a few weeks ago. When I warmed it up for breakfast the next morning, I was amazed at the transformation the heat brought out in it. I thought of nothing else for days whilst conjuring up my weekly cooking plan (which almost always involves cheese). I pondered the cheese counter at the market and decided on one of my favorite cheeses, Fontina Val d'Aosta.
I've used  Fontina in scones before and it was great in a frittata I made recently. I usually just smash a big hunk into a chunk of fresh baguette or melt it onto a slice of baguette with a big pinch of sweet Italian sausage smashed down on it and baked for 10 minutes for quick toasties. This is the real Italian Fontina, not that red wax coated, rubbery, bland, Danish doppelganger one finds at the supermarket.
Fontina Val d'Aosta is a classic Italian cheese made in Northern Italy. It's a raw, washed rind cow's milk cheese. It's a stinky cheese. I love stinky cheese.  It's texture and flavor depends on how long it has been aged. It can be semi-soft to firm and the flavor can be mild and rich or more robust and intense as it ages. Raw milk cheeses are lovely because the flavor enhancing bacteria hasn't been heated out of it. The washed rind adds even more complex flavors.
The Fontina we get at the market is just the right balance. It's got a great funk and a smooth buttery paste. It's pale cream in color and riddled with tiny eyes. The 45% fat content makes it super rich and creamy.
My first attempt, these crazy good scones, many, many moons ago set me on a course of savory scone nirvana. Yet, I google-thon'd, searching for a recipe for a basic savory scone dough using buttermilk ('cuz that's what I needed to use up) and I came upon this one at The Kitchn.
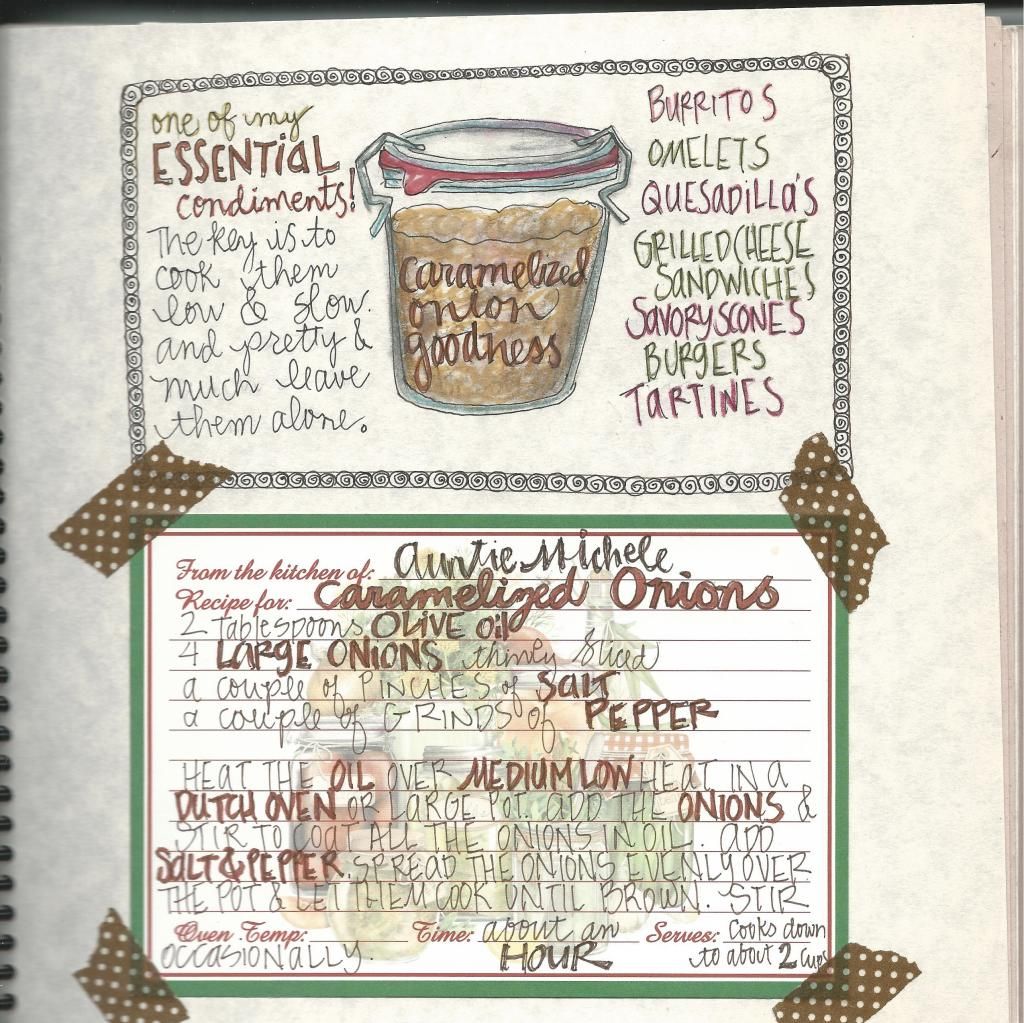
If there's anyone out there who actually reads this blog, you may be familiar with my Three Amigos, my go-to home made condiments: caramelized onions, roasted red peppers, and slooowwww roasted tomatoes. These guys, added to my favorite food in the world~ cheese....well it's a battle for the  starring role in any of these killer savory scones: caramelized onions & blue cheese, chives & goat cheese, cheddar & jalepenos and these:

Roasted Tomato, Fontina, & Dill Scones
adapted from The Kitchn


2 1/2 cups all-purpose flour
1 tablespoon baking powder
1 tablespoon sugar
1 tablespoon sea salt
1/4 teaspoon baking soda
1/4 teaspoon dry mustard
1/2 cup frozen unsalted butter cut into 1/2" cubes
1/2 cup Fontina Val d'Aosta, grated
1/2 cup + 2 tablespoons whole buttermilk
1/4 cup chopped roasted tomatoes
2 tablespoons chopped thyme
2 tablespoons chopped fresh dill
1 egg lightly beaten


In the bowl of a food processor, pulse the dry ingredients. Scatter the frozen butter over the dry ingredients and pulse until the butter pieces are the size of small peas. Add the cheese, buttermilk, tomatoes and herbs. Pulse until everything is just combined. The dough will be pretty shaggy but hold together when pinched between your fingers.
Spread a large sheet of parchment paper over a work surface and turn the dough onto it. Using a bench scraper and working the dough as little as possible, shape, press and flatten the dough into either a 1 1/2 inch thick round, if you want larger scones or a 1 1/2 inch thick rectangle, if you will be making mini scones.
Slide the parchment onto a sheet pan and chill in the freezer for about 30 minutes.
Slice the round into 8 wedges, or the rectangle into 2 inch strips then 2 inch squares then slice each square diagonally across to form little wedges.
Return the wedges to the parchment/sheet pan with some space in between each piece. Cover the pan with a sheet of plastic wrap and return to the freezer for at least another 30 minutes or until you're ready to bake them. If you're planning to freeze any of the unbaked scones, continue to freeze for a minimum of 1 hour total. Remove the frozen scones from the sheet pan and transfer into a freezer bag removing as much air as possible. Place the bag inside a second freezer bag and remove air.
Pre-heat oven to 425 degrees. Place the scones on a parchment lined sheet pan. In a small bowl,  beat the egg with a fork. Brush each scone with egg. Sprinkle with pinches of maldon sea salt (I added fresh za'atar-a Middle Eastern herb blend- to finish these off) and bake for 15 minutes until golden, rotating the sheet pan half way through. Let the sheet pan rest on a cooling rack for 5 minutes and transfer the scones directly onto the rack to continue cooling. Serve them while they're still a little warm. Uneaten scones can be left to cool completely and then stored in an airtight container at room temperature.


Monday, April 6, 2015

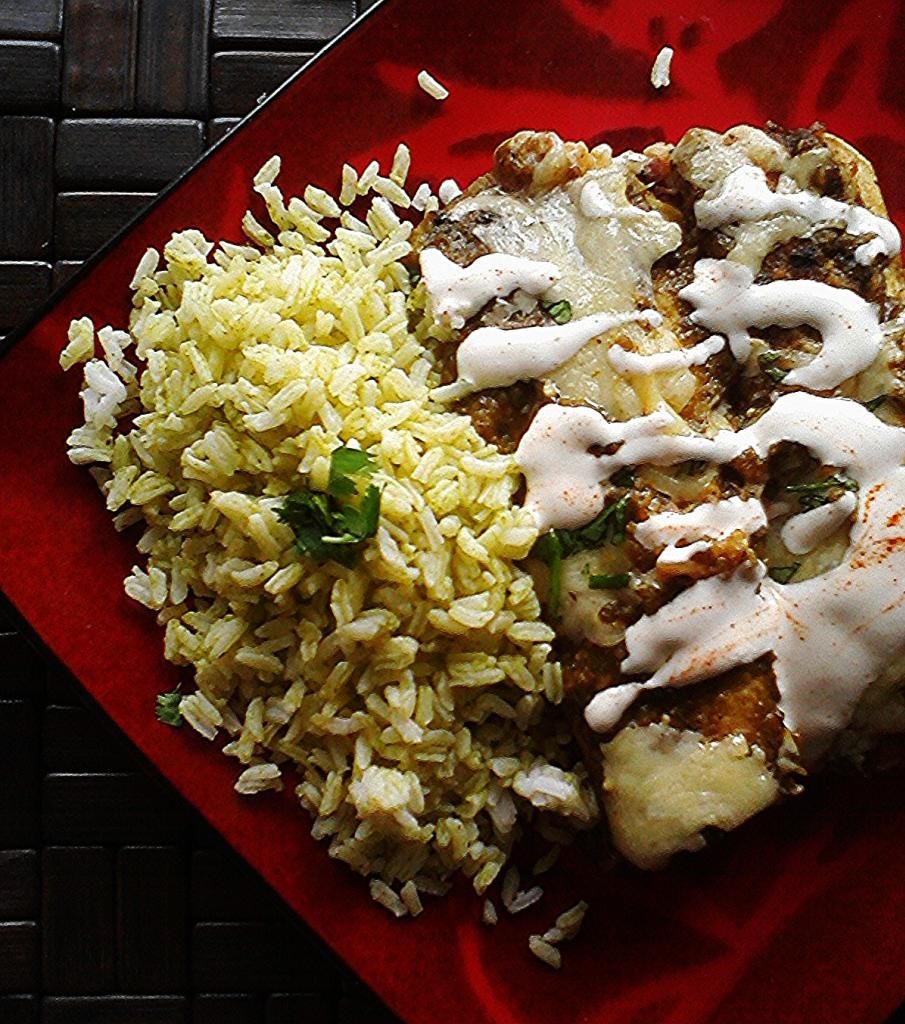
Enchiladas Verdes & Cilantro Lime Rice


This is one for the "Possibly-Even-Better-the-Next-Day" section of the cookbook in my head...Leftovers to Love or something like that...but these enchiladas (and the rice) are so good that leftovers may be a wild dream.
I frequently make big batches of enchiladas along with rice and beans to get myself set up for a week of quick & easy dinners. I love enchiladas and I've been making and refining my recipe since Jr. High Home Ec. Yes, I'm that old.
Many months back I was inspired by a staff meal concoction our chef made of leftover enchiladas verdes that he'd chopped up and tossed with rice and kidney beans. It was so delicious and all I could think about for the next few days was how to recreate this ASAP. I planned the majority of my weekend around it.
First up was a first-Enchiladas Verdes. I've been cooking Mexican dishes all my life and have never ventured toward the tomatillo. Green sauce? no thanks. That was then.
I pulled out my trusty Big Book of Cooks Illustrated and found exactly what I was looking for. True to form, I still spent an hour+ in a Google-thon, looking for the next best thing. Turns out there wasn't, but I already knew that didn't I? All I wanted was for it to be tomorrow already with enchiladas a done deal, cold and congealed sitting in my fridge.
While the chicken was poaching, I made a up the batch of tomatillo sauce and then prepared about a dozen enchiladas, enough to fit the pan and mistakenly made burritos with the rest of the chicken. Burritos are another great make ahead meal and though I was happy to have them later, I should have made more enchiladas. They looked amazing fresh out of the oven (I took pics but night time photography in my kitchen is pointless). I ate two right away and they tasted even better than they looked. I love, love, loved them. The tangy/spicy tomatillo sauce was beautifully balanced by the pepper jack cheese. I used Vella pepper jack, hand-made locally in Sonoma. It's super moist, flavorful and sinfully spicy, something you just can't get in a supermarket block cheese.
I reheated the enchiladas again the next day, which is what I photographed here so the tomatillo sauce isn't as bright as it was when I first pulled it out of the oven. The mess of a drizzle is a crema made with sour cream, lime juice, salt and cayenne pepper.
I don't know what I was thinking, but I re-heated the cilantro lime rice and some black beans I had in the freezer. I cut up the rest of the enchiladas and tossed everything together while it was warm. What a trainwreck. It all turned to mush, but man-o-man it was tasty. I ended up using it as a burrito filling, but in retrospect it would have made pretty awesome fritters.

Note to self: triple this recipe next time and be lovin' on leftovers all week long!
.
Enchiladas Verdes
Cooks Illustrated

4 teaspoons vegetable oil
1 medium onion chopped
½ teaspoon ground cumin
3 garlic cloves minced
1 ½ cups low sodium chicken broth
1 pound boneless skinless chicken breasts
1 ½ pounds tomatillos
3 poblano peppers
1 – 2 ½ teaspoons sugar
½ cup fresh cilantro
8 ounces pepper jack cheese 
12 corn tortillas
Vegetable oil spray

Crema
½  cup Sour cream
Juice from one whole lime
Salt
Cayenne pepper


1.   Turn on the broiler. In a large skillet, heat oil and add the onion, tossing to coat with oil and cook until they begin to soften about 3 minutes. Add the cumin and 2/3 of the garlic and cook another minute until fragrant. Add the chicken broth and the chicken breasts cover and cook until the broth starts to boil. Reduce heat and simmer until the chicken is cooked to 160 degrees, 15-20 minutes. Reserve the broth and let the chicken cool.
2.   Roast the poblanos either in the broiler by slicing down one side and spreading open. Scrape out the seeds and veins if you want less heat, otherwise leave them be. Lay the peppers on a sheet pan or the broiler pan and roast until the skin is blackened. You can also do this over the open flame of the stove top leaving the peppers whole and turning with tongs. Either way, once blackened place the peppers in a bowl and cover tightly with plastic wrap and let them steam and cool down a bit. Then scrape the blackened skin off.
3.   Heat the oven to 400 degrees. Prepare the tomatillos: remove the papery skin and stem, slice in half across the widest part (the equator). Lay the tomatillos, cut side up on a parchment covered sheet pan and brush them across the top with olive oil and sprinkle with salt and pepper. Roast until tomatillos are soft and begin to brown, about 20 minutes.
4.   In the food processor add the cooked vegetables, sugar, salt, remaining garlic and ¼ cup of the reserved broth. Pulse until the sauce is still a little chunky.
5.   In a medium bowl, shred the chicken with two forks. Stir in the cilantro, grated pepper jack and salt to taste.
6.   Transfer the sauce into the skillet and heat. One at a time, dip a tortilla into the sauce so it softens enough to roll. Lay the tortilla on a plate, place about 2 tablespoons of filling in the middle and roll up. Lay the enchilada seam side down into a casserole dish and repeat. Pour the remaining tomatillo sauce over the enchiladas. Sprinkle the remaining ½ cup cheese over the sauce and cover tightly with foil.

7.   Bake the enchiladas until heated through and the cheese is melted and serve. Drizzle with crema and sprinkle sliced scallions on top 

Cilantro Lime Rice
Martha Stewart

Prepare white rice:
1 cup white rice
1 1/2 cups water
1/4 teaspoon salt

Into the blender:
½ cup cilantro
2 tablespoons lime juice
1 garlic clove
1 tablespoon olive oil
2 tablespoons water

Toss into cooked rice

Tuesday, March 3, 2015

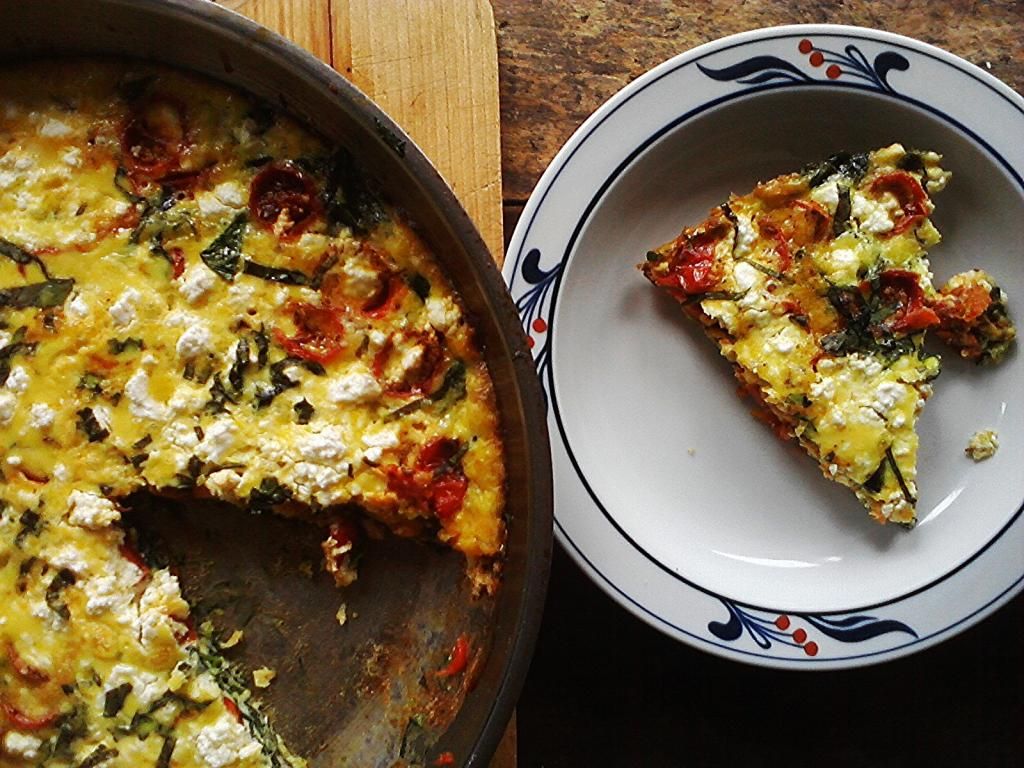
Spinach & Roasted Tomato Frittata


I love frittata's, but the only time I ever make them is when I do the big family breakfast at my sister's on Christmas morning while everyone is still asleep. I make them with the leftovers from our Christmas Eve appetizer party. My sister-in-law always brings the Costco cheese plate and for the last two years, my niece has taken to make what she calls an Astro Weenie Veggie Tree, cocktail weenies and bite-sized crudites skewered with decorative toothpicks onto a big foil covered styrofoam cone -it's pretty awesome but her ambition is undermined by her late-to-the-party timing. By time she's finished chopping and constructing the thing, everyone's already gotten into the sweet and sour meatballs and salami cream cheese roll ups, no one wants veggies. The next morning I deconstruct and cut up whatever is left from the sweet and sour meatballs (usually nothing) and anything else my sister has languishing in the fridge. It's always a crowd pleaser.
This is not that frittata. This is my take on a food52 recipe that showed up on my news feed awhile back, the day after the rare occasion we get leftover frittata in the breakroom at work. I thought, why don't I ever make frittata's for myself? They make great leftovers, the perfect thing to reheat with a small salad when I get home from work hungry.
I had a basket of cherry tomatoes teetering on the edge of the compost bin and it all came together. I slow roasted them. I usually always have feta in the fridge so that night I pondered the cheese selection at work and decided on the Fontina Val d'Aosta, the real deal, made in Italy~a semi-firm, raw milk full flavored cheese. All this time I'd been using fake fontina: fontina style cheese, the red waxed Danish version one finds in the supermarket. There's a big difference. Real Fontina is so much more flavorful and it's more firm than fake fontina which is downright flabby by comparison. 
True Fontina is a great snacker. I had a piece that was a little over 6 ounces. I shredded the 4 or so ounces for the frittata and "tasted" through the remaining bit that I had originally planned for my after-work grilled cheese toast, savoring bite after bite. By the time the frittata came out of the oven the rest was gone.
I love to let a little piece of cheese linger in my mouth for as long as I can. It's like candy.


Spinach & Roasted Tomato Frittata
adapted from food52

1 pound cherry tomatoes sliced in half
1 teaspoon dried thyme or oregano
1 tablespoon olive oil
1 bunch spinach chopped
2 cloves garlic minced
10 big basil leaves sliced into ribbons
7 eggs
4 ounces shredded Fontina cheese
4 ounces feta
salt
pepper


  1. Pre-heat oven to 375 degrees.
  2. In a small bowl, toss the tomatoes with a glug of olive oil, salt, pepper and dried thyme or oregano.
  3. On a parchment lined baking sheet arrange the tomatoes, cut side up so they're not touching. spoon any remaining liquid left in the bowl on top of the cut halves, refilling any that have hollowed out during the tossing. 
  4. Roast for 30 minutes
  5. Heat oil and garlic in a 12 inch skillet over medium heat. Add the spinach and cook down until it is just wilted. Remove from heat and set aside.
  6. Whisk eggs in a big bowl. Add the cooked spinach, fontina, 3/4 of the chopped basil. salt & pepper.
  7. Pour the mixture back into the skillet, top with the tomatoes pressing them down into the mix. Sprinkle on the remaining basil and crumbled feta.
  8. Cook on the stove top, over medium heat until the bottom is just set, about 3 minutes. Slide it into the oven and cook until set, about 15-17 minutes

Wednesday, February 11, 2015

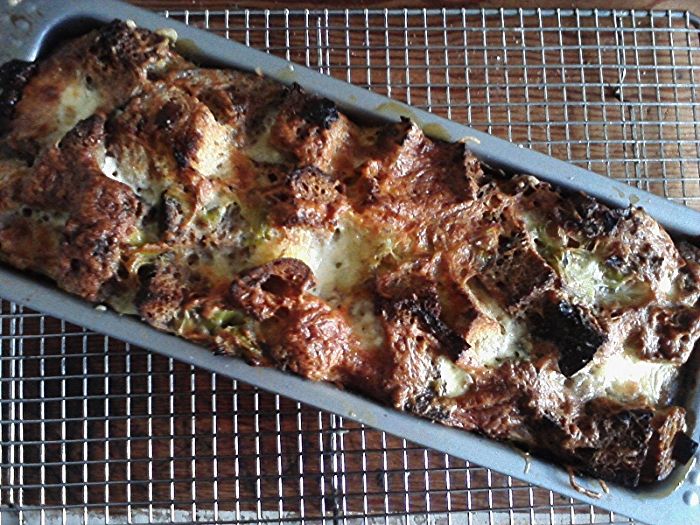
Leek Bread Pudding

I've been eager to try this recipe since Daniel, one of my customers at the market told me about it. He had a basket of leeks, cream, croutons, thyme and Gruyere. I asked him what he was making- "Leek Bread Pudding".
I was intrigued, never having made bread pudding before. I'm a huge fan of the lovely leek and if there's cheese in the mix, count me in. "Wow! that sounds great. Where'd you get the recipe?" Thomas Keller's Ad Hoc at Home, it turns out. Daniel said he'd just made it for the first time earlier in the week and it was so good he wanted to make it again. I laughed because I do the same thing. If I make something new and it's really great I'm already planning my next shopping trip after my first bite. I like to make it again right away to make sure it's as good as I think it is. If it's just as lovely the second time around it'll become part of the repertoire.
When I Googled the recipe, the first thing to come up was Smitten Kitchen's adaption of Keller's recipe so I knew I was golden 'cuz everyone knows how much I love me some Smitten Kitchen. SK's recipe halves the Ad Hoc proportions to fit in a loaf pan and is more suitable for a small family meal as a side dish whereas the Ad Hoc recipe seems more inclined to those folks who entertain on a larger scale than me. Keller's proportions call for 3 cups of heavy cream AND 3 cups of milk. It's hard to carry that much dairy on the handle bars of my bicycle. In the meantime, I got the book from the library. The pictures are very pretty.
This turned out quite well in spite of a few.. uhmm.. substitutions
I used a variety of crusty freezer loaves I get from the day old bread basket at the market to make the croutons. The recipes suggests making croutons with brioche or a pullman loaf which are less dense and crusty.  This was a spontaneous decision when I found leeks at my local produce market yesterday. It was my day off so I didn't get the good stuff and ended up buying a block of supermarket swiss cheese instead of the Emmentaler or Comte the recipe suggests. I also forgot to buy chives so I just added extra thyme.
So yeah, there were a few flaws. It was still delicious so I know it'll be extra awesome next time.

Monday, January 12, 2015

Cheddar & Jalepeno Scones

Finally, I got around to making the Cheddar & Jalepeno Scones again. I was in a savory scone zone last year, inspired by some great savory brioche that we were selling at the market.  Last year I made them with Cabot Vintage Cheddar, a beautiful, moist, aged cheddar with a wonderful zippy flavor. It's a waxed cheese, which keeps all the moisture in as it ages and develops all kinds of tasty goodness. It's moisture makes it a great melter and it's my go-to everyday cheese.
This time I changed it up a little and used Cabot Clothbound Cheddar. It's also an aged cheddar but it's drier, a little saltier and savory-er. These are pretty great, even if I did wimp out on the jalepeno heat by scraping out the seeds and ribs. I used 2 large jalepenos, but Serrano peppers can be used as well. I will be making these again with a little more heat.
I bought a large net bag of jalepenos from my neighborhood Chinese market and I just happened to have the Cooks Illustrated: The Science of  Good Cooking checked out of the library. I share their chosen method for storing chile peppers for more than a couple of days, should you find yourself with an abundance of chiles:
Cut the chile's in half lengthwise and submerge them in a jar with a brine of one tablespoon salt to one cup of water. Rinse the chile's off when ready to use. CI does not recommend freezing fresh chiles (unless you can flash freeze them in a cryo-vac/seal-a-meal kind of deal). You'll end up with mushy peppers when they thaw.


Cheddar Jalepeno Scones
adapted from The Kitchn

1 tablespoon butter
2 large jalepeno peppers, seeded, ribs removed and finely minced
2 1/2 cups all-purpose flour
1 tablespoon baking powder
1 tablespoon sugar
1 tablespoon sea salt
1/4 teaspoon baking soda
1/4 teaspoon dry mustard
1/2 cup frozen unsalted butter cut into 1/2" cubes
1 ½ cups good aged cheddar cheese, grated
1/2 cup + 2 tablespoons whole buttermilk
2 tablespoons chopped cilantro
1 egg lightly beaten
Maldon sea salt to finish

In a small sauté pan, heat butter over medium-high heat. When the bubbling subsides add the jalepenos and sauté until soft, 5 minutes. Set aside and let cool completely.

In the bowl of a food processor, pulse the dry ingredients. Scatter the frozen butter over the dry ingredients and pulse until the butter pieces are the size of small peas. Add the cheese, buttermilk, jalepenos & cilantro. Pulse until everything is just combined. The dough will be pretty shaggy but hold together when pinched between your fingers.

Spread a large sheet of parchment paper over a work surface and turn the dough onto it. Using a bench scraper and working the dough as little as possible, shape, press and flatten the dough into either a 1 1/2 inch thick round, if you want larger scones or a 1 1/2 inch thick rectangle, if you will be making mini scones.

Slide the parchment onto a sheet pan and chill in the freezer for about 30 minutes.

Slice the round into 8 wedges, or the rectangle into 2 inch strips then 2 inch squares then slice each square diagonally across to form little wedges.

Return the wedges to the parchment/sheet pan with some space in between each piece. Cover the pan with a sheet of plastic wrap and return to the freezer for at least another 30 minutes or until you're ready to bake them. If you're planning to freeze any of the unbaked scones, continue to freeze for a minimum of 1 hour total. Remove the frozen scones from the sheet pan and transfer into a freezer bag removing as much air as possible. Place the bag inside a second freezer bag and remove air.

Pre-heat oven to 425 degrees. Place the scones on a parchment lined sheet pan. In a small bowl,  beat the egg with a fork. Brush each scone with egg. Sprinkle with pinches of maldon sea salt and bake for 15 minutes until golden, rotating the sheet pan half way through. Let the sheet pan rest on a cooling rack for 5 minutes and transfer the scones directly onto the rack to continue cooling. Serve them while they're still a little warm. Uneaten scones can be left to cool completely and then stored in an airtight container at room temperature.


Sunday, December 7, 2014

Breakfast Tacodillas

Breakfast Tacodillas, originally uploaded by michele wynne.
Breakfast is and always has been my favorite meal, long before it became a regular in my kitchen, it's always been my favorite meal for dining out.
This is a pretty typical breakfast when I can remember to do it and it's super simple. All you need are some corn tortillas, eggs, cheese and fresh herbs. I also include caramelized onions, roasted peppers and tomatoes when I have them on hand or some corn salsa.
The inspiration for my taco-quesadilla hybrid came about one morning whilst I was noodling around the blogosphere and other time-leeching internet diversions. That day, the hours I spent elsewhere, some how led me to these two recipes that changed the little kitchen for the greater good.  This is a mash-up from my two favorite foodie blogs. I've been making some version of this at least once a week since this taco recipe from Smitten Kitchen caught my eye...then something directed me to this quesadilla recipe from 101 Cookbooks.
Breakfast for one~3 tacodillas:

Assemble whatever assortment of ingredients you have on hand: 2 eggs, 3 corn tortillas, salsa, cheese, herbs etc. I'll usually use whatever cheese I have on hand, but I find fresh goat cheese, feta, or blue cheese or Brie (used here) to be my cheeses of choice.
For this one I used Brie and the last crumbles of some Pt. Reyes Original Blue, caramelized onions, and thyme.
In a small bowl beat the eggs with some salt and pepper. Heat up a little oil in a small non-stick skillet. When the oil is hot, pour in about one third of the eggs, enough to spread to the size of your tortilla. Let the egg set for about 30 seconds and then lay the tortilla over the egg and let that set for another 30 seconds or so until the egg is fused to the tortilla. Carefully flip the whole thing over. Sprinkle some cheese on top of the egg and let it begin to melt. Add any other layers of ingredients. Slide the tortilla onto a plate, folding it in half as you lay it down. Repeat with the remaining tortillas.

Monday, October 27, 2014

A Page from my Book...


... and  one of my favorite things.  This is a super simple and amazingly delicious way to start a morning. I created an illustrated cookbook for my niece's bridal shower gift last year, a compilation of my little kitchen faves. 
This quesadilla eventually morphed into what I call a tacodilla (a hybrid of these two recipes) inspired by my two favorite blogs 101 cookbooks and smitten kitchen.

Monday, July 28, 2014

Roasted Tomato & Basil Grilled Cheese

These are a few of my favorite things:

Cheese~my favorite food in the whole wide world. Truly. This particular spur of the moment concoction uses my everyday go-to cheese, Cabot Vintage Cheddar. I have the great good fortune to spend my 40 hour work week in the most amazing and inspiring foodie mecca's in San Francisco, Bi-Rite Market, where my exposure to cheese has opened up a whole new world. Gone are the days of supermarket block mild cheddar and jack. I've ventured into the world of stinky cheese and haven't looked back.

Slooowww Roasted Tomatoes~my little kitchen staple.


Basil-nothing..well, almost ...makes me happier than getting basil to grow on my window sill for more than a week. I've got one going now that's lasted over a month.


Slow Roasted Tomatoes
Pre-heat the oven to 275 degrees.
a pint or two of any small tomato you like-sliced in half lengthwise. In large bowl toss the tomatoes with a good glug of olive oil, sea salt, fresh ground pepper and if you want, some dried herbs such as rosemary, thyme or tarragon.
lay a sheet of parchment paper onto sheet pan and spread the tomatoes out evenly, cut side up. Spoon the liquid left in the bowl back into the cut halves that appear hollow. Use two pans if you need to so the tomatoes aren't crowded.
Bake for 45 minutes.


My approach to the grilled cheese:
Turn on the broiler.
In a small ramekin, start with 2 tablespoons of softened butter & stir in a dollop of Dijon mustard and 2 tablespoons of grated parmesan.
Slather on one side of two thick slices of country loaf bread.
Grate one cup of your favorite cheddar.
In another small ramekin, spoon up some of those slow roasted tomatoes you've got in the fridge, along with the olive oil it's been encased in. Microwave that for about 30 seconds, just to liquefy the oil. Strain this oil into a non-stick skillet and heat on medium. It's going to start spattering, that's the water from the tomatoes-wait until that stops, then place the slices of bread butter side down and let that get all toasty brown.
Transfer the toasty grilled bread, toasty side down on a small sheet pan or broiler pan. Pile on the grated cheese and place it under the broiler for a minute then spread the tomatoes over the melty cheese and broil for another minute. I sprinkled this with za'atar, but fresh ground pepper works just fine.
Remove and let it rest for about a minute and top with some slivered basil.

Tuesday, May 6, 2014

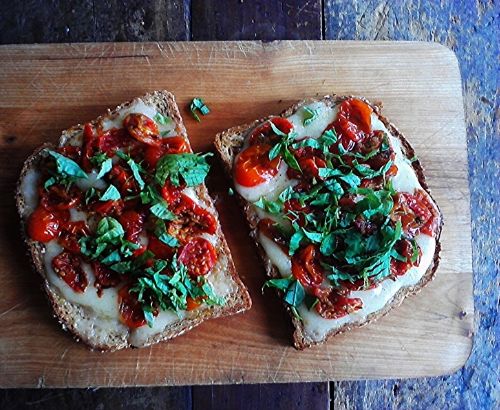
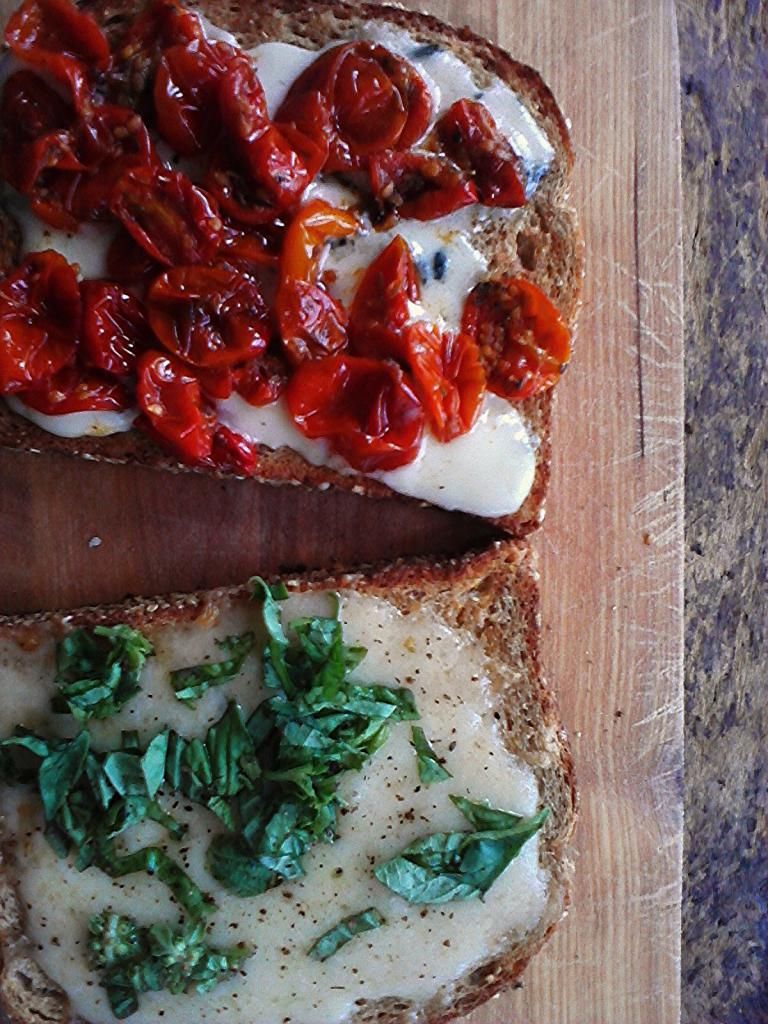
Chevre and Roasted Tomato Toasts with Fresh Za'atar

A while back, I spent a rainy "weekend" in the little kitchen cooking up my favorite condiments -The Three Amigos - slooowww roasted tomatoes, caramelized onions, & roasted red peppers. I then cooked up big batches of barley and white beans for the freezer,  hard boiled some eggs, and made a batch of fresh za'atar, (a Middle Eastern herb & spice blend of thyme, oregano, toasted sesame seeds, salt & sumac),
A day in the little kitchen makes the work week meals a breeze.
Simple omelets and grilled cheese sandwiches take on a whole new level of flavor, a quick blitz of  white beans and roasted peppers or slow roasted tomatoes (along with olive oil & lemon juice) in the food processor make up a lovely spread - the perfect snack with some toasted pita chips. Spread all over a big flour tortilla + egg salad + fresh herbs, or sliced lunch meat + caramelized onion + a generous sprinkle of za'atar, roll it up and you're good to go or slice it into pretty pinwheels.
My favorite quickie meal is a tartine or open-faced, loaded toasts. This one consists of slices of crusty country loaf which were brushed with olive oil and toasted in the oven, then rubbed with garlic, next spread with a mixture of chevre & za'atar, topped with slow roasted tomatoes and another sprinkle of za'atar.

Thursday, May 1, 2014

a stop-you-in-your-tracks grilled cheese sandwich

It's nice to have a leisurely morning, slowly awakening the little grey cells with a couple of pints of coffee. While sitting at my usual window table at my neighborhood cafe on a very, very warm & sunny morning, I was noodling around the blogosphere and working on the cheddar & jalepeno scone post. Suddenly I got very hungry even though I'd just eaten 2 of the afore mentioned scones with my coffee.
I decided that I needed to run home and drop off the computer and then dash up to the market and pick up some eggs and blue cheese, thinking I'd mix up a batch of blue cheese & caramelized onion scone dough before work. I was almost at the door when suddenly I was stopped in my tracks by two little words-grilled cheese.
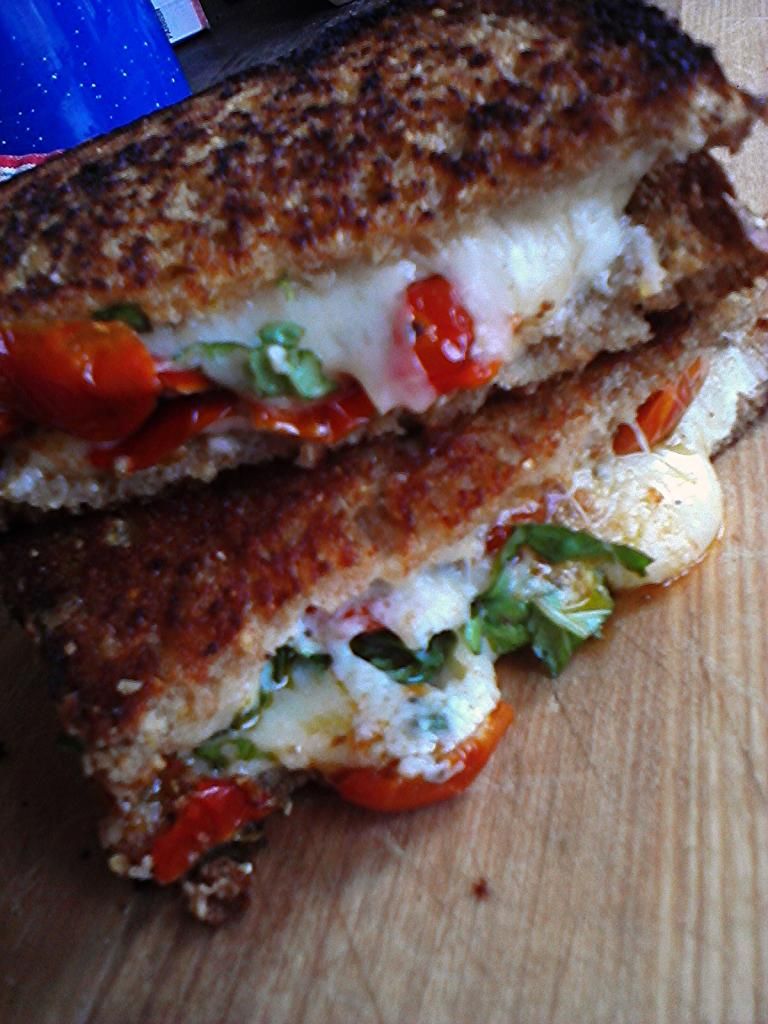
Not so wise to go to the grocery store hungry...was my next thought...in fact, that would be down-right idiotic. Best grab a nosh first. Simply sliced bread and cheddar cheese. It'll only take a couple of minutes. At the refrigerator door, I pondered the last tiny bit of Pt. Reyes Original Blue cheese and those slow-roasted tomatoes and I was pretty darned pleased with myself.  Oh and how's that basil looking?  still perky green after a week. Excellent.
Ten minutes later I sat down to this:
 ...well that's a lie because I had to take 20 pictures of it first. Never made it to the store.

Friday, April 25, 2014

Roasted Red Pepper Grilled Cheese Sandwich

I can't even begin to describe how much I love a grilled cheese sandwich with a fried egg. This was the last of my treasured roasted red peppers. I'm crazy about roasted red peppers and ridicoulously try to hang on to them too long. On the average I roast about 4 red peppers and use them a number of ways to use in omelettes, on toasts, in quesadillas, in spreads and of course, grilled cheese sandwiches.  which I'd covered with olive oil and stored in an airtight jar. I scraped everything into a 1 cup pyrex prep bowl and microwaved for about 30 seconds just to completely liquify the oil. I pressed back the peppers with a fork and drained the oil into a skillet until I was ready to cook the egg.
Here's how this went down:

2 tablespoons butter, softened
2 tablespoons grated parmigiano reggiano
1 teaspoon Dijon mustard
2 slices of multi grain bread
aged gouda grated
sharp cheddar, grated~ I used my fave, Cabot Vintage Cheddar
chopped roasted red peppers
oil from the jar of roasted peppers
1 egg
za'atar

Turn on the broiler.
In a small bowl, mix butter, Parmigiano Reggiano, & Dijon mustard then spread completely over two slices of bread. Heat a non-stick skillet to medium-high heat and lay the bread, butter side down into the pan. Cook until the underside is nice and golden toasty.
Transfer the bread (toasty side down) onto a broiler proof pan and top each slice with cheese, getting the cheese right up to the corners of the bread so it doesn't burn like mine did. Set aside for a moment. Wipe any stuck cheese out of the non stick skillet you toasted the bread in, with a paper towel and add the roasted pepper infused olive oil to the pan over medium heat. Crack the egg into a small bowl or teacup, when the oil is hot tip the egg into the pan. Sprinkle a little salt and pepper over the egg. While the egg is cooking, place the cheese topped bread under the broiler until the cheese melts, 1-2 minutes.  Remove from the broiler, spread one slice with roasted pepper and set aside until the egg is finished cooking. Lay the cooked egg on the second cheesy toast.
Sprinkle with generous pinches of za'atar, or some freshly chopped herbs. Close the book on your sandwich, place it on a plate and using a sharp serrated knife, cut the sandwich in half. Take a moment to enjoy the sight of yolky yellow saucy goodness oozing over the plate. Consume immediately.

Sunday, April 20, 2014

I made Cheese!

I was super excited when this class appeared on the 18 Reasons calender~Homemade Cheddar!  How cool is that? Cheese is my favorite food.
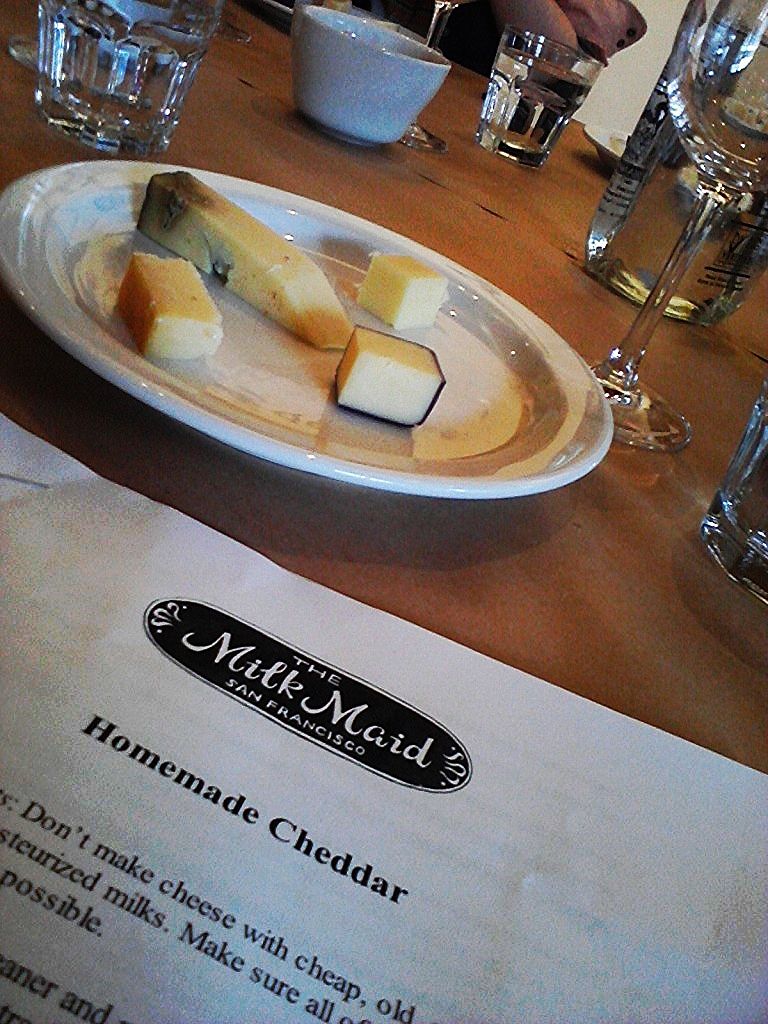
The class was taught by Louella Hill, The Milkmaid.
So here's what went down:

Getting ready to make cheddar. First we taste~on the plate at 1:00: Fresh Tillamook cheddar, moist and buttery. Mild. Supermarket shrink wrap. @4:00 Cabot Vintage Cheddar-one of my favorites-still fairly moist and buttery, much tangier than the Tillamook. This has been my go-to everyday cheese for the last year. It's a wax coated cheese. Aged ??? @8:00 Cabot Clothbound Cheddar or what is also called bandage wrapped. The flavor is so much more intense than the previous cheeses. Finally @10:00 Keen's Cheddar from England. It's got a big moldy veins. YUM! Drier and even more intense than the Cabot. Saltier, savorier. good stuff.
Raw milk is gently heated to 91 degrees, cultured buttermilk is added, then rennet (the enzyme that creates curdling). About 30 minutes later you have a pot of what basically feels like custard. With a knife you start slicing through the custard in straight line cuts a half inch apart, turn the pot 45 degrees and cut again forming 1/2 " grid cuts. Moisture is releasing and here comes the whey.
Then with a flat straining ladle, start making horizontal cuts and gently stir.
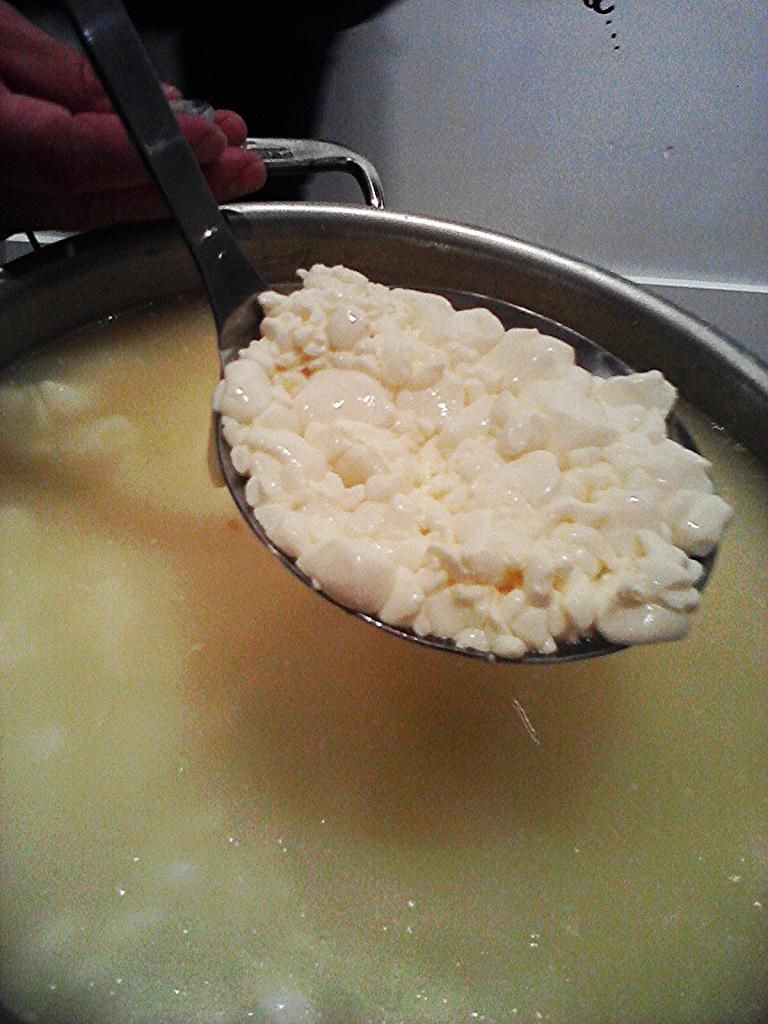
After 30 minutes of stirring the curds, and maintaining the 91 degree temperature, break up smaller and smaller until you end up with something that looks like loose cottage cheese, temp increases to 105 and stirred for another 15 minutes.
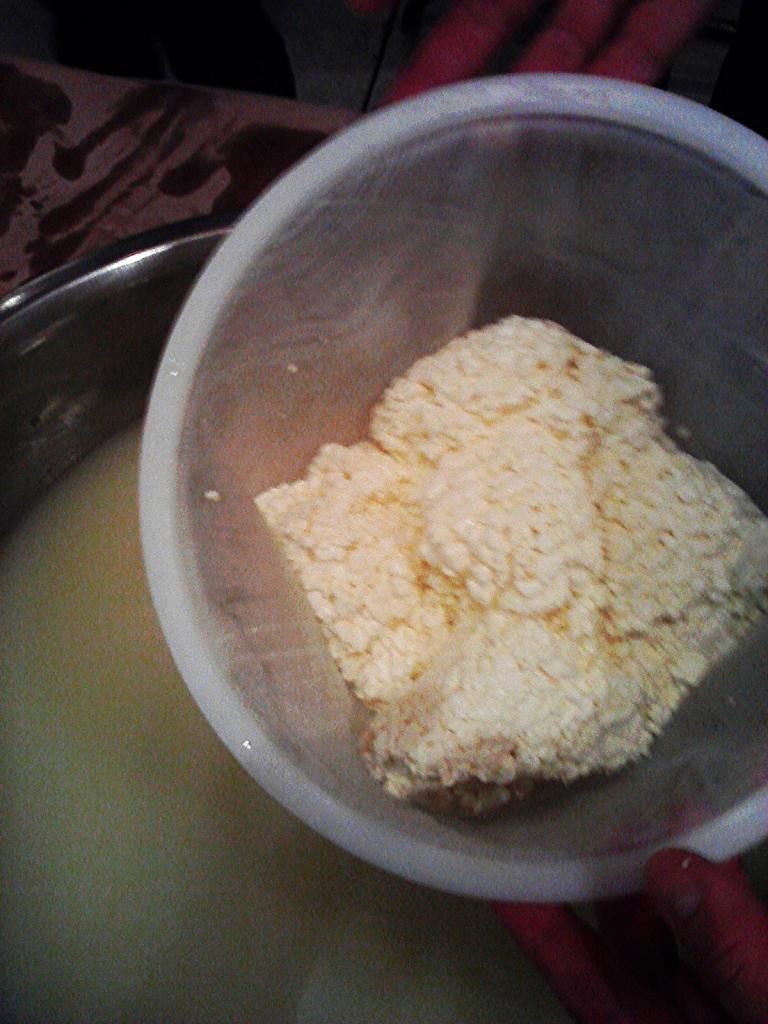
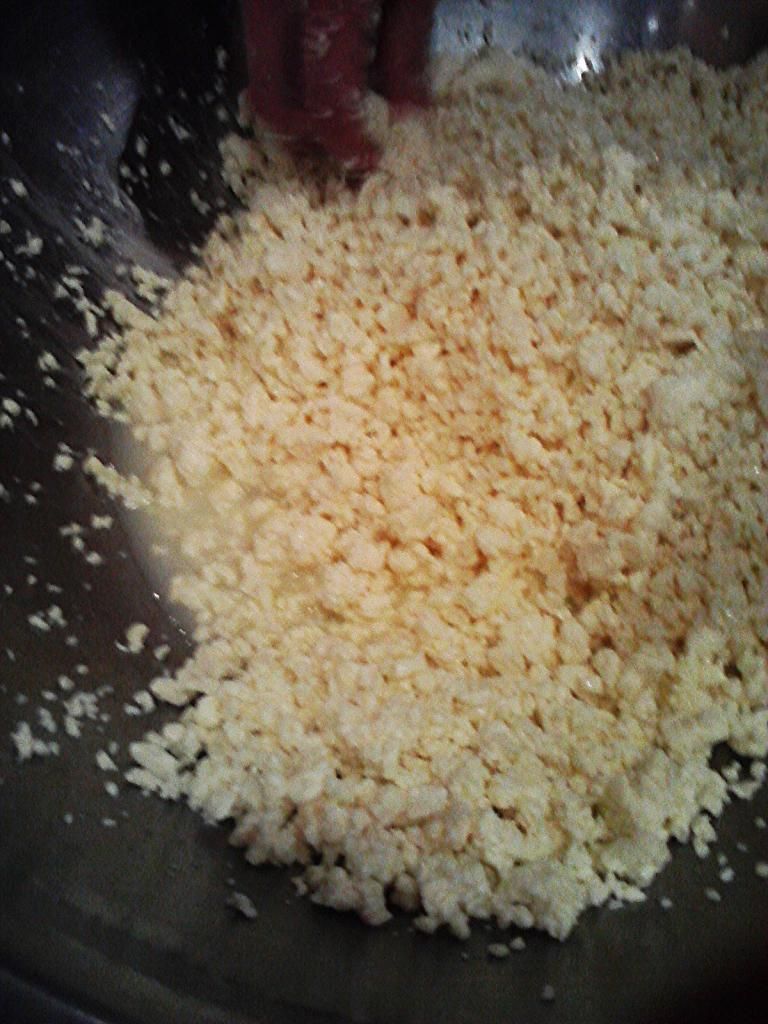
Drain and place the curd, which has clumped into a large mass, in a large bowl and break apart and crumble with your fingers. The thing that surprised me the most was the sweetness of the whey. It made me very sad to see it go down the sink. Traditional ricotta is made from cooked whey.
The curd is still releasing moisture. The curds are scooped up and put in the straining basket and then pressed.
We got cheese...well sorta. This round was only lightly pressed to form it into a wheel that we could all take a picture of. What really happens is that the curd is left in the press overnight with 50 pounds of weight on it to extract all of the moisture. Aged cheddar has to be super dry so as not to mildew while it ages.
Once the wheel has been compressed overnight, it's left to sit out for a day or two in order to dry out and form a skin.
At this point in the class we were each given a small wheel which had been previously made, so that we could commence with the wrapping. We cut up strips and circles of clean white cotton, dipped the "bandages" in bacon fat and wrapped the cheese to protect the cheese while it ages.
We were given little plastic mesh mats and instructed to age our cheese in a zip lock bag in the vegetable drawer of the refrigerator or better yet- in our wine refrigerator <snort>. The cheese needs to be turned every day.
This is called affinage, the care and aging of cheese.Stay tuned.


Wednesday, February 26, 2014

petit basque & mac


petit basque & mac, originally uploaded by michele wynne.
This is the latest from Melt: The Art of Macaroni and Cheese. This bowl of creamy, swirly, sweetly roasty, cheesiness is called Petit Basque with Roasted Garlic, Shallots & Gemelli. I was super excited to try this because it just looked so damn good (as the I-just-wanna-jump-into-the-page-headfirst photography inspires) and in my pursuit of furthering my cheesey gourmandese, I wanted to get my mitts on some Petit Basque, a sheep milk cheese we sell at the market.
Until yesterday, I knew absolutely nothing about sheep milk cheese. I suspect I've tasted it at the market but I don't recall ever eating in any kind of quantity.
A little Cheese 101 I got from The Cheese Chronicles an educational and entertaining adventure through the world of American made cheese:
Sheep milk has a higher fat content than cow or goat milk making it a little richer and creamier. Fresh sheep milk is also very fragile, if handled roughly those big fat globules burst, resulting in a cheese that's sheepier and more barnyardy and unappealingly oily...quoting a quote that was quoted in the book: You should taste the milk, not the animal. Thusly, quality is definitely the key because there are apparently some bad sheep milk cheeses out there.
The Petit Basque comes from the French Pyrenees Mountains where fat little sheep roam around munching on fresh mountain grasses and wild herbs. It's a medium-hard, aged (70 days), small format cheese. Sheep are small, well... smaller than a cow, and produce about 4 pounds of milk a day verses the 40-50 pounds of milk a Holstein produces.
Insert small rant<  scary thing from the book: industrial dairies that produce some those big bricks of cheap supermarket cheese (not to mention the milk), come from cows that are given growth hormones that push the daily milk production of ONE cow up toward 130 pounds. A day!! That's insane!!! Now I get it. Now I understand why you gotta pay for good cheese.  The 10 ounces of  Petit Basque this recipe calls for runs just shy of $16.00. It's definitely worth the occasional indulgence> end rant


This recipe rocks on so many levels. It's a great introduction to sheep milk cheese because the Petit Basque is relatively mild, beautifully creamy, boasting flavor notes of light caramel and subtle fruit. Enhancing the cheeses inherent sweetness is the slightly burnt and sweet caramelized element of roasting 2 heads of garlic plus some lightly caramelized shallots. So needless to say, but I'm saying it anyway...savory sweetness shines.
Here's a link to the recipe.
It's worth noting that when salting, I like to wait until after the cheese is melted into the sauce. This isn't a very salty cheese, but I like to taste the nuances that the salt begins to bring out, so taste, then add a little salt, stir, wait a minute, taste, repeat. The garlic will start to sing a little and the sweetness will enhance. Stop salting when you feel the flavors are optimal...or as they say, salt to taste.
I am now committing to explore sheepy cheeses in more depth. Whilst researching Petit Basque I came upon this article  by Stephanie Stiavetti, one of the authors of Melt. It got me all on a tear to make a gratin using it, seeing as I'm bouncing around between macaroni and grains. This gratin from Smitten Kitchen is just the perfect jumping off point. Farro? Mustard greens?

Thursday, February 20, 2014

Avocado Mac 'n Cheese


Avocado Mac 'n Cheese, originally uploaded by michele wynne.
"The only reason I work out is so I can eat more cheese". That's Ricky Gervais's quote from "back of the napkin" in the current Bon Appetit. I love that. I shall steal it. Except I don't work out. Anyway, I'm obsessing with cheese right now, taking advantage of my awesome workplace and the expertise I have access to everyday. I want to learn more about cheese. So here's what's been going down in the little kitchen.
You may not know this but, I love love love avocados and clearly, mac & cheese, but I have to say that I was initially not so keen on the idea of this combination on my initial pass through the pages of Melt: The Art of Macaroni and Cheese and had the photo I present here been any part of that page I would have slammed the book shut in horror. My cheesy little cell phone cam does not do this dish justice. The photographs in Melt are stunning and the recipe for Beecher's Flagship Cheddar with Avocado, Lime, and Shell Pasta suddenly sang to me when I spied the little pile of imperfect avocado swag at the market the other day, I then headed over to the cheese counter to get the skinny on the Beecher's.
Beecher's Handmade Cheeses come out of Seattle's Pike Place Market. The space houses the fromagerie (the cheese making facility), a cafe, and a retail space. Sounds pretty cool. The Beecher's Flagship is a moist, semi-hard white cheese, sort of a hybrid of cheddar and gruyere. Beecher's doesn't actually call it a cheddar as it uses cultures that aren't normally introduced into cheddars. It's not as tangy as a cheddar, it's a nuttier, mellower deal and that's just fine.  At my market we carry Beecher's Flagship Reserve, which is a dryer, more concentrated version of the Flagship. It took a little nudge to get it to melt than had I used the moister cheese, but when all was said and done, it was a hit and I will be planning my next mac 'n cheese tutorial.


A couple of notes:


This dish is ideally meant for immediate and total consumption due to it's avocado-ey tendency to turn grey by the next day. That's the only leftover down-side but if you give it a little stir, it's fine. I splashed a tiny bit of water in the bowl and covered it tightly with plastic wrap, pierced it with a fork and microwaved for a minute, just taking the chill off and slightly warming it.

The cheese measurements in the book are by the ounce. When purchasing cheeses from specialty stores the pre-wrapped cuts are labeled by fractions of a pound. This confused me 'cuz  I'm mathematically challenged, so it was helpful to make myself this:


2 ounces = .125 of a pound
3 ounces =  .1875 of a pound
4 ounces = .25 of a pound
5 ounces = .3125 of a pound
6 ounces = .375 of a pound
7 ounces = .4375 of a pound
8 ounces = .50 of a pound
9 ounces = .5625 of a pound
10 ounces = .625 of a pound
11 ounces = .6875 of a pound
12 ounces = .75 of a pound
13 ounces = .8125 of a pound
14 ounces = .875 of a  pound
15 ounces = .9375 of a pound


This is more of a way to figure out the cost more than anything. I get my cheesemonger to cut it and do the math.


Note to self: Bike the long way home.


Next up: Point Reyes Original Blue with Pecans, Figs (or dates) and Shell Pasta

Tuesday, February 18, 2014

Gruyere & Emmentaler Macaroni & Cheese

I threw this little bit of heaven together last week when I was in serious need of comfort food and when it comes to comfort food, it's gotta involve cheese. I finally got my mitts on my library wait-list copy of Melt: The Art of Macaroni and CheeseHow the book came on my radar is still a chain of links that I can't even recall, but I took one look at the cover, I knew I must possess it, even if only for 3 weeks. Inside there's one gorgeous, mouth-watering recipe after another. After tagging pretty much every dang page, I got down to some serious study whilst trying to decide where to start.
I am sooo lucky, not only to live in the foodie mecca that is San Francisco, I also have a whole world of amazing artisanal cheeses at my fingertips every day because I work here and I just so happen work along side some the best cheesemongers in the business, like this guy.
Turns out there are endlessly wonderful ways in which macaroni meets and mingles with a vast variety of cheeses.  I shall explore as many ways as my heart, wallet and waistline will permit. 
I have to admit that my first line of editing the number of tagged recipes was cost. Many of these artisanal cheeses can cost upwards of $30 a pound, and when you're tossing meat into the pot, well...it's not an after-work, week-night family dinner.
Fortunately, I don't have to cook for a family. Just me. Eating Mac 'n Cheese all to myself. I decided to start with a simple classic. Gruyere and Emmentaler Macaroni and Cheese. The cheese purchase included Cave Aged Gruyere and Holey Cow, an Emmental-style cheese from the Central Coast Creamery in California. The recipe includes Black Forest Ham cut into 1/2 inch chunks. I bought the sliced version and cut it into small strips. I also included some left-over Italian sausage.
My only mistake was buying the sourdough from my neighborhood super-market. I thought the small "fresh-baked" house-brand boule would be just fine. Wrong. It wasn't until the next day I tasted  the leftover bread  side by side with a fresh Acme sourdough baguette that I saw the light. The boule was remarkably doughy and sour-not in a good way at all. It was so awful, I just let it dry out for bread crumbs.
I've been learning a lot of valuable lessons after almost a year at the market, the most important being spend the extra $ for the good stuff. The more flavorful your components are, the less you need. The less you need, the less you spend.
This turned out beautiful in spite of the bread debacle. The flavors were rich and savory and didn't take much to satisfy. What used to be a 4 serving casserole (in my world) is 6 with ingredients like this and thusly cost effective.
Good Stuff!


Thursday, February 13, 2014

So Gouda.


So Gouda., originally uploaded by michele wynne.
If this is wrong, I don't wanna be right.
If I had a Valentine I would make him this. If I wanted to land a potential valentine, I'd make him this. If I wanted to kill a valentine, I would make him this every day. I have none of the above.
In my sometimes, way too solitary world, hot dogs are a decadent treat. So, so, soooo bad, unidentifiable animal parts, nitrates, fat, artery clogging cholesterol...blaaahdiblaahdiblaaah...
but lately I've been craving a good old fashioned hot dog. It started with the Super Bowl shoppers at the market and now I'm gearing into baseball and thoughts of my favorite afternoons at AT&T Park (the only time I generally will consume a hot dog-oh... and the occasional trip to Costco).
A few weeks ago, I had a 30-something techie kinda guy come through my line at the market with the makings of his Friday night dinner, a package of "Let's be Frank" dogs, a bag of 4 Acme hot dog buns, a 24 ounce bottle of artisanal microbrew ale and a chocolate pot de creme. I said "Wow! that looks sooo good. I want to take that exact same basket home with me tonight". He laughed and that's when he admitted it was  his Friday night dinner. Funny, not only did it trigger my hot dog cravings but it triggered this completely nonsensical observation: Guy in his 30's, I'm thinking this is the perfect quickie-pre-party-all-night dinner. Guy in his 40's??? Dinner and Netflix. Hmmnnn...sounding pretty good. Guy in his 50's? He's got the uncured hot dogs from 4505 Meats, a good bottle of Cabernet and an $8 bar of Dandelion dark chocolate. Even better. Note to self: practice witty banter.
Anyhoo...This crazy dog came about when I managed to nab some day old Acme hot dog buns and a perfectly ripe avocado from the break room. I also had just been sniffing around the cheese counter earlier in the day while a wheel  of Boerenkaas gouda was being cut. Wow, what a knock-out. It's young, creamy and buttery. I'd originally planned a killer grilled cheese with it.

Here's what went down:

Caramelized onions (a staple condiment in the little kitchen)
Dijon mustard
avocado
hot dog or a sausage of some kind (I admit to buying all beef hot dogs from Fresh & Easy)
a gouda melty cheese-cut into long strips
a good quality hot dog roll- I like Acme

Open the buns and place in the oven (far from the broiler heat). Turn on the broiler. Bring a pot of water to  boil and cook the dogs until they're done-all plumpy. Remove the dogs from the water and cut a slice down the center but not all the way through, shove the cheese down into the crack. Remove the buns from the oven and lay them open in a broiler proof pan and lay the dogs in the buns.  Broil just until the cheese is melted. Prepare the dogs with whatever you like: slather on the Dijon,  caramelized onions (I warm them in the microwave a bit first) and avocado.
Depending on your broiler, check on the dogs after a minute and then at frequent intervals until edge of the meat is slightly blackened and the cheese is melty but not running down onto the pan.

Enjoy. This is great with a spicy amber ale. oh and maybe a salad if you've got the room.