Showing posts with label eggs. Show all posts

Tuesday, March 3, 2015

Spinach & Roasted Tomato Frittata


I love frittata's, but the only time I ever make them is when I do the big family breakfast at my sister's on Christmas morning while everyone is still asleep. I make them with the leftovers from our Christmas Eve appetizer party. My sister-in-law always brings the Costco cheese plate and for the last two years, my niece has taken to make what she calls an Astro Weenie Veggie Tree, cocktail weenies and bite-sized crudites skewered with decorative toothpicks onto a big foil covered styrofoam cone -it's pretty awesome but her ambition is undermined by her late-to-the-party timing. By time she's finished chopping and constructing the thing, everyone's already gotten into the sweet and sour meatballs and salami cream cheese roll ups, no one wants veggies. The next morning I deconstruct and cut up whatever is left from the sweet and sour meatballs (usually nothing) and anything else my sister has languishing in the fridge. It's always a crowd pleaser.
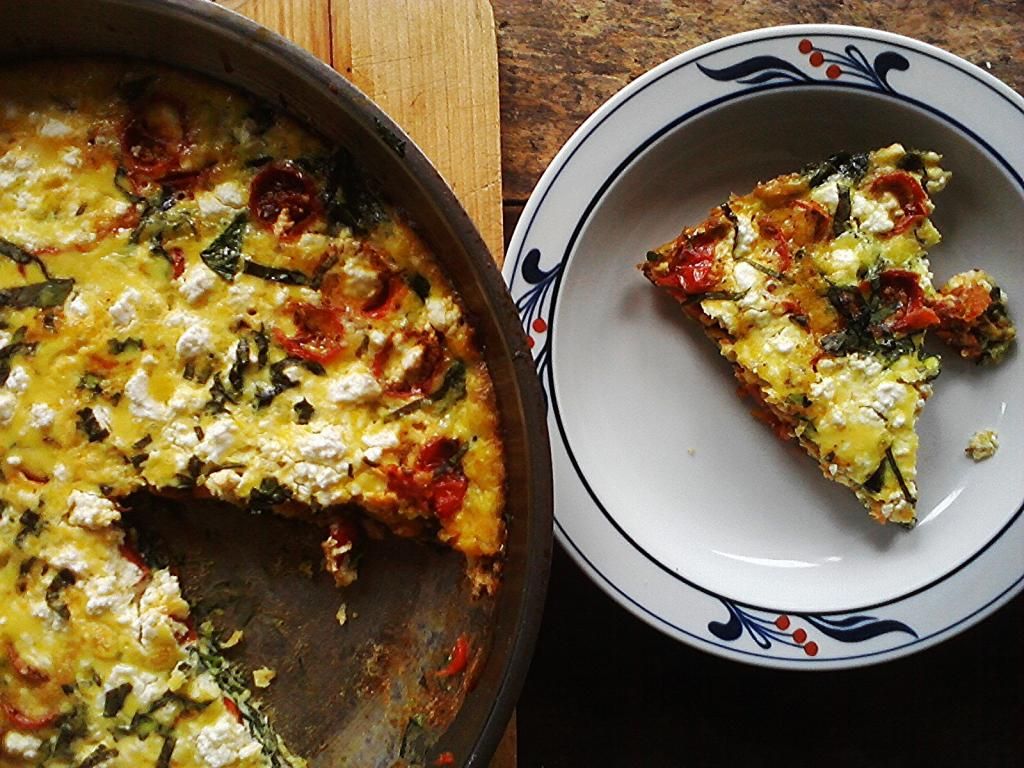
This is not that frittata. This is my take on a food52 recipe that showed up on my news feed awhile back, the day after the rare occasion we get leftover frittata in the breakroom at work. I thought, why don't I ever make frittata's for myself? They make great leftovers, the perfect thing to reheat with a small salad when I get home from work hungry.
I had a basket of cherry tomatoes teetering on the edge of the compost bin and it all came together. I slow roasted them. I usually always have feta in the fridge so that night I pondered the cheese selection at work and decided on the Fontina Val d'Aosta, the real deal, made in Italy~a semi-firm, raw milk full flavored cheese. All this time I'd been using fake fontina: fontina style cheese, the red waxed Danish version one finds in the supermarket. There's a big difference. Real Fontina is so much more flavorful and it's more firm than fake fontina which is downright flabby by comparison. 
True Fontina is a great snacker. I had a piece that was a little over 6 ounces. I shredded the 4 or so ounces for the frittata and "tasted" through the remaining bit that I had originally planned for my after-work grilled cheese toast, savoring bite after bite. By the time the frittata came out of the oven the rest was gone.
I love to let a little piece of cheese linger in my mouth for as long as I can. It's like candy.


Spinach & Roasted Tomato Frittata
adapted from food52

1 pound cherry tomatoes sliced in half
1 teaspoon dried thyme or oregano
1 tablespoon olive oil
1 bunch spinach chopped
2 cloves garlic minced
10 big basil leaves sliced into ribbons
7 eggs
4 ounces shredded Fontina cheese
4 ounces feta
salt
pepper


  1. Pre-heat oven to 375 degrees.
  2. In a small bowl, toss the tomatoes with a glug of olive oil, salt, pepper and dried thyme or oregano.
  3. On a parchment lined baking sheet arrange the tomatoes, cut side up so they're not touching. spoon any remaining liquid left in the bowl on top of the cut halves, refilling any that have hollowed out during the tossing. 
  4. Roast for 30 minutes
  5. Heat oil and garlic in a 12 inch skillet over medium heat. Add the spinach and cook down until it is just wilted. Remove from heat and set aside.
  6. Whisk eggs in a big bowl. Add the cooked spinach, fontina, 3/4 of the chopped basil. salt & pepper.
  7. Pour the mixture back into the skillet, top with the tomatoes pressing them down into the mix. Sprinkle on the remaining basil and crumbled feta.
  8. Cook on the stove top, over medium heat until the bottom is just set, about 3 minutes. Slide it into the oven and cook until set, about 15-17 minutes

Sunday, December 7, 2014

Breakfast Tacodillas

Breakfast Tacodillas, originally uploaded by michele wynne.
Breakfast is and always has been my favorite meal, long before it became a regular in my kitchen, it's always been my favorite meal for dining out.
This is a pretty typical breakfast when I can remember to do it and it's super simple. All you need are some corn tortillas, eggs, cheese and fresh herbs. I also include caramelized onions, roasted peppers and tomatoes when I have them on hand or some corn salsa.
The inspiration for my taco-quesadilla hybrid came about one morning whilst I was noodling around the blogosphere and other time-leeching internet diversions. That day, the hours I spent elsewhere, some how led me to these two recipes that changed the little kitchen for the greater good.  This is a mash-up from my two favorite foodie blogs. I've been making some version of this at least once a week since this taco recipe from Smitten Kitchen caught my eye...then something directed me to this quesadilla recipe from 101 Cookbooks.
Breakfast for one~3 tacodillas:

Assemble whatever assortment of ingredients you have on hand: 2 eggs, 3 corn tortillas, salsa, cheese, herbs etc. I'll usually use whatever cheese I have on hand, but I find fresh goat cheese, feta, or blue cheese or Brie (used here) to be my cheeses of choice.
For this one I used Brie and the last crumbles of some Pt. Reyes Original Blue, caramelized onions, and thyme.
In a small bowl beat the eggs with some salt and pepper. Heat up a little oil in a small non-stick skillet. When the oil is hot, pour in about one third of the eggs, enough to spread to the size of your tortilla. Let the egg set for about 30 seconds and then lay the tortilla over the egg and let that set for another 30 seconds or so until the egg is fused to the tortilla. Carefully flip the whole thing over. Sprinkle some cheese on top of the egg and let it begin to melt. Add any other layers of ingredients. Slide the tortilla onto a plate, folding it in half as you lay it down. Repeat with the remaining tortillas.

Monday, October 27, 2014

A Page from my Book...


... and  one of my favorite things.  This is a super simple and amazingly delicious way to start a morning. I created an illustrated cookbook for my niece's bridal shower gift last year, a compilation of my little kitchen faves. 
This quesadilla eventually morphed into what I call a tacodilla (a hybrid of these two recipes) inspired by my two favorite blogs 101 cookbooks and smitten kitchen.

Friday, April 25, 2014

Roasted Red Pepper Grilled Cheese Sandwich

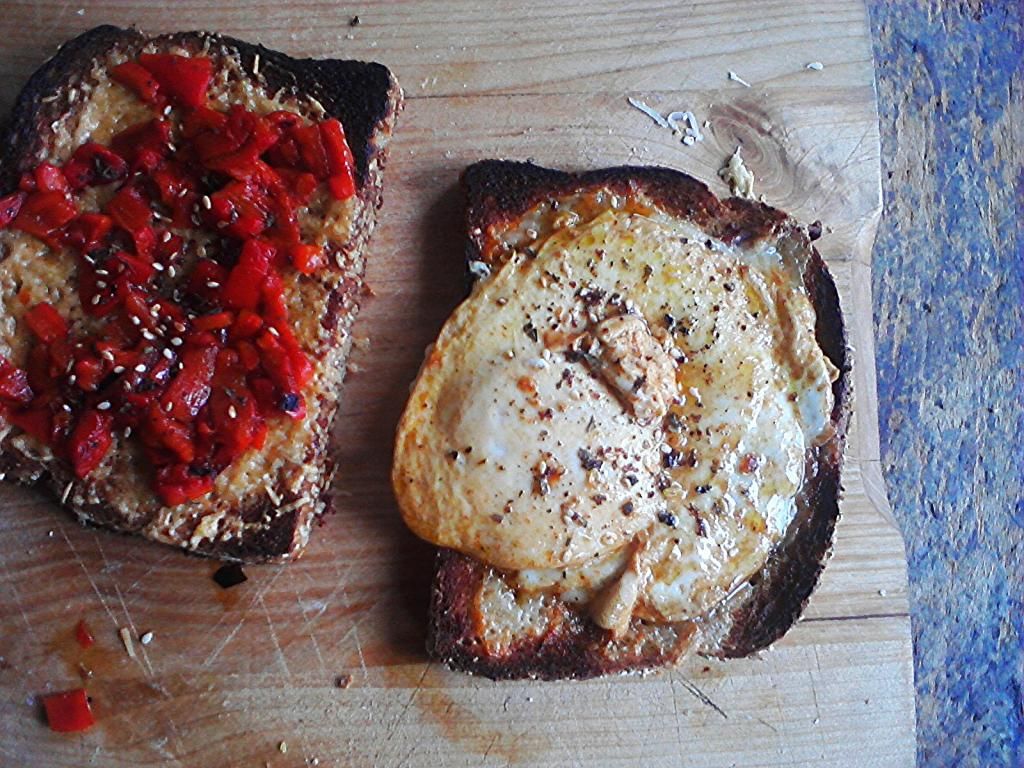
I can't even begin to describe how much I love a grilled cheese sandwich with a fried egg. This was the last of my treasured roasted red peppers. I'm crazy about roasted red peppers and ridicoulously try to hang on to them too long. On the average I roast about 4 red peppers and use them a number of ways to use in omelettes, on toasts, in quesadillas, in spreads and of course, grilled cheese sandwiches.  which I'd covered with olive oil and stored in an airtight jar. I scraped everything into a 1 cup pyrex prep bowl and microwaved for about 30 seconds just to completely liquify the oil. I pressed back the peppers with a fork and drained the oil into a skillet until I was ready to cook the egg.
Here's how this went down:

2 tablespoons butter, softened
2 tablespoons grated parmigiano reggiano
1 teaspoon Dijon mustard
2 slices of multi grain bread
aged gouda grated
sharp cheddar, grated~ I used my fave, Cabot Vintage Cheddar
chopped roasted red peppers
oil from the jar of roasted peppers
1 egg
za'atar

Turn on the broiler.
In a small bowl, mix butter, Parmigiano Reggiano, & Dijon mustard then spread completely over two slices of bread. Heat a non-stick skillet to medium-high heat and lay the bread, butter side down into the pan. Cook until the underside is nice and golden toasty.
Transfer the bread (toasty side down) onto a broiler proof pan and top each slice with cheese, getting the cheese right up to the corners of the bread so it doesn't burn like mine did. Set aside for a moment. Wipe any stuck cheese out of the non stick skillet you toasted the bread in, with a paper towel and add the roasted pepper infused olive oil to the pan over medium heat. Crack the egg into a small bowl or teacup, when the oil is hot tip the egg into the pan. Sprinkle a little salt and pepper over the egg. While the egg is cooking, place the cheese topped bread under the broiler until the cheese melts, 1-2 minutes.  Remove from the broiler, spread one slice with roasted pepper and set aside until the egg is finished cooking. Lay the cooked egg on the second cheesy toast.
Sprinkle with generous pinches of za'atar, or some freshly chopped herbs. Close the book on your sandwich, place it on a plate and using a sharp serrated knife, cut the sandwich in half. Take a moment to enjoy the sight of yolky yellow saucy goodness oozing over the plate. Consume immediately.

Thursday, March 20, 2014

Polenta with Pan Roasted Asparagus

Yaaayyy asparagus! Love it. Almost as much as I love polenta. Add a flowing stream of warm runny egg yolk and my meal in a bowl is a gorgeous feast.
Asparagus came into the market a few weeks ago and I've been jonesing to make this ever since, but I sort of got side tracked by my current obsession with cauliflower soup and roasting cauliflower and tossing it around in gratins and grain bowls.
I like to buy polenta in bulk when I can, the coarse ground, not the quick cooking type. I'll cook a fairly large batch because I love the leftovers. My basic recipe goes something like this:

4 1/2 cups water
4 teaspoons Better Than Bouillion low-sodium chicken broth base (optional)
1 teaspoon sea salt
1 1/2 cups polenta
2 tablespoons butter
1/2 cup grated Parmigiano Reggiano

Bring the water to a boil in a large pot (that has a lid to fit). Whisk in the broth base if you're using it. Add the salt. Whisk in the polenta. Using a flat edged wooden paddle, continue to stir the polenta until it starts to thicken a little. Turn the heat down to medium and cover the pot. Stir it every ten minutes for a total cooking time of 30 minutes. It may seem like it's done earlier, but it'll be less grainy and sweeter if it continues to cook the full 30 minutes.
Stir in the butter and cheese. If you prefer it creamier add some milk or more water/broth.

This is my favorite way to prepare asparagus:
Snap off the tough ends of the asparagus spears. Heat about a tablespoon of olive oil in a skillet on medium-high heat, when the oil starts to shimmer, add the asparagus spears to the pan so they line up side by side. Add few pinches of large grain sea salt and crushed red pepper flakes. Move the pan back and forth so the oil coats the spears and to allow the seasonings to distribute. Cover and cook for 5-7 minutes, shaking the pan occasionally, until the asparagus starts to brown and is cooked through.
Within my polenta I like to stir in any or all of my favorite flavor enhancers like roasted red peppers, slow-roasted grape tomatoes or caramelized onions. This batch includes all three. Over-kill? Perhaps, but that's just how I roll. Oh yeah...and I crumbled on the last bit of my Pt. Reyes Original Blue Cheese. Oh yeah.


Thursday, November 21, 2013

Chilaquiles!


Chilaquiles!, originally uploaded by michele wynne.

Welcome to my current little kitchen obsession. Here's what's going on here~fried tortilla chips bathed in chile sauce and then dusted with finely grated cotija cheese. Sounds pretty good right? Well, hold onto your hats because that's only the beginning of this crazy good brunch I made for myself yesterday and the day before and the day before that! These ridiculously good wet nachos are then layered with sliced avocado, fresh cilantro, couple of eggs poached in chile sauce and then finished with a drizzle of crema. These things are addictive!
Inspiration came by way of a birthday lunch (thanks Sheena!), many months ago to Nopalito where they serve an appetizer version called Totopos Con Chile.
Traditionally, Chilaquiles are prepared for brunch as a way to use up stale tortillas, leftover salsa and cheese.
I was intrigued, in fact more than a little surprised that I'd never before encountered these given that I've been devouring Mexican cuisine since I made my first taco in Home Ec.

Anyhoo, after an intense Google-thon, here's how this all went down:

Red Chile Sauce
adapted from Bon Appetit
 
7 dried Guajillo chiles
28 ounce can crushed tomatoes
1 medium onion
5 cloves garlic
1 jalepeno
1/8 teaspoon smoked paprika
2 tablespoons vegetable oil
2 teaspoons agave nectar
2 teaspoons Sriracha
salt to taste

Chips

6 to 8 corn tortillas, cut into 4 wedges each-leave them out overnight to dry
4 tablespoons of oil
salt

grated Cotija

Crema
8 ounces sour cream
2 tablespoons fresh lemon or lime  juice
salt

additional toppings:
sliced avocado
black beans
Cilantro-chopped
cooked chicken
 
Soak the chiles in 4 cups of boiling water for about 15 minutes. While the chiles are soaking, heat 2 tablespoons of oil in a medium skillet and cook the diced onions until brown and caramelized, add the garlic, jalepeno and paprika and cook for another minute or two until the jalepeno softens. Remove from the heat. Back to your chiles, reserving the soaking liquid, remove the stem and cut the chile open, remove the seeds and lay the chiles out on a cutting board and chop them all up. Pour the cooking liquid through a strainer to remove the seeds.
 In a blender, pour in the can of tomatoes, add the onion mixture and the chili pepper. Wipe the skillet with a paper towel. Place the lid on the blender with the central part of the lid removed. Stand by with the liquid and once the blend gets moving, slowly pour the liquid into the blender, just until the funnel forms and the sauce is blending nicely.
Lay out a baking sheet or large plate lined with paper towels. In the skillet, add 4 tablespoons oil and heat to medium high. When the oil is hot, place the tortilla wedges in a single layer and cook until golden brown turning them over with tongs, frying in batches until you're done, drain the chips on th paper towel and sprinkle with salt.
The next part of this goes a little fast. For the Totopo version I prep the grated cheese on a plate or a wide shallow dish and have it at the ready for when the chips come out of the sauce.
Drain off most of the oil and let the skillet cool down a little.
If making these for brunch, I'll have another smaller pan (with a fitted lid) ready so I can poach some eggs in the sauce as well. Crack eggs into ramekins.
Pour the pureed sauce into the skillet and bring to a simmer. Stir in the agave and the Sriracha.  Taste. Add salt, a pinch or two at a time, to bring out the flavor of the tomatoes and peppers. Add more agave and/or Sriracha if you want. Pour some sauce into the second pan and poach the eggs
Return the chips into the skillet and carefully stir to coat them with sauce. Cook for about a minute or so. If you're serving these as an appetizer you'll want to keep them crisp. With tongs, remove the chips, shaking off excess sauce and then dipping the chip onto the plate of cheese to coat. If you're going the brunch-poached egg route then a little additional cooking time is fine to make them fork friendly. With a slotted spoon, scoop up the chips and place them directly onto your serving platter or individual plates  and sprinkle cheese on top and then layer any additional toppings like avocado, black beans or cooked chicken. Lay the poached eggs on top and then drizzle crema on top and sprinkle with additional cheese and chopped cilantro and be ready to dive into the crazygoodness of Chilaquiles.


Friday, January 11, 2013

caramelized onion and mushroom tart

Two years ago when I started educating myself about cooking, I knew nothing about caramelized onions. I didn't know what "caramelized" even meant. Sure, I'd cooked onions until they were brown, blindly following recipes without any analyzation of the process or result. Sugar in onions? Who knew? A few french onion soups had been produced throughout a lifetime of sporadic cooking, rarely processing the process. It was a  means to an end, satisfying hunger as quickly as possible, or occasional entertainment, and as long as the result wasn't burnt or raw or oversalted and tasted good (which meant edible) , the task was deemed a success, tagged with a bookmark or stuffed into a binder and I moved on.
I discovered a recipe for Onion Jam  in Kim Boyce's Good to the Grain last year. It was only then that  I fully understood the process. Suddenly, all of that browning and caramelizaton talk from Americas Test Kitchen finally made sense. If I had to choose my biggest kitchen AHA! moment, that would be it.
It takes about 90 minutes to cook the onions down their jammy consistency. Onion jam on a BLT is the most amazing thing ever. I mixed some into a tuna salad today that was off-the-hook. Even on a fork, all by itself, it's the ultimate marraige of sweet and savory in one bite. Caramelization is a beautiful thing and shouldn't be rushed. Onions for this tart don't have to be cooked this long though, you want more structure.
I came across this article at Slate.com this morning that was dead-on, humourous and an eye-opener about writing recipes. The writer accuses recipe writers of lying about how long it takes to caramelize onions, because the long cooking time is a deterrent to a recipes appeal. 
The article concludes: "The best time to caramelize onions is yesterday".
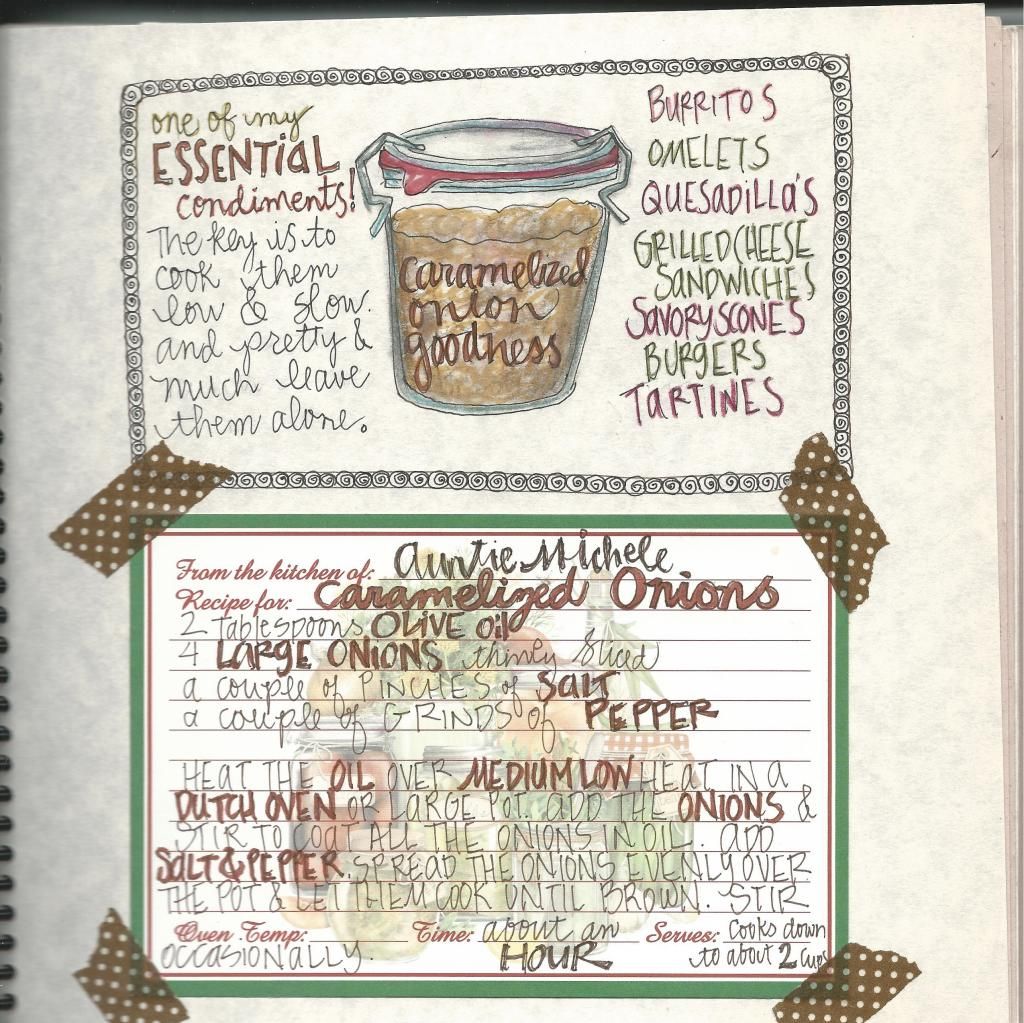
Earlier in the week I caramelized about 3 pounds of onions in a dutch oven. I was left with about 2 cups of gooey good onions. It keeps in an airtight jar for a week, though rarely lasts that long. I use caramelized onions in all kinds of ways, the breakfast tacodilla is it's most frequent destiny.

 I've been in  pastry mode for a couple of weeks now, so when I scored  giant bag of button mushrooms from the Chinese market I knew a tart was in my immediate future. This is a hybrid of recipes adapted from Smitten Kitchen and Dorie Greenspan's Around my French Table.

caramelized onions-again, way more than you need for this recipe and do this ahead of time. A dutch oven is great when cooking a large batch because the cast iron has great heat distribution, there's a lot of surface area to promote browning.

2 tablespoons oil
3 large yellow onions (sliced 1/4 thick)
1 teaspoon salt
black pepper
1 teaspoon red wine vinegar

Heat the oil in dutch oven on medium-high heat and then add the onions. Toss until the onions are coated and cook until they start to brown, stirring infrequently, just to redistribute the onions so they come in contact with the surface of the pot. Once the browning starts (it take's about 20 minutes to get there), add salt, lower the heat and cover the pot and cook for another 20 minutes so the onions release their moisture and get really soft.
Remove the cover and continue to cook for another 30 minutes until the water evaporates and the onions become brown. De-glaze with red wine vinegar at the end.

Pastry
from smitten kitchen

1 1/4 cups flour
1 tablespoon plus 2 teaspoons cornstarch
1/4 teaspoon salt
6 tablespoons butter, diced
1 egg

In the food processor pulse the dry ingredients to combine. Pulse butter until it's in bits the size of small peas. Pulse in the egg until the dough forms.
On a floured work surface roll the dough into a 12 inch circle, carefully roll it over the rolling pin to lift it off the counter and into the tart pan. Press the dough into the corner of the pan and trim off the excess. If you're using a fluted tart pan with a removable base lift the tart pan by the edge and put it onto a plate. Cover with plastic wrap and chill for 30 minutes.

filling:

2 tablespoons butter
1 pound white button mushrooms-stems removed, sliced
1/2 teaspoon salt
1 teaspoon dried tarragon
1 cup of beef stock ( or vegetable stock)
1 tablespoon fresh thyme
1/2 cup caramelized onions
2 eggs
1/2 cup heavy cream
1/2 cup fontina cheese (or gruyere)
salt
pepper
nutmeg
1 teaspoon dijon mustard

Preheat the oven to 350 degrees.
Remove the chilled tart shell from the fridge. Line with foil or parchment and weight the pastry down with pie weights, dried beans or rice. I keep a jar of white beans labeled For Pastry and re-use.
Bake for 10 minutes, remove the weights, foil or parchment and bake for another 5 minutes, until the pastry appears dry, but not browning.
Remove from the oven and brush with dijon mustard. Set aside
While the pastry is par-baking (also called blind baking) heat up a  large skillet over medium high heat, melt the butter until it stops foaming. Add the sliced mushrooms and toss to coat, then let them cook undisturbed, about 5-7 minutes until they start to brown. Toss again to redistribute and continue to brown. Add the salt, pepper and tarragon. The mushrooms will release their water. Cook uncovered until the water evaporates and a fond  (the browned bits) forms on the skillet. Add the beef broth and de-glaze the skillet. Continue to cook until the broth reduces. Remove from the heat and stir in fresh thyme.
In a small bowl or a large pyrex measuring cup, wisk the eggs, cream, salt, pepper and nutmeg together then stir in the grated cheese.
Place your par-baked tart shell on a sheet pan, spoon in the caramelized onions and spread it evenly over the bottom. Then add your mushroom layer spreading it evenly over the onions. Pour the egg mixture over the surface.
Place the sheet pan on th middle rack of the oven and bake for 35-40 minutes until the center is puffed and brown. Let it rest for about 10 minutes, remove the fluted ring from the base. Slice and enjoy with a big green salad.
This tart re-heats nicely and I pack it for lunch.