Showing posts with label brunch. Show all posts

Tuesday, March 3, 2015

Spinach & Roasted Tomato Frittata


I love frittata's, but the only time I ever make them is when I do the big family breakfast at my sister's on Christmas morning while everyone is still asleep. I make them with the leftovers from our Christmas Eve appetizer party. My sister-in-law always brings the Costco cheese plate and for the last two years, my niece has taken to make what she calls an Astro Weenie Veggie Tree, cocktail weenies and bite-sized crudites skewered with decorative toothpicks onto a big foil covered styrofoam cone -it's pretty awesome but her ambition is undermined by her late-to-the-party timing. By time she's finished chopping and constructing the thing, everyone's already gotten into the sweet and sour meatballs and salami cream cheese roll ups, no one wants veggies. The next morning I deconstruct and cut up whatever is left from the sweet and sour meatballs (usually nothing) and anything else my sister has languishing in the fridge. It's always a crowd pleaser.
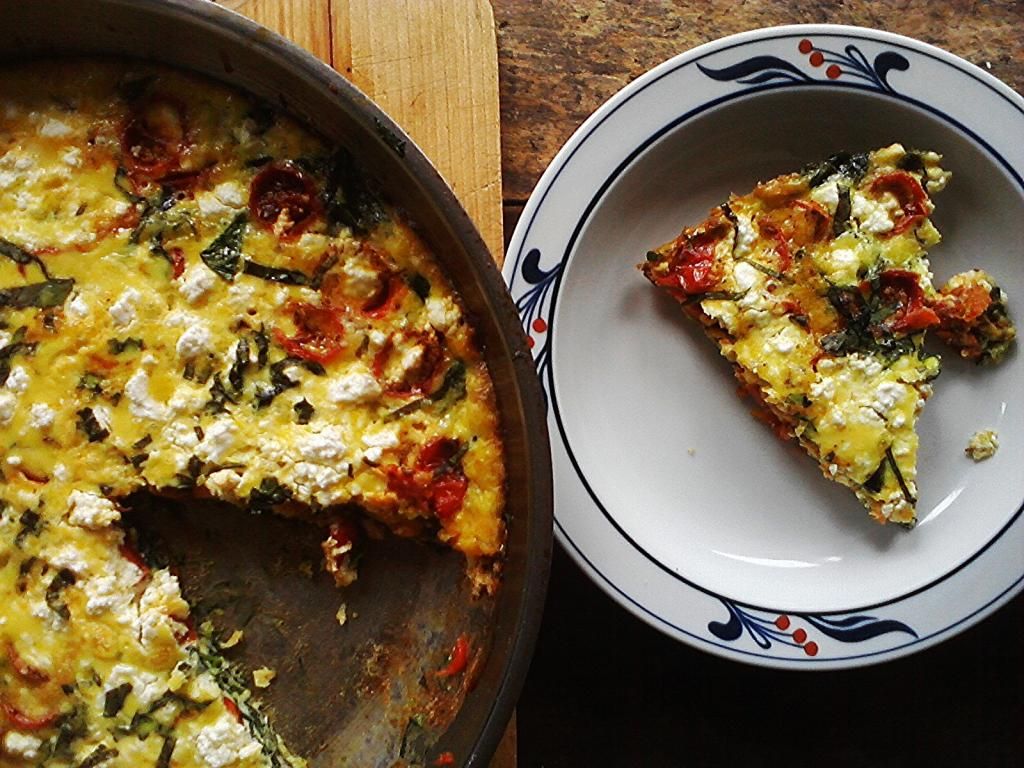
This is not that frittata. This is my take on a food52 recipe that showed up on my news feed awhile back, the day after the rare occasion we get leftover frittata in the breakroom at work. I thought, why don't I ever make frittata's for myself? They make great leftovers, the perfect thing to reheat with a small salad when I get home from work hungry.
I had a basket of cherry tomatoes teetering on the edge of the compost bin and it all came together. I slow roasted them. I usually always have feta in the fridge so that night I pondered the cheese selection at work and decided on the Fontina Val d'Aosta, the real deal, made in Italy~a semi-firm, raw milk full flavored cheese. All this time I'd been using fake fontina: fontina style cheese, the red waxed Danish version one finds in the supermarket. There's a big difference. Real Fontina is so much more flavorful and it's more firm than fake fontina which is downright flabby by comparison. 
True Fontina is a great snacker. I had a piece that was a little over 6 ounces. I shredded the 4 or so ounces for the frittata and "tasted" through the remaining bit that I had originally planned for my after-work grilled cheese toast, savoring bite after bite. By the time the frittata came out of the oven the rest was gone.
I love to let a little piece of cheese linger in my mouth for as long as I can. It's like candy.


Spinach & Roasted Tomato Frittata
adapted from food52

1 pound cherry tomatoes sliced in half
1 teaspoon dried thyme or oregano
1 tablespoon olive oil
1 bunch spinach chopped
2 cloves garlic minced
10 big basil leaves sliced into ribbons
7 eggs
4 ounces shredded Fontina cheese
4 ounces feta
salt
pepper


  1. Pre-heat oven to 375 degrees.
  2. In a small bowl, toss the tomatoes with a glug of olive oil, salt, pepper and dried thyme or oregano.
  3. On a parchment lined baking sheet arrange the tomatoes, cut side up so they're not touching. spoon any remaining liquid left in the bowl on top of the cut halves, refilling any that have hollowed out during the tossing. 
  4. Roast for 30 minutes
  5. Heat oil and garlic in a 12 inch skillet over medium heat. Add the spinach and cook down until it is just wilted. Remove from heat and set aside.
  6. Whisk eggs in a big bowl. Add the cooked spinach, fontina, 3/4 of the chopped basil. salt & pepper.
  7. Pour the mixture back into the skillet, top with the tomatoes pressing them down into the mix. Sprinkle on the remaining basil and crumbled feta.
  8. Cook on the stove top, over medium heat until the bottom is just set, about 3 minutes. Slide it into the oven and cook until set, about 15-17 minutes

Monday, January 12, 2015

Cheddar & Jalepeno Scones

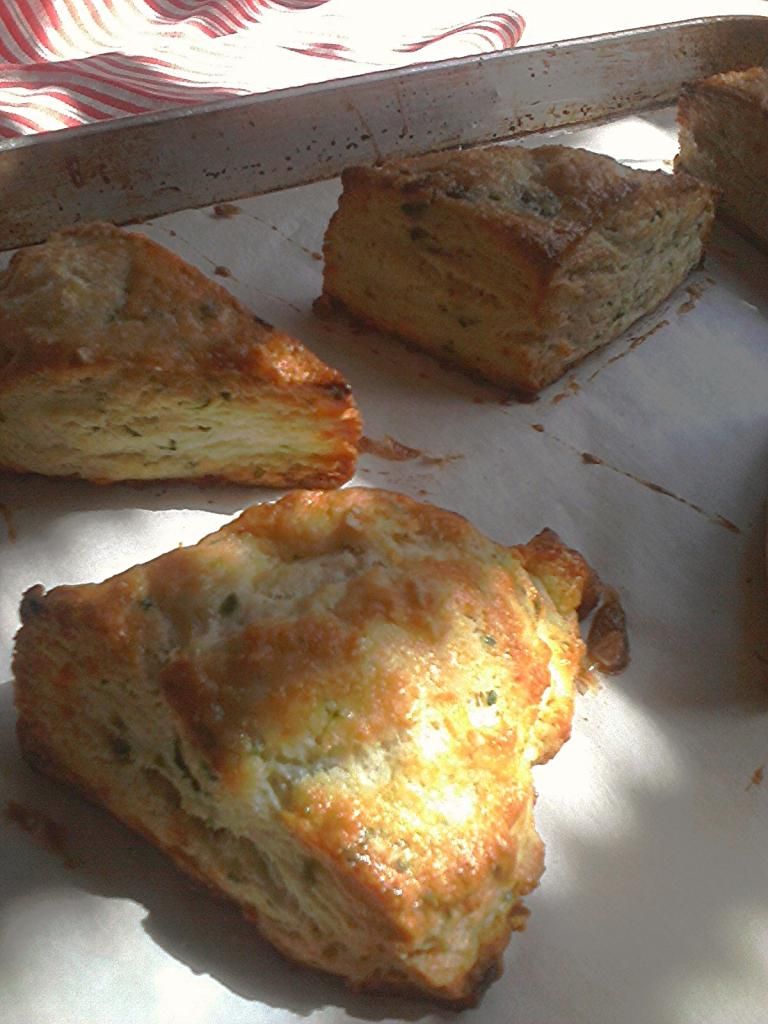
Finally, I got around to making the Cheddar & Jalepeno Scones again. I was in a savory scone zone last year, inspired by some great savory brioche that we were selling at the market.  Last year I made them with Cabot Vintage Cheddar, a beautiful, moist, aged cheddar with a wonderful zippy flavor. It's a waxed cheese, which keeps all the moisture in as it ages and develops all kinds of tasty goodness. It's moisture makes it a great melter and it's my go-to everyday cheese.
This time I changed it up a little and used Cabot Clothbound Cheddar. It's also an aged cheddar but it's drier, a little saltier and savory-er. These are pretty great, even if I did wimp out on the jalepeno heat by scraping out the seeds and ribs. I used 2 large jalepenos, but Serrano peppers can be used as well. I will be making these again with a little more heat.
I bought a large net bag of jalepenos from my neighborhood Chinese market and I just happened to have the Cooks Illustrated: The Science of  Good Cooking checked out of the library. I share their chosen method for storing chile peppers for more than a couple of days, should you find yourself with an abundance of chiles:
Cut the chile's in half lengthwise and submerge them in a jar with a brine of one tablespoon salt to one cup of water. Rinse the chile's off when ready to use. CI does not recommend freezing fresh chiles (unless you can flash freeze them in a cryo-vac/seal-a-meal kind of deal). You'll end up with mushy peppers when they thaw.


Cheddar Jalepeno Scones
adapted from The Kitchn

1 tablespoon butter
2 large jalepeno peppers, seeded, ribs removed and finely minced
2 1/2 cups all-purpose flour
1 tablespoon baking powder
1 tablespoon sugar
1 tablespoon sea salt
1/4 teaspoon baking soda
1/4 teaspoon dry mustard
1/2 cup frozen unsalted butter cut into 1/2" cubes
1 ½ cups good aged cheddar cheese, grated
1/2 cup + 2 tablespoons whole buttermilk
2 tablespoons chopped cilantro
1 egg lightly beaten
Maldon sea salt to finish

In a small sauté pan, heat butter over medium-high heat. When the bubbling subsides add the jalepenos and sauté until soft, 5 minutes. Set aside and let cool completely.

In the bowl of a food processor, pulse the dry ingredients. Scatter the frozen butter over the dry ingredients and pulse until the butter pieces are the size of small peas. Add the cheese, buttermilk, jalepenos & cilantro. Pulse until everything is just combined. The dough will be pretty shaggy but hold together when pinched between your fingers.

Spread a large sheet of parchment paper over a work surface and turn the dough onto it. Using a bench scraper and working the dough as little as possible, shape, press and flatten the dough into either a 1 1/2 inch thick round, if you want larger scones or a 1 1/2 inch thick rectangle, if you will be making mini scones.

Slide the parchment onto a sheet pan and chill in the freezer for about 30 minutes.

Slice the round into 8 wedges, or the rectangle into 2 inch strips then 2 inch squares then slice each square diagonally across to form little wedges.

Return the wedges to the parchment/sheet pan with some space in between each piece. Cover the pan with a sheet of plastic wrap and return to the freezer for at least another 30 minutes or until you're ready to bake them. If you're planning to freeze any of the unbaked scones, continue to freeze for a minimum of 1 hour total. Remove the frozen scones from the sheet pan and transfer into a freezer bag removing as much air as possible. Place the bag inside a second freezer bag and remove air.

Pre-heat oven to 425 degrees. Place the scones on a parchment lined sheet pan. In a small bowl,  beat the egg with a fork. Brush each scone with egg. Sprinkle with pinches of maldon sea salt and bake for 15 minutes until golden, rotating the sheet pan half way through. Let the sheet pan rest on a cooling rack for 5 minutes and transfer the scones directly onto the rack to continue cooling. Serve them while they're still a little warm. Uneaten scones can be left to cool completely and then stored in an airtight container at room temperature.


Thursday, July 24, 2014

Everything Bagel Bombs

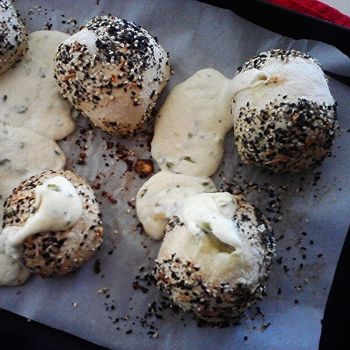
These are wicked. A flavorful scallion cream cheese filling is scooped into little balls and frozen, then wrapped in yeasty dough, washed with beaten egg and coated with an everything bagel mix. As the dough bakes and rises the cream cheese explodes.


I came upon this recipe awhile back at The Amateur Gourmet and became quite obsessed with them. Then, as is habit in the little kitchen, I move on, continuously in search of "the next best thing".
Recently I went back over some of my kitchen faves to compile into an illustrated kitchen journal as a gift for my niece's bridal shower. The bagel bombs were re-tested on the family and all agreed this was a keeper. The link to the recipe has some great step photos.


Bagel Bombs
from the Momofuku Milk Bar Cookbook by Christina Tosi via The Amateur Gourmet
 
Ingredients:
 8 ounces cream cheese (plain, not low-fat)
 One bunch of scallions, green part thinly sliced
 1 teaspoon sugar
 1/2 teaspoon kosher salt + 1/2 tablespoon (for dough) + 3/4 teaspoon for the bagel mix coating
 1 3/4 cups (or 225 grams) flour
 1/4 packet (or 1/2 teaspoon) active dry yeast
 7/8 cups (or 185 g) lukewarm water
 Neutral oil
 1 tablespoon white sesame seeds
 2 teaspoons black sesame seeds
 2 teaspoons poppy seeds
 1 tablespoon dried onions
 1/2 teaspoon onion powder
 1/4 teaspoon garlic powder
 1 egg
 
Method:
Put the cream cheese in the bowl of a stand mixer fitted with the paddle attachment and cream it on medium speed, until fluffy. Scrape down the sides of the bowl and add the scallions, sugar, and salt and mix briefly to incorporate. Taste and add a pinch more salt if you like. Scoop the cream cheese on to a parchment-lined cookie sheet in 8 even lumps and freeze until solid, 1 to 3 hours.

To make the dough, stir together the flour, salt and yeast in the bowl of your stand mixer. Hold the dough hook in your hand and combine the dry ingredients, add the water and continue mixing by hand for 1 minute, until the mixture has come together into a shaggy mess.

Attach the bowl and hook to the mixer and have the machine mix the dough on the lowest speed for 3 minutes, or until the ball of dough is smoother and more cohesive. If the dough is sticky sprinkle in more flour one tablespoon at a time, until the dough releases from the bottom of the bowl.  Knead for 4 more minutes on the lowest speed. The dough should look like a wet ball and should bounce back when lightly poked.

Brush a large bowl with oil and dump the dough into it. Cover with plastic wrap and let the dough proof at room temperature for 45 minutes.

Make the bagel mix by mixing together the salt, sesame seeds, poppy seeds, dried onions, onion powder, and garlic powder. What

Preheat the oven to 325.

Punchdown and flatten the dough on a smooth, dry countertop. Use a bench scraper to divide the dough into 8 equal pieces. Use your fingers to gently stretch each piece of dough out into a flat disc between 2 and 3 inches wide.

Put a frozen cream cheese ball in the center of each dough circle. Bring up the edges of each round and pinch to seal so that the cream cheese ball is completely encased in dough. Gently roll the ball between the palms of your hands to ensure the bomb has a nice, round shape. Arrange the bombs 4 inches apart on a parchment lined cookie sheet.


Whisk the egg and 1/2 teaspoon water together and brush a generous coat of egg wash on the buns. Sprinkle a heavy even coating of the bagel mix all over the bagel bombs~every possible inch, except for the bottoms, should be coated.

Bake the bagel bombs for 20 to 30 minutes. While in the oven, the bombs will become a deep golden brown and a few may have cream cheese explosions. Continue baking until you see this happen! Not to worry–serve them as is or use a small teaspoon to tuck the cream cheese back inside the bagel bomb. Bagel bombs are best served warm out of the oven. Store any leftovers <HA!> wrapped well in plastic wrap, in the fridge for up to 3 days.

 *Make ahead up until baking. Freeze them on a sheet pan then transfer to a freezer bag. They can go straight from the freezer into the oven.


Wednesday, September 11, 2013

polenta with slow roasted tomatoes...

The upside to being broke is the surge of creativity poverty evokes. The work week pretty much takes care of itself but the days off are where the challenge lays. Typically on those days the little kitchen is a flurry of activity. First the big clean up, fridge and pantry are assessed, cookbooks tagged, foodie websites scoured and email newsletters are perused for more inspiration, and lists are made. 
In the lean times, The Three Amigos are a girls best friend in the kitchen.  This is an amazing trio of condiments that include slow roasted tomatoes, caramelized onions and roasted red peppers. They are cheap to produce and once the prep is done and the peppers are roasted, you can leave the rest alone and go do something else. So for all of about $6.00 I bought 4 pounds of cheap supermarket plum tomatoes (super low and slow roasting transforms cheap flavorless tomatoes), 5 large yellow onions and 3 red bell peppers.  
I like to roast peppers in the broiler. I cut the top and bottom off the pepper, slice the pepper open, remove the seeds and rib, and cut the pepper into 3 or 4 pieces so that they lay down flat in the broiler and will blacken evenly. Remove the green stem from the top piece and lay the two ends in the broiler as well. Keep an eye on them, checking them every 5 minutes. When the skins are all black, remove them and turn the oven down to 250 degrees. Put the peppers into a bowl and cover tightly with plastic wrap and let them steam for about 5 minutes. Lay the pieces on a cutting board and peel the skins off. I use a cheap serrated steak knife and scrape the skins off while using a fork to hold the piece in place.
To roast the tomatoes, slice them in half lengthwise, brush with olive oil and sprinkle a bit of salt on top.  Lay them on parchment  lined baking sheets and roast in a 250 degree oven for about 3 hours. This really depends on the size and quality of your tomatoes. The larger and more watery the tomato, the longer it will take. They will shrink significantly, but there should still be a little burst of super delicious, intense juice when you bite into it. I cooked this batch a little too long and many of the edges were tough. They wouldn't be so great on a sandwich, but were perfect cut up and mixed into this polenta.
The peppers and tomatoes can be stored in airtight jars covered with olive oil for up to a week. I love to use the flavored olive oil for scrambling eggs.
In a moment I can only attribute to serendipity, I opened up my weekly America's Test Kitchen newsletter the next morning to find a gorgeous Creamy Cheesy Polenta staring at me. Oh yes. I pictured the jar of polenta in my pantry, made a couple of notes and I high tailed it home. I took 2 tips from ATK. I used more water and added baking soda (this apparently works on polenta the way it does with beans). It wasn't until the polenta was done, that it occurred to me to add some chopped up roasted tomatoes. I didn't think polenta could get any better. 
I like to cook polenta in a broth made with Better Than Bouillion (low sodium) and a sprig of rosemary, both optional
 
Creamy Cheesy Tomatoey Polenta
adapted from America's Test Kitchen
 
7 1/2 cups water
 1 1/2 tablespoons Better Than Bouillion (optional)
sprig of fresh rosemary
1 1/2 cups dried polenta (don't use the quick cooking kind)
1 teaspoon sea salt
a couple of grinds of pepper
1/2 teaspoon baking soda
2 tablespoons butter
1/2 cup parmesano reggiano
5-6 roasted tomato halves, chopped
2 tablespoons chopped roasted peppers
a bit more salt to taste
a bit more pepper to taste
a poached egg perhaps 
finely slivered basil for garnish
a little shaved parmesan for garnish
 
Bring the water to a boil, stir in the bouillion to dissolve and toss in the rosemary sprig. If using store bought rosemary (which can be dry and prone to start shedding spindles), lower the heat to a simmer for about 10 minutes to extract some flavor  from the rosemary then remove it and any errant spindles before adding the polenta. If you've just snipped it from the garden it will stay in tact and you can fish the whole thing out later, there may be a few spindles, I turn up the heat and bring to a boil again, stir in the salt and baking soda. Slowly pour in the polenta while gently stirring with a flat edged wooden spoon. Turn the heat to low, cover the pot and leave it alone for 5 minutes.  Remove the cover and whisk out any lumps. Cover again and leave it for 20 minutes, or until the polenta has absorbed all the liquid and is tender.
Stir in the butter until it melts. Stir in the cheese. Taste. Add a few pinches of salt, stir and taste until the cheese really sings. You can stop right there...buuut if you're me, you toss in those tomatoes and roasted peppers. Stir, taste, salt, stir, taste until the tomatoes shine through and you've convinced yourself of your genius.
Try to resist just shoveling this into your gob straight from the pot while still standing over the stove.
Poach yourself an egg and slice up a little basil. Spoon the polenta into a bowl, top with the poached egg, crack some pepper on top, shave a little cheese over that and finish with a sprinkling of basil. Done. Done. And. Done.
Oh and purely pure coincidence, after this post was done, I Googled slow roasted tomatoes to get a fix on oven temps and lo and behold,  number one was Smitten Kitchen with this gorgeous post from her archives.

Friday, July 5, 2013

Shakshuka


Shakshuka, originally uploaded by michele wynne.
I saw a gorgeous photograph of this thing called Shakshuka when I finally got my mitts on Jerusalem last year. That was my inspiration to commit to my library cookery books by limiting my bookmarking by editing down to 10 recipes AND copying each recipe long-hand.  Then, as usual, I got side-tracked.
Some roundabout trip through the blogosphere landed me on Smitten Kitchens Shakshuka post and my OCD kicked in and I had to make Shakshuka. Now!  For my 4th of July birthday brunch. Nevermind that I had Ottolenghi's perfectly perfect recipe in my TO DO binder and Smitten Kitchen's also perfecty good recipe saved on my phone, true to form, I spent an entire morning googling a gazillion ways to make Shakshuka. I landed on David Lebovitz's adaption . It involved the least amount of shopping and it was adapted from both my original inspiration, Jerusalem, and Secrets of the Best Chefs (Amateur Gourmets Adam Roberts brilliant book).
The only shopping I needed to do was for the greens (I decided on spinach), chili peppers and caraway seeds. I work in a specialty market and I'm surrounded by foodies of all calibers. As I talked up my birthday/4th of July plans, I don't know what surprised me more: those who loved Shakshuka and those who'd never heard of it. 
Shakshuka is believed to be of Tunisian origin, a dish of eggs poached in a spicy tomato sauce. It's the North African version of Huevos Rancheros or what the Italians call Eggs in Purgatory. It's super simple, budget friendly and healthy to boot. It can be adapted and personalized in endless ways and best of all, the sauce can be made up in large batches and frozen in 2-cup freezer bags to make meals in minutes and its amazing for any meal of the day. Served with a salad and a big crusty hunk of bread, it's dinner...or spooned over a bowl of polenta...oh dear!
This is Smitten Kitchen's adaption which I kept bouncing back to. It's slightly simpler in that it doesn't include the toasting and grinding of whole spices.
 

Friday, January 11, 2013

caramelized onion and mushroom tart

Two years ago when I started educating myself about cooking, I knew nothing about caramelized onions. I didn't know what "caramelized" even meant. Sure, I'd cooked onions until they were brown, blindly following recipes without any analyzation of the process or result. Sugar in onions? Who knew? A few french onion soups had been produced throughout a lifetime of sporadic cooking, rarely processing the process. It was a  means to an end, satisfying hunger as quickly as possible, or occasional entertainment, and as long as the result wasn't burnt or raw or oversalted and tasted good (which meant edible) , the task was deemed a success, tagged with a bookmark or stuffed into a binder and I moved on.
I discovered a recipe for Onion Jam  in Kim Boyce's Good to the Grain last year. It was only then that  I fully understood the process. Suddenly, all of that browning and caramelizaton talk from Americas Test Kitchen finally made sense. If I had to choose my biggest kitchen AHA! moment, that would be it.
It takes about 90 minutes to cook the onions down their jammy consistency. Onion jam on a BLT is the most amazing thing ever. I mixed some into a tuna salad today that was off-the-hook. Even on a fork, all by itself, it's the ultimate marraige of sweet and savory in one bite. Caramelization is a beautiful thing and shouldn't be rushed. Onions for this tart don't have to be cooked this long though, you want more structure.
I came across this article at Slate.com this morning that was dead-on, humourous and an eye-opener about writing recipes. The writer accuses recipe writers of lying about how long it takes to caramelize onions, because the long cooking time is a deterrent to a recipes appeal. 
The article concludes: "The best time to caramelize onions is yesterday".
Earlier in the week I caramelized about 3 pounds of onions in a dutch oven. I was left with about 2 cups of gooey good onions. It keeps in an airtight jar for a week, though rarely lasts that long. I use caramelized onions in all kinds of ways, the breakfast tacodilla is it's most frequent destiny.

 I've been in  pastry mode for a couple of weeks now, so when I scored  giant bag of button mushrooms from the Chinese market I knew a tart was in my immediate future. This is a hybrid of recipes adapted from Smitten Kitchen and Dorie Greenspan's Around my French Table.

caramelized onions-again, way more than you need for this recipe and do this ahead of time. A dutch oven is great when cooking a large batch because the cast iron has great heat distribution, there's a lot of surface area to promote browning.

2 tablespoons oil
3 large yellow onions (sliced 1/4 thick)
1 teaspoon salt
black pepper
1 teaspoon red wine vinegar

Heat the oil in dutch oven on medium-high heat and then add the onions. Toss until the onions are coated and cook until they start to brown, stirring infrequently, just to redistribute the onions so they come in contact with the surface of the pot. Once the browning starts (it take's about 20 minutes to get there), add salt, lower the heat and cover the pot and cook for another 20 minutes so the onions release their moisture and get really soft.
Remove the cover and continue to cook for another 30 minutes until the water evaporates and the onions become brown. De-glaze with red wine vinegar at the end.

Pastry
from smitten kitchen

1 1/4 cups flour
1 tablespoon plus 2 teaspoons cornstarch
1/4 teaspoon salt
6 tablespoons butter, diced
1 egg

In the food processor pulse the dry ingredients to combine. Pulse butter until it's in bits the size of small peas. Pulse in the egg until the dough forms.
On a floured work surface roll the dough into a 12 inch circle, carefully roll it over the rolling pin to lift it off the counter and into the tart pan. Press the dough into the corner of the pan and trim off the excess. If you're using a fluted tart pan with a removable base lift the tart pan by the edge and put it onto a plate. Cover with plastic wrap and chill for 30 minutes.

filling:

2 tablespoons butter
1 pound white button mushrooms-stems removed, sliced
1/2 teaspoon salt
1 teaspoon dried tarragon
1 cup of beef stock ( or vegetable stock)
1 tablespoon fresh thyme
1/2 cup caramelized onions
2 eggs
1/2 cup heavy cream
1/2 cup fontina cheese (or gruyere)
salt
pepper
nutmeg
1 teaspoon dijon mustard

Preheat the oven to 350 degrees.
Remove the chilled tart shell from the fridge. Line with foil or parchment and weight the pastry down with pie weights, dried beans or rice. I keep a jar of white beans labeled For Pastry and re-use.
Bake for 10 minutes, remove the weights, foil or parchment and bake for another 5 minutes, until the pastry appears dry, but not browning.
Remove from the oven and brush with dijon mustard. Set aside
While the pastry is par-baking (also called blind baking) heat up a  large skillet over medium high heat, melt the butter until it stops foaming. Add the sliced mushrooms and toss to coat, then let them cook undisturbed, about 5-7 minutes until they start to brown. Toss again to redistribute and continue to brown. Add the salt, pepper and tarragon. The mushrooms will release their water. Cook uncovered until the water evaporates and a fond  (the browned bits) forms on the skillet. Add the beef broth and de-glaze the skillet. Continue to cook until the broth reduces. Remove from the heat and stir in fresh thyme.
In a small bowl or a large pyrex measuring cup, wisk the eggs, cream, salt, pepper and nutmeg together then stir in the grated cheese.
Place your par-baked tart shell on a sheet pan, spoon in the caramelized onions and spread it evenly over the bottom. Then add your mushroom layer spreading it evenly over the onions. Pour the egg mixture over the surface.
Place the sheet pan on th middle rack of the oven and bake for 35-40 minutes until the center is puffed and brown. Let it rest for about 10 minutes, remove the fluted ring from the base. Slice and enjoy with a big green salad.
This tart re-heats nicely and I pack it for lunch.


Friday, November 9, 2012

apple mosaic tart and one sunny afternoon in the city..


apple mosaic tart, originally uploaded by riptideredsf.
The morning I woke up to this on my Smitten Kitchen news feed, I knew this was the next thing the little kitchen would attempt to re-produce. I finally got around to this last week and it was perfectly lovely in spite of my gross mismanagement of the puff pastry. Normally, I don't have much to do with puff pastry as I've always related it to precious hors d'oeuvres or elegant desserts, neither of which have much of a place in my life. But when a certain test kitchen dummy blindsided me with a lobster pot pie challenge, somehow it seemed that pedaling up to the market for puff pastry was on the top of my to-do list. The produce market was ripe with apples and I was ripe to make this pretty tart. I got de-railed by something or other and had to re-freeze the puff pastry. Well, the pastry was in and out of the freezer 3 times before it made it's way into the tart.
Once baked though it was nice and puffy on the sides, the bottom was a little flimsy but brilliant, fresh from the oven. It was also great the next day for breakfast and then crumbled up with ice-cream and chocolate sauce for dessert the next two nights. I managed to consume it all by myself.
That was not the plan.
I was going to share it with my co-workers the next day...but somehow it never made it to the office. I had another idea. I'd bring it with me to the Smitten Kitchen book signing at Omnivore to share it with my friend while waiting in line. I wanted to tell Deb, whilst she was signing my cookbook, all about it. None of those things happened.
A little over a week ago The Smitten Kitchen Cookbook came out and last Sunday, Smitten Kitchen came to town. I'd been anticipating this event since I first read that Omnivore Books was an early stop on the book tour. I even refrained from pre-purchasing the book from Amazon, happy to pay full retail (something I NEVER do) in support of my local independent bookseller and of Deb Perelman, cookbook author and the genius behind Smitten Kitchen. I wanted an autographed copy.
So did everyone else, as it turns out.
On a gorgeously sunny Sunday afternoon in San Francisco, my friend and neighbor Sheena and I showed up around 1:30 for the 2:00 event and the line was already around the block. No surprise. I knew this was gonna be huge. Sheena dropped me off so she could park the car and by the time she met me in line, the line had grown another 1/2 block.
A few minutes later, a gobsmacked bookseller came out to inform the huge line that the 150 copies had already sold out. I had to chuckle, 150 books? There were at least 300 people there and probably even more who showed up and were deterred by the overwhelming crowd. A few minutes later Deb Perelman, with her equally gobsmacked husband Alex, came out to greet the crowd and say hello. She was so sweet and  so humbly overwhelmed at the turnout.
No one seemed deterred by the shortage of books. I saw no exasperation or impatience. I seemed that people were just happy to hang out with others of their ilk.
We were welcome to wait in line to purchase a book that would be mailed to us later. And guess what? we gladly did!