Showing posts with label Smitten Kitchen. Show all posts

Tuesday, April 21, 2015

savory little scones


Are savory little scones just biscuits?

I got my mitts on a spectacularly delicious cheddar and spinach scone that was somehow left unsold at the market a few weeks ago. When I warmed it up for breakfast the next morning, I was amazed at the transformation the heat brought out in it. I thought of nothing else for days whilst conjuring up my weekly cooking plan (which almost always involves cheese). I pondered the cheese counter at the market and decided on one of my favorite cheeses, Fontina Val d'Aosta.
I've used  Fontina in scones before and it was great in a frittata I made recently. I usually just smash a big hunk into a chunk of fresh baguette or melt it onto a slice of baguette with a big pinch of sweet Italian sausage smashed down on it and baked for 10 minutes for quick toasties. This is the real Italian Fontina, not that red wax coated, rubbery, bland, Danish doppelganger one finds at the supermarket.
Fontina Val d'Aosta is a classic Italian cheese made in Northern Italy. It's a raw, washed rind cow's milk cheese. It's a stinky cheese. I love stinky cheese.  It's texture and flavor depends on how long it has been aged. It can be semi-soft to firm and the flavor can be mild and rich or more robust and intense as it ages. Raw milk cheeses are lovely because the flavor enhancing bacteria hasn't been heated out of it. The washed rind adds even more complex flavors.
The Fontina we get at the market is just the right balance. It's got a great funk and a smooth buttery paste. It's pale cream in color and riddled with tiny eyes. The 45% fat content makes it super rich and creamy.
My first attempt, these crazy good scones, many, many moons ago set me on a course of savory scone nirvana. Yet, I google-thon'd, searching for a recipe for a basic savory scone dough using buttermilk ('cuz that's what I needed to use up) and I came upon this one at The Kitchn.
If there's anyone out there who actually reads this blog, you may be familiar with my Three Amigos, my go-to home made condiments: caramelized onions, roasted red peppers, and slooowwww roasted tomatoes. These guys, added to my favorite food in the world~ cheese....well it's a battle for the  starring role in any of these killer savory scones: caramelized onions & blue cheese, chives & goat cheese, cheddar & jalepenos and these:

Roasted Tomato, Fontina, & Dill Scones
adapted from The Kitchn


2 1/2 cups all-purpose flour
1 tablespoon baking powder
1 tablespoon sugar
1 tablespoon sea salt
1/4 teaspoon baking soda
1/4 teaspoon dry mustard
1/2 cup frozen unsalted butter cut into 1/2" cubes
1/2 cup Fontina Val d'Aosta, grated
1/2 cup + 2 tablespoons whole buttermilk
1/4 cup chopped roasted tomatoes
2 tablespoons chopped thyme
2 tablespoons chopped fresh dill
1 egg lightly beaten


In the bowl of a food processor, pulse the dry ingredients. Scatter the frozen butter over the dry ingredients and pulse until the butter pieces are the size of small peas. Add the cheese, buttermilk, tomatoes and herbs. Pulse until everything is just combined. The dough will be pretty shaggy but hold together when pinched between your fingers.
Spread a large sheet of parchment paper over a work surface and turn the dough onto it. Using a bench scraper and working the dough as little as possible, shape, press and flatten the dough into either a 1 1/2 inch thick round, if you want larger scones or a 1 1/2 inch thick rectangle, if you will be making mini scones.
Slide the parchment onto a sheet pan and chill in the freezer for about 30 minutes.
Slice the round into 8 wedges, or the rectangle into 2 inch strips then 2 inch squares then slice each square diagonally across to form little wedges.
Return the wedges to the parchment/sheet pan with some space in between each piece. Cover the pan with a sheet of plastic wrap and return to the freezer for at least another 30 minutes or until you're ready to bake them. If you're planning to freeze any of the unbaked scones, continue to freeze for a minimum of 1 hour total. Remove the frozen scones from the sheet pan and transfer into a freezer bag removing as much air as possible. Place the bag inside a second freezer bag and remove air.
Pre-heat oven to 425 degrees. Place the scones on a parchment lined sheet pan. In a small bowl,  beat the egg with a fork. Brush each scone with egg. Sprinkle with pinches of maldon sea salt (I added fresh za'atar-a Middle Eastern herb blend- to finish these off) and bake for 15 minutes until golden, rotating the sheet pan half way through. Let the sheet pan rest on a cooling rack for 5 minutes and transfer the scones directly onto the rack to continue cooling. Serve them while they're still a little warm. Uneaten scones can be left to cool completely and then stored in an airtight container at room temperature.



Wednesday, February 11, 2015

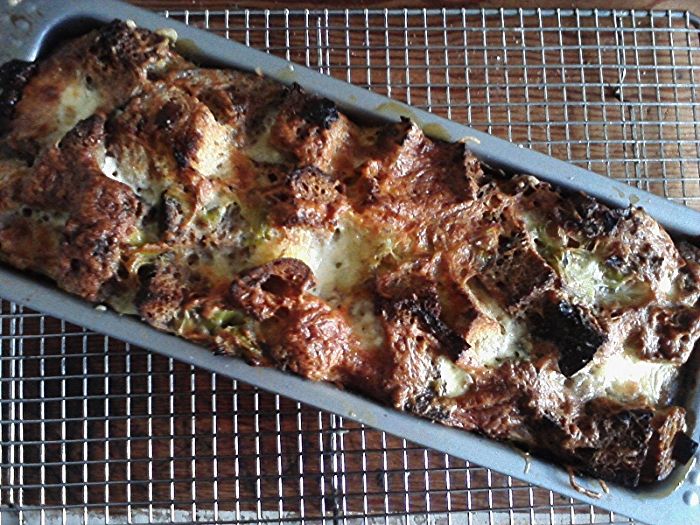
Leek Bread Pudding

I've been eager to try this recipe since Daniel, one of my customers at the market told me about it. He had a basket of leeks, cream, croutons, thyme and Gruyere. I asked him what he was making- "Leek Bread Pudding".
I was intrigued, never having made bread pudding before. I'm a huge fan of the lovely leek and if there's cheese in the mix, count me in. "Wow! that sounds great. Where'd you get the recipe?" Thomas Keller's Ad Hoc at Home, it turns out. Daniel said he'd just made it for the first time earlier in the week and it was so good he wanted to make it again. I laughed because I do the same thing. If I make something new and it's really great I'm already planning my next shopping trip after my first bite. I like to make it again right away to make sure it's as good as I think it is. If it's just as lovely the second time around it'll become part of the repertoire.
When I Googled the recipe, the first thing to come up was Smitten Kitchen's adaption of Keller's recipe so I knew I was golden 'cuz everyone knows how much I love me some Smitten Kitchen. SK's recipe halves the Ad Hoc proportions to fit in a loaf pan and is more suitable for a small family meal as a side dish whereas the Ad Hoc recipe seems more inclined to those folks who entertain on a larger scale than me. Keller's proportions call for 3 cups of heavy cream AND 3 cups of milk. It's hard to carry that much dairy on the handle bars of my bicycle. In the meantime, I got the book from the library. The pictures are very pretty.
This turned out quite well in spite of a few.. uhmm.. substitutions
I used a variety of crusty freezer loaves I get from the day old bread basket at the market to make the croutons. The recipes suggests making croutons with brioche or a pullman loaf which are less dense and crusty.  This was a spontaneous decision when I found leeks at my local produce market yesterday. It was my day off so I didn't get the good stuff and ended up buying a block of supermarket swiss cheese instead of the Emmentaler or Comte the recipe suggests. I also forgot to buy chives so I just added extra thyme.
So yeah, there were a few flaws. It was still delicious so I know it'll be extra awesome next time.

Sunday, December 7, 2014

Breakfast Tacodillas

Breakfast Tacodillas, originally uploaded by michele wynne.
Breakfast is and always has been my favorite meal, long before it became a regular in my kitchen, it's always been my favorite meal for dining out.
This is a pretty typical breakfast when I can remember to do it and it's super simple. All you need are some corn tortillas, eggs, cheese and fresh herbs. I also include caramelized onions, roasted peppers and tomatoes when I have them on hand or some corn salsa.
The inspiration for my taco-quesadilla hybrid came about one morning whilst I was noodling around the blogosphere and other time-leeching internet diversions. That day, the hours I spent elsewhere, some how led me to these two recipes that changed the little kitchen for the greater good.  This is a mash-up from my two favorite foodie blogs. I've been making some version of this at least once a week since this taco recipe from Smitten Kitchen caught my eye...then something directed me to this quesadilla recipe from 101 Cookbooks.
Breakfast for one~3 tacodillas:

Assemble whatever assortment of ingredients you have on hand: 2 eggs, 3 corn tortillas, salsa, cheese, herbs etc. I'll usually use whatever cheese I have on hand, but I find fresh goat cheese, feta, or blue cheese or Brie (used here) to be my cheeses of choice.
For this one I used Brie and the last crumbles of some Pt. Reyes Original Blue, caramelized onions, and thyme.
In a small bowl beat the eggs with some salt and pepper. Heat up a little oil in a small non-stick skillet. When the oil is hot, pour in about one third of the eggs, enough to spread to the size of your tortilla. Let the egg set for about 30 seconds and then lay the tortilla over the egg and let that set for another 30 seconds or so until the egg is fused to the tortilla. Carefully flip the whole thing over. Sprinkle some cheese on top of the egg and let it begin to melt. Add any other layers of ingredients. Slide the tortilla onto a plate, folding it in half as you lay it down. Repeat with the remaining tortillas.

Monday, October 27, 2014

A Page from my Book...


... and  one of my favorite things.  This is a super simple and amazingly delicious way to start a morning. I created an illustrated cookbook for my niece's bridal shower gift last year, a compilation of my little kitchen faves. 
This quesadilla eventually morphed into what I call a tacodilla (a hybrid of these two recipes) inspired by my two favorite blogs 101 cookbooks and smitten kitchen.

Tuesday, July 29, 2014

Zucchini Fritters

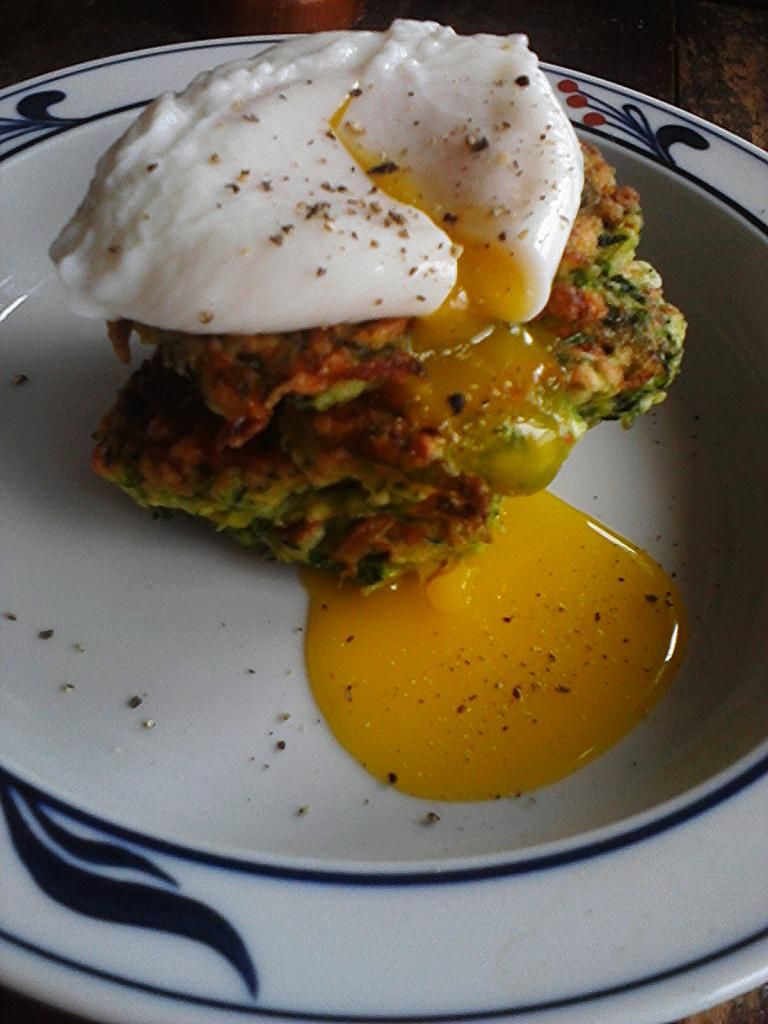
I can't get enough of these tasty little fritters-so simple and they're a great do-ahead. Topped with a poached egg...well, they are just the thing.
This recipe is a mash-up of two recipes I love. One from Smitten Kitchen and the other from The Longevity Kitchen Cookbook.

I've made these several times over the last two weeks. I've been playing around with spices. I like to add several grinds of Trader Joe's Everyday Spice Blend to the egg mix. I didn't put it in the recipe because it's not really necessary-I just like using those grinders.  The parsley, cilantro, mint medley came to mind as a really nice herb combo, one I had gleaned from the zucchini burgers I made from Jerusalem. I didn't have any mint though.


Zucchini & Sweet Potato Fritters
inspired by smitten kitchen and The Longevity Kitchen Cookbook

2 medium zucchini
1 small sweet potato-about the same size as the zucchini
1 small yellow onion
1 finely chopped scallion-green part only
1 heaped teaspoon coarse or Kosher salt, plus extra to taste
2 medium eggs, lightly beaten
Freshly ground black pepper
¼ cup chopped fresh herbs (I used parsley & cilantro-mint would be good here too)
1/2 cup all-purpose flour
1/2 teaspoon baking powder
sunflower oil for frying

Preheat oven to 200 degrees and place a sheet pan inside.
Trim ends off zucchini, peel the sweet potato, slice the onion in half and peel.  Grate everything either on the large holes of a box grater or in the food processor.
In a large bowl, toss the shredded vegetables with 1+ teaspoon coarse salt and set aside for 10 minutes. Line a colander with a clean tea towel and transfer the grated vegetables into the middle of the tea towel. Gather the ends and twist and squeeze out as much liquid as you can-there will be a lot.
Return the grated vegetables to a large bowl and loosen the compact ball with two forks and stir in your chopped herbs. Taste to see if you need more salt. To the beaten egg add stir in some freshly ground black pepper, then add to the shredded vegetables. In another small bowl, stir together flour and baking powder, then stir the mixture into the veg mix as well.
In a large heavy skillet, heat 2 tablespoons of oil over medium-high heat until shimmering. I like to use two forks to form small dollops of the veg mix into the skillet so there’s space between each pattie. Lightly press them flatter with the back of the fork. Cook the fritters over moderately high heat until the edges underneath are golden, about 3 to 4 minutes. If you find this happening too quickly, reduce the heat to medium. Flip the fritters and fry them on the other side until browned underneath again, about 2 to 3 minutes more. Drain briefly on paper towels then transfer to baking sheet and then into the warm oven until needed. Repeat process, keeping the pan well-oiled, with remaining batter. The fritters should continue to cook in the warm oven for another 10 minutes to finish setting and get a little more crisp.
Stack them up and top with a poached egg.
These fritters keep well, chilled in the fridge for a couple of days though they never last that long.They can also be frozen-place a sheet pan in the freezer, place the cooked fritters on the chilled sheet pan and freeze until solid, about an hour. Transfer the frozen fritters into a freezer bag and drawing or pressing out as much air as possible.
When you’re ready, bake them on a sheet pan, in a 325 degree oven until they’re hot and crisp.


Wednesday, November 6, 2013

Apple Butter


Apple Butter, originally uploaded by michele wynne.
The Big Grey Box has been overwhelmed by apples and pears for weeks now. I've been bringing small piles home thinking about the abundance of applesauce I could be consuming on a daily basis.
This applesauce to be exact, a recipe so super simple and results in the best freakin' applesauce you'll likely ever spoon into your gob. An apple sauce so flavorful it must be the star of this most amazing cake if you've got a little more time and need to come up with a killer Autumn everyday cake. Well, I didn't do either. As usual, my bounty sat in the fridge for a couple of days. I'd opened and closed that crisper drawer so many times, just not ready to cope with the apple peeling. That, and I kept forgetting to buy lemons. I thought about a crumble, but I didn't have any butter. Then the other morning whilst bouncing around the blogosphere (rather than, you know, go to the store) I stumbled across this Slow Cooker Apple Butter.
I have no regrets.
It cooks on low for 12 hours covered and then 2 more hours uncovered. I pureed it in the food to get it super smooth. Somehow I was expecting it to be thicker and more spreadable than it was. I was tempted to cook it down some more on the stove top. I refrained.
I ended up with jars galore...well...5. Enough to share with Sheena and the break room. It got the thumbs up from my market mates. Success!

Monday, October 14, 2013

Caramelized Onion, Kale and Rice Gratin

There have been many, many kitchen epiphanies over the last 6 months I've been working at Bi-Rite. There is one standout that has transformed my little kitchen: Cheese.
Previously, aside from the occasional purchase of true Parmigiano Reggiano and Azur Blue cheese from the infrequent excursion to the Whole Foods cheese counter,  those giant blocks of supermarket bright orange cheddar, jack and mozzarella were little kitchen staples.
Our cheese counter at Bi-Rite is my Happy Place and my favorite part about working The Creamery-the area in the store where we sell our amazing hand made ice cream. I love the ice cream, but I love the cheese more and the position of the cheese counter smack-dab next to me all day long...well...let's just say that there are suckier ways to spend an 8 hour work day. So when I brought home a bunch of greens and was contemplating my usual brown rice/quinoa bowl, somewhere in the back of my brain I heard the word gratin. Coincidentally, my sister has been posting on her Facebook page, her kitchen explorations of the Smitten Kitchen Cookbook I gave her for Christmas last year, so not to be outdone, I pulled out mine and made this. It's slight riff on one of my favorite recipes. 
In my kitchen, Twice Rescued Kale, Spinach, Dandelion Green, Caramelized Onion, Three Cheese and Brown Rice Gratin is a more fitting, if tedious title and probably not all that appealing I'd hazard to guess...but this one was off-the-hook good. I credit the cheeses. This pan was like crack. I finished the entire thing off, all by myself, in two days.
Earlier this week I came home with two new cheeses and I made this killer grilled cheese sandwich from smitten kitchen using what is now my favorite cheddar, Cabot Vintage Cheddar. It's perfectly sharp and melty. Unbelievably flavorful.  Along with it, I bought Beecher's Flagship Reserve, an English Clothbound Cheddar, which also produced a tasty grilled cheese sandwich. The Beecher's is harder, and flavorfully sharp. It can be used like a parmesan. I used the last bits of these along with some Parmigiano Reggiano. Good lord, I can't wait to make a mac and cheese with this.
 
Here's the recipe from the book. It's amazing.

wild rice gratin with kale, caramelized onions, and baby swiss
from the smitten kitchen cookbook

wild rice:

5 cups cooked wild rice (from 1 2/3 cups, 10.5 ounces, 300 grams uncooked)
        **I used brown rice because it's what I had on hand**

caramelized onions:

1 tablespoon butter
1 tablespoon olive oil
2 large sweet onions, halved and thinly sliced
1/2 tablespoon table salt
freshly ground black pepper
4 cups stemmed, ribboned kale leaves (from an 8 ounce or 225 gram bundle)
       **I used a mixture of kale, spinach and dandelion greens**

assembly:
2 cups (8 ounces or 225 grams) coarsely grated Emmentaler or another Swiss cheese
     **my mix: Parmigiano Reggiano, Beechers Flagsghip Reserve Cheddar and Cabot Vintage Cheddar
2 tablespoons unsalted butter (1 tablespoon to grease dish, 1 tablespoon melted, for crumbs)
3/4 cup chicken or vegetable broth
1 cup (60 grams) fine, dry breadcrumbs
table salt
freshly ground black pepper

Cook the rice according to package directions, but if you're like me and buy your rice in bulk and don't own a rice cooker, boil up a big pot of salted water, dump in your rinsed rice, boil the crap out of it until it becomes chewy and then drain the rice into a collander, flatten a piece of aluminum foil down onto the surface of the rice, add about a cup of water back into your cooking pot and turn the heat to high, put the colander back into the pot and cover, turning the heat to low once it's come to a boil. Steam the rice until it reaches the texture you like.
Pre-heat the oven to 375 degrees.
Meanwhile, caramelize the onions:
Heat the butter an olive oil in a large, heavy skillet over medium-low heat. Add onions, sprinkle with salt and a little pepper, and cook until they're tender and sweet, stirring occasionally, about 30 minutes. Add the kale ribbons, and cook until they wilt a bit, about 5 minutes. Stir together the onion-kale mixture, rice and one cup of grated cheese in a large bowl. Season to taste with additional salt and pepper if you need to.
Assemble the gratin: Use 1 tablespoon of butter to generously coat a 2 quart baking dish. Spread the rice mixture into the dish and pour broth over it. Sprinkle the remaining cheese over the top. Toss bread crumbs with 1 tablespoon melted butter and salt and pepper to taste: sprinkle over cheese.
Bake for 25-30 minutes, or until a little bubbly and beginning to brown on top.

Sunday, October 6, 2013

Strawberry Summer Cake


Strawberry Summer Cake, originally uploaded by michele wynne.
What goes around, comes around. Last night as we were closing up the market, one of my produce pals presented a box of culled strawberries (not so pretty) free for the taking. I didn't have to think twice about where these were going.
Smitten Kitchen's Strawberry Summer Cake has been one of the most repeated SK recipes to come out of my oven since I discovered it a couple of years ago.  It's a super simple, everyday, all-occasion cake, equally at home to be selfishly consumed all by your lonesome with your morning cuppa joe or fancied up with a light dusting of powdered sugar to present as a gift,  served at a dinner party with a blob of whipped cream or a side of vanilla bean ice-cream...or cut into wedges, packed in a plastic container, shoved sideways into a back pack, and transported by bike back to work and left on the table of the staff break room, where it disappeared in under an hour.
There was a scary moment, which I don't recall ever happening before. My first attempt involved can of out dated evaporated milk (really should have known better). I added it to the creamed butter and sugar, along with the egg and vanilla, some scary curdling occurred. Really scary. Scary enough to toss it, run to the store for fresh milk and do it again. It still curdled, I convinced myself that it wasn't as bad and moved on. I wasn't like sour milk curdling. It was the butter solids not incorporating  into the milk liquids. Upon reflection this did seem to be an odd step  and should have been expected when attempting to mix fat and water without agitation-physical, emulsifying agitation that is. My mental agitation clouded that logic at first. But as OCD as I can get sometimes, I went back to the original post, read the intro again to make sure I got the steps right and after two years the post has over 800 comments. Try as I might, could not find one comment where curdling was a concern. It just seems odd that no one was worried about this. 
After all of that it was a success. I'm going to do it again with a bunch of pears I brought home last night..

Wednesday, September 11, 2013

polenta with slow roasted tomatoes...

The upside to being broke is the surge of creativity poverty evokes. The work week pretty much takes care of itself but the days off are where the challenge lays. Typically on those days the little kitchen is a flurry of activity. First the big clean up, fridge and pantry are assessed, cookbooks tagged, foodie websites scoured and email newsletters are perused for more inspiration, and lists are made. 
In the lean times, The Three Amigos are a girls best friend in the kitchen.  This is an amazing trio of condiments that include slow roasted tomatoes, caramelized onions and roasted red peppers. They are cheap to produce and once the prep is done and the peppers are roasted, you can leave the rest alone and go do something else. So for all of about $6.00 I bought 4 pounds of cheap supermarket plum tomatoes (super low and slow roasting transforms cheap flavorless tomatoes), 5 large yellow onions and 3 red bell peppers.  
I like to roast peppers in the broiler. I cut the top and bottom off the pepper, slice the pepper open, remove the seeds and rib, and cut the pepper into 3 or 4 pieces so that they lay down flat in the broiler and will blacken evenly. Remove the green stem from the top piece and lay the two ends in the broiler as well. Keep an eye on them, checking them every 5 minutes. When the skins are all black, remove them and turn the oven down to 250 degrees. Put the peppers into a bowl and cover tightly with plastic wrap and let them steam for about 5 minutes. Lay the pieces on a cutting board and peel the skins off. I use a cheap serrated steak knife and scrape the skins off while using a fork to hold the piece in place.
To roast the tomatoes, slice them in half lengthwise, brush with olive oil and sprinkle a bit of salt on top.  Lay them on parchment  lined baking sheets and roast in a 250 degree oven for about 3 hours. This really depends on the size and quality of your tomatoes. The larger and more watery the tomato, the longer it will take. They will shrink significantly, but there should still be a little burst of super delicious, intense juice when you bite into it. I cooked this batch a little too long and many of the edges were tough. They wouldn't be so great on a sandwich, but were perfect cut up and mixed into this polenta.
The peppers and tomatoes can be stored in airtight jars covered with olive oil for up to a week. I love to use the flavored olive oil for scrambling eggs.
In a moment I can only attribute to serendipity, I opened up my weekly America's Test Kitchen newsletter the next morning to find a gorgeous Creamy Cheesy Polenta staring at me. Oh yes. I pictured the jar of polenta in my pantry, made a couple of notes and I high tailed it home. I took 2 tips from ATK. I used more water and added baking soda (this apparently works on polenta the way it does with beans). It wasn't until the polenta was done, that it occurred to me to add some chopped up roasted tomatoes. I didn't think polenta could get any better. 
I like to cook polenta in a broth made with Better Than Bouillion (low sodium) and a sprig of rosemary, both optional
 
Creamy Cheesy Tomatoey Polenta
adapted from America's Test Kitchen
 
7 1/2 cups water
 1 1/2 tablespoons Better Than Bouillion (optional)
sprig of fresh rosemary
1 1/2 cups dried polenta (don't use the quick cooking kind)
1 teaspoon sea salt
a couple of grinds of pepper
1/2 teaspoon baking soda
2 tablespoons butter
1/2 cup parmesano reggiano
5-6 roasted tomato halves, chopped
2 tablespoons chopped roasted peppers
a bit more salt to taste
a bit more pepper to taste
a poached egg perhaps 
finely slivered basil for garnish
a little shaved parmesan for garnish
 
Bring the water to a boil, stir in the bouillion to dissolve and toss in the rosemary sprig. If using store bought rosemary (which can be dry and prone to start shedding spindles), lower the heat to a simmer for about 10 minutes to extract some flavor  from the rosemary then remove it and any errant spindles before adding the polenta. If you've just snipped it from the garden it will stay in tact and you can fish the whole thing out later, there may be a few spindles, I turn up the heat and bring to a boil again, stir in the salt and baking soda. Slowly pour in the polenta while gently stirring with a flat edged wooden spoon. Turn the heat to low, cover the pot and leave it alone for 5 minutes.  Remove the cover and whisk out any lumps. Cover again and leave it for 20 minutes, or until the polenta has absorbed all the liquid and is tender.
Stir in the butter until it melts. Stir in the cheese. Taste. Add a few pinches of salt, stir and taste until the cheese really sings. You can stop right there...buuut if you're me, you toss in those tomatoes and roasted peppers. Stir, taste, salt, stir, taste until the tomatoes shine through and you've convinced yourself of your genius.
Try to resist just shoveling this into your gob straight from the pot while still standing over the stove.
Poach yourself an egg and slice up a little basil. Spoon the polenta into a bowl, top with the poached egg, crack some pepper on top, shave a little cheese over that and finish with a sprinkling of basil. Done. Done. And. Done.
Oh and purely pure coincidence, after this post was done, I Googled slow roasted tomatoes to get a fix on oven temps and lo and behold,  number one was Smitten Kitchen with this gorgeous post from her archives.

Friday, July 5, 2013

Shakshuka


Shakshuka, originally uploaded by michele wynne.
I saw a gorgeous photograph of this thing called Shakshuka when I finally got my mitts on Jerusalem last year. That was my inspiration to commit to my library cookery books by limiting my bookmarking by editing down to 10 recipes AND copying each recipe long-hand.  Then, as usual, I got side-tracked.
Some roundabout trip through the blogosphere landed me on Smitten Kitchens Shakshuka post and my OCD kicked in and I had to make Shakshuka. Now!  For my 4th of July birthday brunch. Nevermind that I had Ottolenghi's perfectly perfect recipe in my TO DO binder and Smitten Kitchen's also perfecty good recipe saved on my phone, true to form, I spent an entire morning googling a gazillion ways to make Shakshuka. I landed on David Lebovitz's adaption . It involved the least amount of shopping and it was adapted from both my original inspiration, Jerusalem, and Secrets of the Best Chefs (Amateur Gourmets Adam Roberts brilliant book).
The only shopping I needed to do was for the greens (I decided on spinach), chili peppers and caraway seeds. I work in a specialty market and I'm surrounded by foodies of all calibers. As I talked up my birthday/4th of July plans, I don't know what surprised me more: those who loved Shakshuka and those who'd never heard of it. 
Shakshuka is believed to be of Tunisian origin, a dish of eggs poached in a spicy tomato sauce. It's the North African version of Huevos Rancheros or what the Italians call Eggs in Purgatory. It's super simple, budget friendly and healthy to boot. It can be adapted and personalized in endless ways and best of all, the sauce can be made up in large batches and frozen in 2-cup freezer bags to make meals in minutes and its amazing for any meal of the day. Served with a salad and a big crusty hunk of bread, it's dinner...or spooned over a bowl of polenta...oh dear!
This is Smitten Kitchen's adaption which I kept bouncing back to. It's slightly simpler in that it doesn't include the toasting and grinding of whole spices.
 

Monday, July 1, 2013

Mr. Crispy

Lunchtime, originally uploaded by michele wynne.
I can noodle away hours and hours searching for that next best recipe, seeking inspiration and making list upon list of new ingredients to try, cook books to reserve and peruse, restaurants and food shops I want to check out. I hit up my favorite foodie blogs and make more lists. I love lists...making them and then crossing things off them.
A few weeks ago I came across Smitten Kitchen's post about her recent vacation in Italy and I've been thinking about it ever since. She posed this question:

"Where are you going this summer and what can't you wait to eat when you get there?"

I'm not going anywhere, sometimes I think I'll never go anywhere again. But I started a list anyway. Things I would eat in Paris which morphed into Places I would like to eat in Paris. I Googled and Google mapped my way through Paris' eateries.
I couldn't stop thinking of all the travelling I used to do and all the food I didn't eat. I was not an adventurous eater. I dug out the journal from a 1997 trip to Paris that I unearthed during my latest Feng Shui purge. 
I subsisted on a diet of baguettes, brie and beer. There was the occasional addition of  salami (if I came across something that resembled the super-thin slices found in a package of Gallo) when I felt like a splurge. The ultimate indulgence was the rare Omelette Fromage. It's embarassing now to think how delighted I was with myself and my travel saavy resourcefulness, when one day I wandered into a little bistro in the Bastille, later writing, "Where else can you get a sandwich and beer for $4.00!?!?!" Yes, part of it was frugality but I was also the pickiest eater ever. That was my biggest challenge when I travelled. In the Greek Islands, when all of my friends were gorging on calamari, I was eating French fries dipped in Tzatziki sauce.
 What I wouldn't give now to be able to eat my way through Paris. Trying as many classic dishes as I could.  As things stand now I'd have win the lottery or charm a wealthy patron. I have this ridiculous illusion that one of my moneyed chums would be so desirous of my personally tweeked guidance through the arrondisements of Paris that they would insist on our funding a gastronomic assault on its bistros and brasseries.
I would start simply. My current obsession with the Croque Monsieur would be my jumping off point.

#1 Croque Monsieur and Croque Madame: I wouldn't have touched either of these with a ten foot pole back then because I didn't like ham and the whole egg deal in the Croque Madame grossed me out...and the béchamel sauce? What the hell was that all about? Sheeesh!

#2 Boeuf Bourguignon: It was probably out of my budget range back then but even if it weren't I would have been afraid of biting into big fatty hunks of meat. That would have totally grossed me out.

#3 Coq au Vin: see #2
#4 Ratatouille-well...the eggplant.
#5 Yes! I would eat Escargot now! I've never eaten it but if I were ever to get to Paris again, I would do it.

I have been inspired to prepare some of these classic French dishes. First up:

Le Croque Monsieur
(this translates as the Crispy Mister)
It's still a work in progress (I've yet to attempt the béchamel version I've bookmarked in The Barefoot Contessa in Paris) so far, it goes a little bit like this:

2 slices of bread
butter
1/2 cup cheese (gruyere, emmentaler, gouda-anything flavorful that melts well) grated
2 slices of smoked ham-I've also used smoked turkey
caramelized onions
Dijon mustard
Turn on the broiler and on the stove top heat up a skillet on medium high heat. Butter  a couple of slices of bread and place the slices butter side down onto the hot skillet and pile on some grated cheese and cook until the underside of the bread is toasty and golden brown. Transfer the cheesy toasts onto a broiler proof pan and broil a few minutes until the cheese is all melty and bubbly.
Toss a couple slices of cooked Virginia ham into the still hot skillet to heat through then lay the slices on one side of the sandwich and caramelized onion on the other half, just as you remove the pan from the broiler. Spread a little or a lot of Dijon mustard on the ham side and sandwich your two melty slices together and slice in half and you're good to go.

I've made this a couple of times now and it's off-the-hook good. So good I failed to get a decent picture of it. The meal in the photo is a simple grilled cheese sandwich. The Scallion Ramen soup was a concoction I came up with when cleaning my pantry and discovering 3 packages of Top Ramen. I tossed out the flavor packet and made my own starting with a base of Chicken Better Than Bouillion and adding miso, fish sauce, caramelized onions and scallions then tossing in the noodles to absorb all of those great flavors.
The Orzo Salad is topped with a brilliant Salad Booster from 101 Cookbooks.


Thursday, May 9, 2013

Spring Vegetable Pot Stickers

Pot Stickers Round Two:
I spent the morning attempting to embrace the journey rather than speed to the destination. This can be difficult for me at times but now,  100 potstickers later it's still a time sucking endeavor but, I think I got this. This video helped...so at least my tucking and pleating has made some strides.
This recipe for Spring Vegetable Potstickers comes from Smitten Kitchen (big surprise there)...another timely post celebrating fresh Spring vegetables when I'm oh so obessessed with them now, both in the little kitchen and in my new job. We got fiddlehead ferns and chiogga beets in yesterday-stay tuned.
Anyhoo, smitten put this recipe on my radar just as I was uptomyelbows in my first attempt at the potsticka. Her recipe intrigued and challenged me on a couple of levels. Her ingredients include fava beans and tofu in addition to my beloved asparagus. I was soooo jazzed up to make these that I pedaled over to Bi-Rite on my day off to purchase my employee discounted bountiful basket of asparagus, fava beans and TOFU! Two firsts for the little kitchen: tofu and fava beans.
I adore hate adore fava beans! As you peel away the layers from the large bumpy shell revealing a cushiony pod interior that looks like cotton batting, to the wiggly yellow umbilical cord that caps the leathery sac that covers the buttery soft bean...you almost expect something alien to emerge. Gorgeous, but seriously- a pain in the ass to shell. On the other hand, it's a given that the pot sticker process is gonna be a long one so what's it gonna hurt to add another 20 minutes to the process when , who am I kidding, I've got nothing better to do on a day off.
On to tofu...if anyone can get me to embrace tofu, it's gonna be smitten kitchen. In this recipe it's sort of disguised to look like crumbled cheese, now if I could only get it to soak up some flavor. That was my only teeensy problem with this recipe. I loved the look and texture of the finished dumpling but I wasn't getting any definitive flavor from it. I realized that I was way too hesitant with the scallions and chives.
I broke my number one rule:        first time recipe-follow exactly.
I didn't have quite enough scallions and I thought 1/2 cup of chives seemed excessive. I should have known better. Trust in the smitten-she's never let me down yet.

Thursday, May 2, 2013

Ramp Pizza


Ramp Pizza, originally uploaded by riptideredsf.
Just a few short weeks ago, I'd never heard of ramps. Many changes have occured since then and this recipe for Ramp Pizza, appearing from Smitten Kitchen last week was nothing short of freaky.
The big news is: I got a new job. I ventured out of my comfort zone, leaving a job I was content with but ultimately unchallenged or inspired by. After a few fits and starts, I have landed here. A gourmet market so special and inspiring, I'm practically chomping at the bit to re-vamp the little kitchen and my life. The company mission statement? Building community through food.
Though my new career so perfectly gels with the original intention of my little blog: embracing the veg, it will open up a whole new world of food for me. 
I'm currently obsessed with the produce...mostly attempting to memorize an overwhelming number of numbers that identify each type of fruit and vegetable. I knew that would be a challenge, but what surprises and intrigues me are the odd creatures I've never seen before.


As I'm OCD'ing  Googling my way through Ramp 101:

a wild leek, sort of a cross between a scallion and green garlic... pungent and onion-y. They're not cultivated, grown in gardens or on farms. They are foraged from forests, found mainly in the east from the Carolinas to Canada. Their season only lasts the first few weeks of Spring...

...up pops the recipe from Smitten Kitchen, just as I'm pondering what one does with a ramp. Pizza! Brilliant...a little piece of my comfort zone.


Monday, April 22, 2013

Vegetable pot stickers


Vegetable pot stickers, originally uploaded by riptideredsf.
This was a first for the little kitchen: Pot stickahzzz!  I spent the entire afternoon making pot stickers.  Why? when my favorite Asian market, New May Wah sells a ginormous bag of 'em for something ridiculous, like 8.99, and Trader Joes are pretty darned good too. I loves to have them in freezer for those nights when I'm just too worn out to make anything and too broke to go out. Pull the bag out of the freezer and toss a handful into hot skillet with some peanut oil and 10 minutes later( providing you've got some left-over rice in the fridge) , dinner is served.
Is it worth the labor involved you may ask? Yes and no. If they taste brilliant then hell yah! This first attempt is not quite there yet but has potential and I'm seeing the dumpling assembly as theraputic, along the lines of garbanzo bean peeling.
I've had this recipe from 101 Cookbooks for Golden Potstickers, a vegetable pot sticker starring yellow lentils, on my to do list for months (prompted by a pantry purge of all the jars of lentils I had decorating my shelf). I used red lentils  and a bunch of excess cabbage I'd shredded up for a slaw that was juuusst about to find its way into the compost bin-thus another refrigerator rescue was born!
Make the lentil pot stickers and the dipping sauce just the way Heidi explains it and they'll be wonderful. But, if you're me and your fridge is always on spoil alert, this lentil base is a great host for a sauteed veggie mash-up. The lentils are cooked and then pulsed in the food processor. The texture is up to you.  If you have a lot of veg to add just make sure it's diced small and perhaps you'll need an extra package of wrappers lest your bowl of filling gets a little whack once you add the vegetables. These freeze perfectly so make as many as you can handle.
The cabbage (or any veg or green that needs to find a greater purpose) goes into a hot skillet with 1-2 tablespoons of peanut oil (I'd gauge it thusly: 1 tablespoon for every 2 cups of veg) , red pepper flakes, chinese 5 spice ( 1 teaspoon for every 2 cups of veg)  and salt (to taste~taste often). Toss the pan to get the cabbage coated and when it's almost soft, (and this is totally optional) dash in some Sriracha, taste it and dash some more if you want...and then  fold the sauteed vegetables into the lentil mix.
Smitten Kitchen just posted a Spring Vegetable Pot Sticker recipe that is definitely going on my to do list.  In addition to the great recipe, she's got some great process pics for folding technique.
Un-wrap the won-ton/pot sticker wrappers and place them into an airtight container or get a damp tea towel to cover the package while you work. I use two spoons to form the filling and have a small bowl of water the moisten the edges of the wrappers. Line a baking sheet with parchment paper or wax paper to place your formed pot stickers on. Sit down at your kitchen table or your coffee table and pop in a French Chef DVD and commence to wrapping. Keep a damp towel over the formed pot-stickers as you work and make sure they aren't touching. When the baking sheet is full put it in the freezer (without the towel) for about an hour. Transfer them into a freezer bag and draw out as much air as you can. Keep the bag in the freezer and when your ready to cook some off, have a half cup of cold water standing by.
Heat up a non-stick skillet (make sure it has a lid to fit) on medium heat with a tablespoon of peanut oil and when the oil starts to shimmer, place the pot stickers flat side down and cook until the bottom just starts to brown. with the lid in one hand pour in the water and place the lid on the pan firmly and cook until the water has reduced by half (about 7 minutes). Remove the lid and continue cooking until the water has evaporated and the bottoms are browned (about more 3 minutes).


Saturday, April 6, 2013

Farro with Coconut Curry Lentil Soup

This was a mash-up of the last of my new favorite soup and finally, a successful attempt at cooking farro. I added a last minute poached egg to top it off. It was divine! 
It's been hit and miss with my few lame attempts at farro, a super healthy whole grain that looks like a cross between brown rice and barley. When cooked properly it has nice chewy texture and a slightly nutty flavor that makes it a hearty base for a main course.
I first came across it when I made this most excellent soup from Smitten Kitchen way back when and it wasn't easy to find back then. Now I get it in the bulk food section at Whole Foods or Rainbow. It's cooking time varies based on the type you buy: Pearled, semi-pearled or plain or I guess, unpearled. The pearling process breaks down the tough outer skin thus reducing the cooking time.
It's not inexpensive, so I've been hesitant to keep at it after having such underwhelming results. But since I've been cooking rice the Jamie Oliver way, I figured I give the farro another go.
Get a large pot of salted water boiling. I also start a full tea kettle to boil as well if I need to add more water later. Spread a cup or so of farro onto a baking sheet and pick out any impurites (if you've purchased the better bagged stuff this is probably not necessary), either way, the next step is to rinse it through a strainer.
When the water has come to a boil, add the farro and keep it at a boil  until it's almost tender (this could take 30-45 minutes so keep an eye on it and add more water if you have to). Then carefully pour the water and farro into a collander that will fit back into your original pot. Cover the farro with aluminum foil, pressing it down onto the surface. Pour about an inch of water (from the kettle) back into the pot and bring it to a boil. Put the collander back into the pot and place a lid on top. Reduce the heat until the water is simmering and then steam it until it's done. Check it every ten minutes and stop when the farro has reached a consistency you like. It took forever but it turned out brilliant. I wasn't planning on eating it that night anyway (I prepare rice and farro in large batches to re-heat for weekday office lunches and too-worn-out-to-cook dinners) so you can just let it go while doing something else. You can reduce the cooking time if you soak the farro overnight.
My current curry obsession led me to this next keeper: Coconut Curry Lentil Soup  from 101 Cookbooks.
Did I mention that this makes a super-tasty and satisfying breakfast with the addition of a fried or poached egg?

Sunday, February 3, 2013

Hummus


Hummus, originally uploaded by riptideredsf.
All I can say is "Wow!"

This "ethereally smooth hummus"came my way via Smitten Kitchen who got it from Ottolenghi's new cookbook Jerusalem, which I just happen to have in my possession for the next couple of weeks thanks to my local library. Double Wow! This hummus is so amazingly smooth and flavorful and could not be more simple. Well, I lie. It could be more simple. Smittens key to it's ethereal smoothness is to peel the cooked chickpeas. Crazy? perhaps. Obsessive? no doubt, but it's seriously worth the added effort and it's a fine task to occupy my hands whilst watching Downton Abbey. I pack it in my lunch and make my co-workers dizzy with envy. Sometimes I share. They like that.

My only adaption is how I prepare the dry beans. I cooked the beans the way I always cook dry beans: in a low, slow-cooker overnight in 4 times their volume of water seasoned with vegetarian fake chicken seasoning and a couple of sprigs of fresh thyme. I pick over and rinse the dried beans but I don't soak them. I've never had a problem with that.

I had a massive stack of whole grain tortillas, flecked with all sorts of healthy bits, in the freezer from the time I tagged along with Sheena to Costco months back. Those tortillas-as it turned out-didn't really gel with my breakfast burrito plan. They were like cardboard, but with all due kitchen diligence, they turned out the perfect cracker. I brushed them with a little olive oil and sprinkled on some salt and za'atar (a middle eastern herb blend of marjoram, oregano, thyme, sesame seeds, salt and sometimes dried sumac), and baked them on a baking sheet for 15 minutes in a 400 degree oven.

This goes in the keeper file.


Tuesday, January 15, 2013

not michele's little kitchen

I was noodling around in the archives and found this. My very first post from November 2, 2010. It had been sitting in draft suspension.

I had to photograph this great stove (oh! and my mise). This is soooo NOT my kitchen. I'm house sitting, cooking smitten kitchen's mushroom bourguignon on a big fancy stove-top grill. This grill IS the inspiration and launching pad for Michele's Little Kitchen. Well, there are a couple of things that inspired and launched this blog. Many firsts occurred this week and the culmination was just overwhelming enough to spew forth the need to write it all down.

It started with a Weight Watchers vegetable challenge. Never been a big fan I have to say, of vegetables that is, not WW- but it sparked my OCD and in an attempt to channel it to the greater good, I decided to embrace the veg.  
I start with my old copy of Vegetarian Cooking for Everyone (a cookbook club acquisition I'd barely cracked) and got to tagging. A list is made and I'm off the local produce markets. I suddenly had visions of veggie kabobs dancing on this grill. Squash, Zucchini and eggplant-vegetables I wouldn't touch with a ten foot pole a few short years ago, now, planning a trip to the produce market is enough to make me giddy with anticipation. 
First lesson learned? a little olive oil, salt and pepper can make an old shoe taste good.

It was Smitten Kitchen's  Mushroom Bourguignon that was the real game-changer though.  I had no idea how rich, meaty and lush mushrooms could be.

Monday, January 14, 2013

carrot soup with lemon tahini drizzle and toasted chickpeas

I woke up the other morning to find the food blogosphere all about chickpeas and carrots. These are just s few of the recipes I latched onto:

smitten kitchens latest carrot soup- I've made this twice last week-it's sooooo simple!
101 cookbooks morrocan carrot soup-I haven't made this yet but it's on the queue for Le Weekend
Amateur Gourmet's Anything Goes Salad-I've made this wonderful chopped salad a few times now. It's a great work salad because it's perfectly fine in the refrigerator for a couple of days, so I can make a lot.

The Smitten Kitchen Carrot Soup appeared first and there was absolutely no reason not to jump right into this because I had all of the ingredients on hand-the usual bunch of carrots, just waiting for their greater purpose, the questionable dregs of a jar of tahini (does tahini have a shelf life? he jar says nothing!),  a near empty jar of dried chickpeas and a newly purchased bag of za'atar (an new stranger to the little kitchen inspired The Amateur Gourmet salad up above).
I had to laugh when I read Deb's comment about her self-imposed carrot soup challenge, as it sounded very akin to my own evolution with most vegetables.
The soup is sooooo simple and flavorful on its own, but the addition of the tahini & lemon added that little kick of brightness. My drizzle work needs some finessing and it's far too fussy a finish for a simple carrot soup, but couldn't help myself after I'd poured that vibrant bowl of orange. The soupy canvas seemed to call to my squeeze bottle.
An equally inspiring discovery was the toasted chickpea. I've never toasted chickpeas before and when I pulled them out of the oven and tasted them I was blown away by how good they were...salty & spicy with a touch of crunch...just a brilliant snack all on their own.
Carrot soups collided today. A new cooking school recently popped up on my  radar.
Scanning their website, I discovered they were having an open house today. I pedaled by to check it out. It was inspiring and enlightening.
They demonstrated 4 recipes including a curry carrot soup. It was good. Thick and spicy...but not as good as this. A lot of curry and a lot of milk and cream. Not that there's anything wrong with that. If I hadn't just made this, I probably would have been singing the praises of that curry carrot soup. It was a tad more work (roasting carrots-and I looooovvvve roasted anything) than this super simple SK soup (everything gets tossed into the pot and sauteed-add stock-cook until carrots are soft-puree-done). 
Something I took particular note of: the chef/instructor said never to garnish a soup wth something that was not already a component of the soup. Hmmnnn...What am I to make of that? I loved the tahini swirl and toasted chickpea croutons.
Nevertheless, the carrot soup is definitely a keeper and I shall roast the carrots next time.

Friday, January 11, 2013

caramelized onion and mushroom tart

Two years ago when I started educating myself about cooking, I knew nothing about caramelized onions. I didn't know what "caramelized" even meant. Sure, I'd cooked onions until they were brown, blindly following recipes without any analyzation of the process or result. Sugar in onions? Who knew? A few french onion soups had been produced throughout a lifetime of sporadic cooking, rarely processing the process. It was a  means to an end, satisfying hunger as quickly as possible, or occasional entertainment, and as long as the result wasn't burnt or raw or oversalted and tasted good (which meant edible) , the task was deemed a success, tagged with a bookmark or stuffed into a binder and I moved on.
I discovered a recipe for Onion Jam  in Kim Boyce's Good to the Grain last year. It was only then that  I fully understood the process. Suddenly, all of that browning and caramelizaton talk from Americas Test Kitchen finally made sense. If I had to choose my biggest kitchen AHA! moment, that would be it.
It takes about 90 minutes to cook the onions down their jammy consistency. Onion jam on a BLT is the most amazing thing ever. I mixed some into a tuna salad today that was off-the-hook. Even on a fork, all by itself, it's the ultimate marraige of sweet and savory in one bite. Caramelization is a beautiful thing and shouldn't be rushed. Onions for this tart don't have to be cooked this long though, you want more structure.
I came across this article at Slate.com this morning that was dead-on, humourous and an eye-opener about writing recipes. The writer accuses recipe writers of lying about how long it takes to caramelize onions, because the long cooking time is a deterrent to a recipes appeal. 
The article concludes: "The best time to caramelize onions is yesterday".
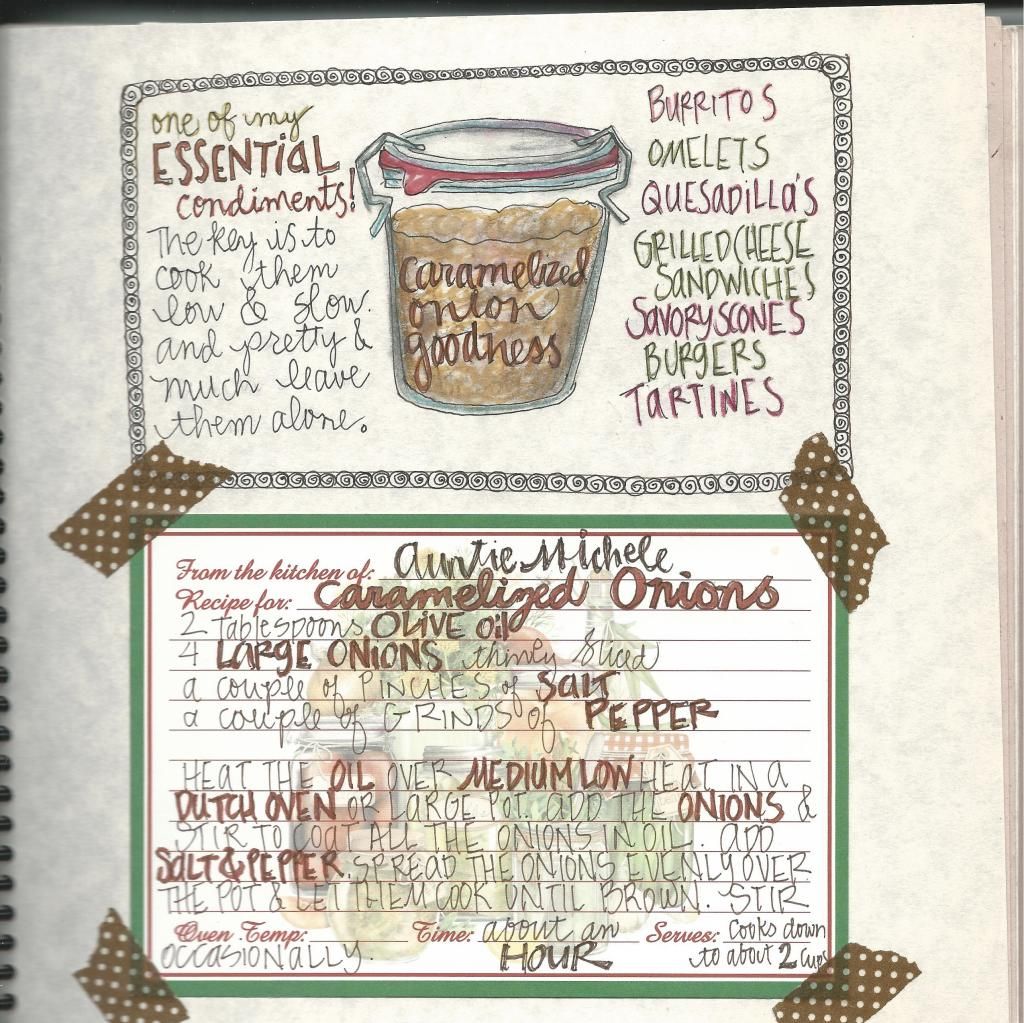
Earlier in the week I caramelized about 3 pounds of onions in a dutch oven. I was left with about 2 cups of gooey good onions. It keeps in an airtight jar for a week, though rarely lasts that long. I use caramelized onions in all kinds of ways, the breakfast tacodilla is it's most frequent destiny.

 I've been in  pastry mode for a couple of weeks now, so when I scored  giant bag of button mushrooms from the Chinese market I knew a tart was in my immediate future. This is a hybrid of recipes adapted from Smitten Kitchen and Dorie Greenspan's Around my French Table.

caramelized onions-again, way more than you need for this recipe and do this ahead of time. A dutch oven is great when cooking a large batch because the cast iron has great heat distribution, there's a lot of surface area to promote browning.

2 tablespoons oil
3 large yellow onions (sliced 1/4 thick)
1 teaspoon salt
black pepper
1 teaspoon red wine vinegar

Heat the oil in dutch oven on medium-high heat and then add the onions. Toss until the onions are coated and cook until they start to brown, stirring infrequently, just to redistribute the onions so they come in contact with the surface of the pot. Once the browning starts (it take's about 20 minutes to get there), add salt, lower the heat and cover the pot and cook for another 20 minutes so the onions release their moisture and get really soft.
Remove the cover and continue to cook for another 30 minutes until the water evaporates and the onions become brown. De-glaze with red wine vinegar at the end.

Pastry
from smitten kitchen

1 1/4 cups flour
1 tablespoon plus 2 teaspoons cornstarch
1/4 teaspoon salt
6 tablespoons butter, diced
1 egg

In the food processor pulse the dry ingredients to combine. Pulse butter until it's in bits the size of small peas. Pulse in the egg until the dough forms.
On a floured work surface roll the dough into a 12 inch circle, carefully roll it over the rolling pin to lift it off the counter and into the tart pan. Press the dough into the corner of the pan and trim off the excess. If you're using a fluted tart pan with a removable base lift the tart pan by the edge and put it onto a plate. Cover with plastic wrap and chill for 30 minutes.

filling:

2 tablespoons butter
1 pound white button mushrooms-stems removed, sliced
1/2 teaspoon salt
1 teaspoon dried tarragon
1 cup of beef stock ( or vegetable stock)
1 tablespoon fresh thyme
1/2 cup caramelized onions
2 eggs
1/2 cup heavy cream
1/2 cup fontina cheese (or gruyere)
salt
pepper
nutmeg
1 teaspoon dijon mustard

Preheat the oven to 350 degrees.
Remove the chilled tart shell from the fridge. Line with foil or parchment and weight the pastry down with pie weights, dried beans or rice. I keep a jar of white beans labeled For Pastry and re-use.
Bake for 10 minutes, remove the weights, foil or parchment and bake for another 5 minutes, until the pastry appears dry, but not browning.
Remove from the oven and brush with dijon mustard. Set aside
While the pastry is par-baking (also called blind baking) heat up a  large skillet over medium high heat, melt the butter until it stops foaming. Add the sliced mushrooms and toss to coat, then let them cook undisturbed, about 5-7 minutes until they start to brown. Toss again to redistribute and continue to brown. Add the salt, pepper and tarragon. The mushrooms will release their water. Cook uncovered until the water evaporates and a fond  (the browned bits) forms on the skillet. Add the beef broth and de-glaze the skillet. Continue to cook until the broth reduces. Remove from the heat and stir in fresh thyme.
In a small bowl or a large pyrex measuring cup, wisk the eggs, cream, salt, pepper and nutmeg together then stir in the grated cheese.
Place your par-baked tart shell on a sheet pan, spoon in the caramelized onions and spread it evenly over the bottom. Then add your mushroom layer spreading it evenly over the onions. Pour the egg mixture over the surface.
Place the sheet pan on th middle rack of the oven and bake for 35-40 minutes until the center is puffed and brown. Let it rest for about 10 minutes, remove the fluted ring from the base. Slice and enjoy with a big green salad.
This tart re-heats nicely and I pack it for lunch.


Friday, January 4, 2013

Cashew Butter Balls


It's a week into the New Year and I've only just come up with my resolution. I have only one: To learn some thing new. Every day. It will probably be kitchen related most likely, but I'm keeping my eyes and ears wide open. Really, we all learn new things everyday. We just don't always remember them, or think them relevent enough to our lives to take particular note of.
This one's pretty simple, general and as good of a place to start as any:
You CAN teach an old dog new tricks.
So, I start this year with a new take on an old favorite. Back to back posts on what is essentially the same cookie. The subtle differences that make one damn good and the other one sheer bliss.
These Cashew Butter Balls are a gigantic leap forward for what I thought was the crowning stand-out of my holiday baking-the Mexican Wedding Cakes, or what I started calling Sugar Bombs. They are always the first to disappear from every cookie tray or tin I've turned out for the last 10 years. I thought that they were perfect just they way they were. If it ain't broke, don't fix it. So many recipes, so little time...and all that jazz.
Yet, when a post as timely and gorgeous as Smitten Kitchen's pops up on my radar, I get all twitchy with anticipation. I attempt to wrangle my kitchen OCD for the greater good and go all ATK on these bad boys.  So much so, that I was compelled, for the first time ever, to bake AFTER Christmas. That's saying something.
These were brilliant. I love them so much that I have started my new tradition of The New Year Cookie. I gifted these to friends I met up with between Christmas and New Year's Day. I made up two gift boxes, saving about 6 for myself. I was actually going to bring them to the cafe and share them with Sheena, but they never made it. Once I ate the first one and it was so delightful, I had to have another, just to make sure I wasn't over-reacting. Once I ate the third, it was all over. These buttery, sweet, melt-in-your-mouth bites of nutty heaven are addicting. I dub thee Crack Cookies.
I suspect, if I never make another cookie but this, for the rest of my life, I shall make all of my friends and family very happy as they curse the crap outta me.