Monday, December 16, 2013

Distraction


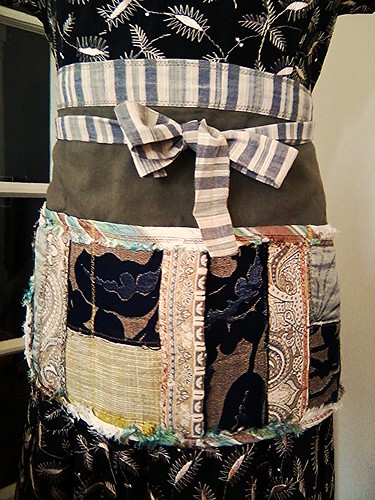
cafe apron, originally uploaded by michele wynne.
Look out people. I've been crafting.
The little kitchen has been re-purposed of late, thus the shocking lack of cooking content.
Just before Thanksgiving, whilst attempting yet another Feng Shui purge, I dug out for what has to be the 100th time, 2 storage containers of fabrics I've accumulated over the years (it used to be 3 times that much). At the same time I found myself wanting an apron for my holiday greeting duties at work. I was also sadly poor and just needed a no cost hobby to occupy my non-work hours. I finally found a use for all of the sewing stuff I've been hauling all over the country for the past 20+ years.
 
I made this:
 
 
and so it began....an apron a day. The shabby chic apron at the top seems to be generating a bit of buzz. 
This one began with an impromptu detour last weekend to the SF Bazaar Craft Fair, I  came across a huge table covered with stacks and stacks of decorator fabric swatches. I was handed a small shopping bag and invited to take as many as I wanted...for free!!! See, this is how it all begins.
So here's the deal: this non-profit, all-volunteer organization called FabMo goes around to all of the bay area decorator showrooms and collects up all of their discontinued fabrics, swatches and other samples which would otherwise end up as landfill.  Volunteers organize in a warehouse space in Mountain View and open up 3 days each month and those in the know can go in and take as much as you want, leaving a voluntary donation.
My apartment has been a disaster hotbed of creativity for the last week as the whole floor has been covered in fabric swatches. I'm actually really happy with the results because after much R & D, I've come up with a style that incorporates my theatrical background and most specifically my affinity for the art of  distressing-starting with something new, beating the crap out of it, thus giving it a life with character...or so I like to think. These aprons would only get better with age.
If you click the top picture you can see the photo gallery of all of the aprons I've made this past month.
 

Monday, December 2, 2013

Handmade Chocolates


Handmade Chocolates, originally uploaded by michele wynne.
There are worse places to spend an 8 hour work day.  I've been thinking of my past jobs, the  last being one where I drank coffee, ate cupcakes and surfed the internet all day, where even the best work day can now be reflected upon as being tedious and uninspiring.
Working in a gourmet food market has many perks to someone who loves great food and amazing food stuff. Co-workers constantly offering up samples of this amazing cheese or tastes of that refreshing new wine. That in itself makes for a delicious workday. Then there are the local vendors hanging out for a few hours to chat and share tastes of their gorgeous artisanal treats. That happens pretty regularly. During the holidays this happens all day, everyday. The amount of chocolate I consumed the week of Thanksgiving was nothing short of obscene. There was one standout: gate comme des filles chocolat. Alexandra Whisnant makes the most amazing chocolates by hand. Her ganaches are infused with coffee, clementines, meyer lemon and bacon, just to name a few. The ganache is cut and hand formed, dipped in chocolate then decorated with finishes like goldleaf, glitter, decorative transfer patterns, candied lemon and bacon. She makes her boxes by hand, using heavyweight colored paper in assorted colors and a variety of decorative adhesive tapes to seal each box-an absolutely gorgeous presentation.
So the next great perk of working at Bi-Rite is being able to take advantage of the amazing cooking classes and events offered at 18 Reasons, our non-profit educational space. When I signed up for the Handmade Chocolates class I had no idea who Alexandra was, even when she was in the store last week I didn't make the connection, so I was absolutely thrilled when I showed up for class yesterday and saw the stack of her signature boxes.
Wheeee, I made these super amazing chocolates last night.
I learned how to temper chocolate, make ganache and form these gorgeous and most excellent tasting truffles. It was a good day.

Thursday, November 21, 2013

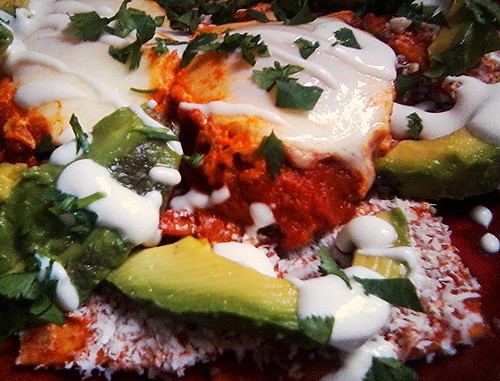
Chilaquiles!


Chilaquiles!, originally uploaded by michele wynne.

Welcome to my current little kitchen obsession. Here's what's going on here~fried tortilla chips bathed in chile sauce and then dusted with finely grated cotija cheese. Sounds pretty good right? Well, hold onto your hats because that's only the beginning of this crazy good brunch I made for myself yesterday and the day before and the day before that! These ridiculously good wet nachos are then layered with sliced avocado, fresh cilantro, couple of eggs poached in chile sauce and then finished with a drizzle of crema. These things are addictive!
Inspiration came by way of a birthday lunch (thanks Sheena!), many months ago to Nopalito where they serve an appetizer version called Totopos Con Chile.
Traditionally, Chilaquiles are prepared for brunch as a way to use up stale tortillas, leftover salsa and cheese.
I was intrigued, in fact more than a little surprised that I'd never before encountered these given that I've been devouring Mexican cuisine since I made my first taco in Home Ec.

Anyhoo, after an intense Google-thon, here's how this all went down:

Red Chile Sauce
adapted from Bon Appetit
 
7 dried Guajillo chiles
28 ounce can crushed tomatoes
1 medium onion
5 cloves garlic
1 jalepeno
1/8 teaspoon smoked paprika
2 tablespoons vegetable oil
2 teaspoons agave nectar
2 teaspoons Sriracha
salt to taste

Chips

6 to 8 corn tortillas, cut into 4 wedges each-leave them out overnight to dry
4 tablespoons of oil
salt

grated Cotija

Crema
8 ounces sour cream
2 tablespoons fresh lemon or lime  juice
salt

additional toppings:
sliced avocado
black beans
Cilantro-chopped
cooked chicken
 
Soak the chiles in 4 cups of boiling water for about 15 minutes. While the chiles are soaking, heat 2 tablespoons of oil in a medium skillet and cook the diced onions until brown and caramelized, add the garlic, jalepeno and paprika and cook for another minute or two until the jalepeno softens. Remove from the heat. Back to your chiles, reserving the soaking liquid, remove the stem and cut the chile open, remove the seeds and lay the chiles out on a cutting board and chop them all up. Pour the cooking liquid through a strainer to remove the seeds.
 In a blender, pour in the can of tomatoes, add the onion mixture and the chili pepper. Wipe the skillet with a paper towel. Place the lid on the blender with the central part of the lid removed. Stand by with the liquid and once the blend gets moving, slowly pour the liquid into the blender, just until the funnel forms and the sauce is blending nicely.
Lay out a baking sheet or large plate lined with paper towels. In the skillet, add 4 tablespoons oil and heat to medium high. When the oil is hot, place the tortilla wedges in a single layer and cook until golden brown turning them over with tongs, frying in batches until you're done, drain the chips on th paper towel and sprinkle with salt.
The next part of this goes a little fast. For the Totopo version I prep the grated cheese on a plate or a wide shallow dish and have it at the ready for when the chips come out of the sauce.
Drain off most of the oil and let the skillet cool down a little.
If making these for brunch, I'll have another smaller pan (with a fitted lid) ready so I can poach some eggs in the sauce as well. Crack eggs into ramekins.
Pour the pureed sauce into the skillet and bring to a simmer. Stir in the agave and the Sriracha.  Taste. Add salt, a pinch or two at a time, to bring out the flavor of the tomatoes and peppers. Add more agave and/or Sriracha if you want. Pour some sauce into the second pan and poach the eggs
Return the chips into the skillet and carefully stir to coat them with sauce. Cook for about a minute or so. If you're serving these as an appetizer you'll want to keep them crisp. With tongs, remove the chips, shaking off excess sauce and then dipping the chip onto the plate of cheese to coat. If you're going the brunch-poached egg route then a little additional cooking time is fine to make them fork friendly. With a slotted spoon, scoop up the chips and place them directly onto your serving platter or individual plates  and sprinkle cheese on top and then layer any additional toppings like avocado, black beans or cooked chicken. Lay the poached eggs on top and then drizzle crema on top and sprinkle with additional cheese and chopped cilantro and be ready to dive into the crazygoodness of Chilaquiles.


Thursday, November 14, 2013

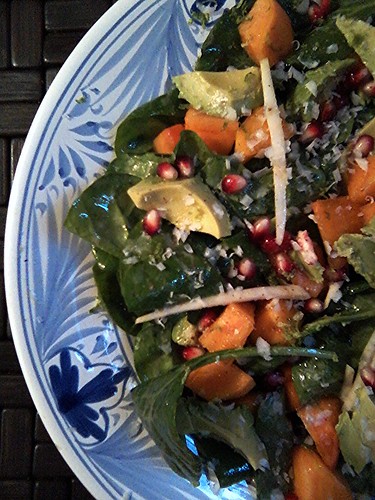
Spinach, Persimmon & Avocado Salad with Lime Miso Dressing

I snagged a bunch of fuyu persimmons from the market yesterday with absolutely no idea what to do with them. I thought I was going to make some sort of baked thing with them, but it seems that the softer, pulpier Hayicha persimmon is more suited to that particular endeavor. My google search for persimmon recipes led me to this recipe for Spinach, Jicama and Avocado Salad with Miso Dressing. It was the best place to start as I'd also managed to snag some avocados and I've been meaning to try Jicama.
Until a few weeks ago, I'd never eaten a persimmon. From the moment the first Fuyu's arrived in the market and I was fascinated by it's perfection, from its gorgeous orange color and the cute little leafy cap, I wanted to take it home and draw it. I was surprised by how sweet they were. I was surprised that they were sweet at all. For some reason I expected persimmons to be more vegetal, like a tomato.
This morning I set out with a short list of ingredients I needed to compose the afore mentioned salad but alas could not find any jicama, even at my local Latino produce market. I decided to go with celery root instead.

6 ounces baby spinach
1/4 of a large celery root cut into matchsticks
1 avocado cut into cubes
2 persimmons, peeled and cut into cubes
pomegranate seeds
lime zest
salt
pepper
Parmigiano Reggiano, shaved

Miso Dressing
4 teaspoons lime juice
4 teaspoons water
1 1/2 tablespoons shiro miso
1/3 cup + 2 tablespoons olive oil

My new way of preparing salads is a method I learned from my cooking classes at 18 Reasons~layering. I used to toss everything together in my big stainless steel bowl thinking that I wanted every component evenly distributed and coated with dressing. I've since learned better.
Here, the ingredients get layered onto a plate in two layers and the dressing gets drizzled on within the layers as well (unless you have an ingredient or two that could use a little tenderizing prior to  assembly).
I poured about 2 tablespoons of dressing into a large tossing bowl and stirred around the match sticks of celery root and let them sit a few minutes (not really necessary because I like the crunch of the celery root) then I tossed in the spinach to get the leaves a little coated. I commenced to building the salad by layering down half of the spinach & celery root first, then 1/2 of the persimmons, avocado, a sprinkling of pomegranate seeds, a drizzle of dressing and finally some shaved Parmiggiano Reggiano (I used Cotija on a another version). Repeat the layering.
Not only does a layered salad look gorgeous, but each bite tastes different so your palate is never bored. 


Wednesday, November 6, 2013

Apple Butter


Apple Butter, originally uploaded by michele wynne.
The Big Grey Box has been overwhelmed by apples and pears for weeks now. I've been bringing small piles home thinking about the abundance of applesauce I could be consuming on a daily basis.
This applesauce to be exact, a recipe so super simple and results in the best freakin' applesauce you'll likely ever spoon into your gob. An apple sauce so flavorful it must be the star of this most amazing cake if you've got a little more time and need to come up with a killer Autumn everyday cake. Well, I didn't do either. As usual, my bounty sat in the fridge for a couple of days. I'd opened and closed that crisper drawer so many times, just not ready to cope with the apple peeling. That, and I kept forgetting to buy lemons. I thought about a crumble, but I didn't have any butter. Then the other morning whilst bouncing around the blogosphere (rather than, you know, go to the store) I stumbled across this Slow Cooker Apple Butter.
I have no regrets.
It cooks on low for 12 hours covered and then 2 more hours uncovered. I pureed it in the food to get it super smooth. Somehow I was expecting it to be thicker and more spreadable than it was. I was tempted to cook it down some more on the stove top. I refrained.
I ended up with jars galore...well...5. Enough to share with Sheena and the break room. It got the thumbs up from my market mates. Success!

Monday, October 14, 2013

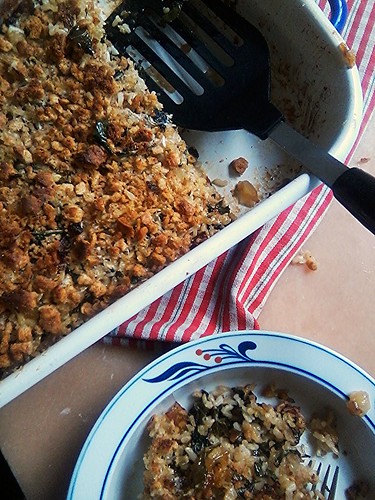
Caramelized Onion, Kale and Rice Gratin

There have been many, many kitchen epiphanies over the last 6 months I've been working at Bi-Rite. There is one standout that has transformed my little kitchen: Cheese.
Previously, aside from the occasional purchase of true Parmigiano Reggiano and Azur Blue cheese from the infrequent excursion to the Whole Foods cheese counter,  those giant blocks of supermarket bright orange cheddar, jack and mozzarella were little kitchen staples.
Our cheese counter at Bi-Rite is my Happy Place and my favorite part about working The Creamery-the area in the store where we sell our amazing hand made ice cream. I love the ice cream, but I love the cheese more and the position of the cheese counter smack-dab next to me all day long...well...let's just say that there are suckier ways to spend an 8 hour work day. So when I brought home a bunch of greens and was contemplating my usual brown rice/quinoa bowl, somewhere in the back of my brain I heard the word gratin. Coincidentally, my sister has been posting on her Facebook page, her kitchen explorations of the Smitten Kitchen Cookbook I gave her for Christmas last year, so not to be outdone, I pulled out mine and made this. It's slight riff on one of my favorite recipes. 
In my kitchen, Twice Rescued Kale, Spinach, Dandelion Green, Caramelized Onion, Three Cheese and Brown Rice Gratin is a more fitting, if tedious title and probably not all that appealing I'd hazard to guess...but this one was off-the-hook good. I credit the cheeses. This pan was like crack. I finished the entire thing off, all by myself, in two days.
Earlier this week I came home with two new cheeses and I made this killer grilled cheese sandwich from smitten kitchen using what is now my favorite cheddar, Cabot Vintage Cheddar. It's perfectly sharp and melty. Unbelievably flavorful.  Along with it, I bought Beecher's Flagship Reserve, an English Clothbound Cheddar, which also produced a tasty grilled cheese sandwich. The Beecher's is harder, and flavorfully sharp. It can be used like a parmesan. I used the last bits of these along with some Parmigiano Reggiano. Good lord, I can't wait to make a mac and cheese with this.
 
Here's the recipe from the book. It's amazing.

wild rice gratin with kale, caramelized onions, and baby swiss
from the smitten kitchen cookbook

wild rice:

5 cups cooked wild rice (from 1 2/3 cups, 10.5 ounces, 300 grams uncooked)
        **I used brown rice because it's what I had on hand**

caramelized onions:

1 tablespoon butter
1 tablespoon olive oil
2 large sweet onions, halved and thinly sliced
1/2 tablespoon table salt
freshly ground black pepper
4 cups stemmed, ribboned kale leaves (from an 8 ounce or 225 gram bundle)
       **I used a mixture of kale, spinach and dandelion greens**

assembly:
2 cups (8 ounces or 225 grams) coarsely grated Emmentaler or another Swiss cheese
     **my mix: Parmigiano Reggiano, Beechers Flagsghip Reserve Cheddar and Cabot Vintage Cheddar
2 tablespoons unsalted butter (1 tablespoon to grease dish, 1 tablespoon melted, for crumbs)
3/4 cup chicken or vegetable broth
1 cup (60 grams) fine, dry breadcrumbs
table salt
freshly ground black pepper

Cook the rice according to package directions, but if you're like me and buy your rice in bulk and don't own a rice cooker, boil up a big pot of salted water, dump in your rinsed rice, boil the crap out of it until it becomes chewy and then drain the rice into a collander, flatten a piece of aluminum foil down onto the surface of the rice, add about a cup of water back into your cooking pot and turn the heat to high, put the colander back into the pot and cover, turning the heat to low once it's come to a boil. Steam the rice until it reaches the texture you like.
Pre-heat the oven to 375 degrees.
Meanwhile, caramelize the onions:
Heat the butter an olive oil in a large, heavy skillet over medium-low heat. Add onions, sprinkle with salt and a little pepper, and cook until they're tender and sweet, stirring occasionally, about 30 minutes. Add the kale ribbons, and cook until they wilt a bit, about 5 minutes. Stir together the onion-kale mixture, rice and one cup of grated cheese in a large bowl. Season to taste with additional salt and pepper if you need to.
Assemble the gratin: Use 1 tablespoon of butter to generously coat a 2 quart baking dish. Spread the rice mixture into the dish and pour broth over it. Sprinkle the remaining cheese over the top. Toss bread crumbs with 1 tablespoon melted butter and salt and pepper to taste: sprinkle over cheese.
Bake for 25-30 minutes, or until a little bubbly and beginning to brown on top.

Wednesday, October 9, 2013

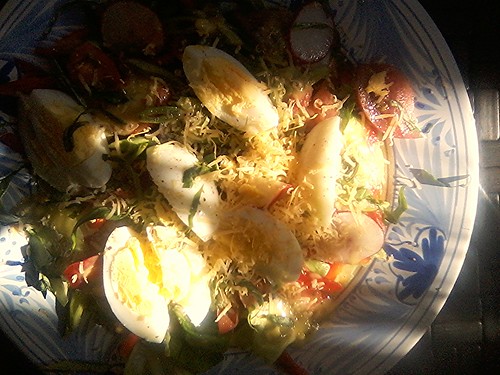
Layered Breakfast Salad


Breakfast Salad, originally uploaded by michele wynne.
I really do love salads yet I rarely make them. By the time I've collected up my favorite salad components, rinsed, dried and chopped, sliced and slivered...well...it just seems like an awful lot of work when all is said and done for something that is essentially a side dish. It's kind of like exercising...I'll make every excuse not to do it, but once I've convinced myself to start I really enjoy it, even though more often than not, once I've enjoyed the first salad or two, I still end up with a lot of sad produce that I just can't manage to use up.
 
I am newly inspired by a couple of things:
 
1) Little Gems and Baby Heads!  Small heads of lettuce that are perfect for the single serving salad. I love, love, love the crunchy Little Gems. I'd never seen these before I started working at Bi-Rite.
2) Layered rather than tossed salads-I've taken a couple of cooking classes at 18 Reasons, Bi-Rite's non-profit educational space. The gal who runs the program and teaches many of the classes always builds the salad on platters. Each component is prepped and spread on the plate or platter in two layers and generally consists of no more than 4-5 components including the dressing, which is also drizzled on within the layers. 
3) Gifts from the Grey Box: The salad pictured above started with my culled collection of 3 Little Gems, one Baby Head, one heirloom tomato, a bunch of radishes (sliced paper thin on a mandolin), a red bell pepper (sliced in thin strips) and a handful of romano beans (sliced thinly on the diagonal). Lastly, some slivered basil.
 
My go to dressing is a honey Dijon vinaigrette:
1/3 cup Olive Oil
2 tablespoons of lemon juice
1 clove garlic finely minced and smashed
1 tablespoon Dijon
1 teaspoon honey or agave nectar
a pinch of salt
a couple of grinds of fresh pepper
1 thinly sliced scallion
 
I put all the dressing components into a small jam jar and shake it like crazy to emulsify.
 
The  dinner salad was topped with a little of my new favorite cheese, L'Amuse Gouda. The eggs were added to the next-day breakfast leftovers which held up surprisingly well. What I didn't use the night before, when I started layering on my salad plate, I put into a plastic sandwich container, keeping each component in it's own little pile within the single container.

The only thing missing is bacon!

Update: I just found this article as I was looking up the Little Gem. It includes and interview with Simon, our produce buyer at Bi-Rite.


Sunday, October 6, 2013

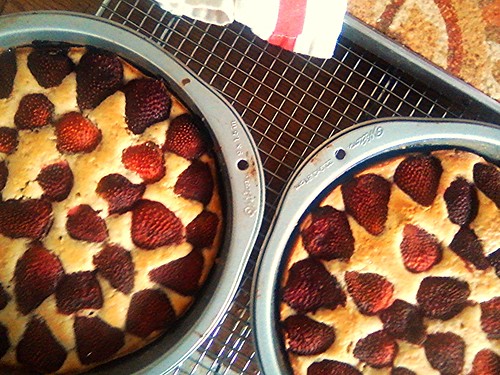
Strawberry Summer Cake


Strawberry Summer Cake, originally uploaded by michele wynne.
What goes around, comes around. Last night as we were closing up the market, one of my produce pals presented a box of culled strawberries (not so pretty) free for the taking. I didn't have to think twice about where these were going.
Smitten Kitchen's Strawberry Summer Cake has been one of the most repeated SK recipes to come out of my oven since I discovered it a couple of years ago.  It's a super simple, everyday, all-occasion cake, equally at home to be selfishly consumed all by your lonesome with your morning cuppa joe or fancied up with a light dusting of powdered sugar to present as a gift,  served at a dinner party with a blob of whipped cream or a side of vanilla bean ice-cream...or cut into wedges, packed in a plastic container, shoved sideways into a back pack, and transported by bike back to work and left on the table of the staff break room, where it disappeared in under an hour.
There was a scary moment, which I don't recall ever happening before. My first attempt involved can of out dated evaporated milk (really should have known better). I added it to the creamed butter and sugar, along with the egg and vanilla, some scary curdling occurred. Really scary. Scary enough to toss it, run to the store for fresh milk and do it again. It still curdled, I convinced myself that it wasn't as bad and moved on. I wasn't like sour milk curdling. It was the butter solids not incorporating  into the milk liquids. Upon reflection this did seem to be an odd step  and should have been expected when attempting to mix fat and water without agitation-physical, emulsifying agitation that is. My mental agitation clouded that logic at first. But as OCD as I can get sometimes, I went back to the original post, read the intro again to make sure I got the steps right and after two years the post has over 800 comments. Try as I might, could not find one comment where curdling was a concern. It just seems odd that no one was worried about this. 
After all of that it was a success. I'm going to do it again with a bunch of pears I brought home last night..

Tuesday, October 1, 2013

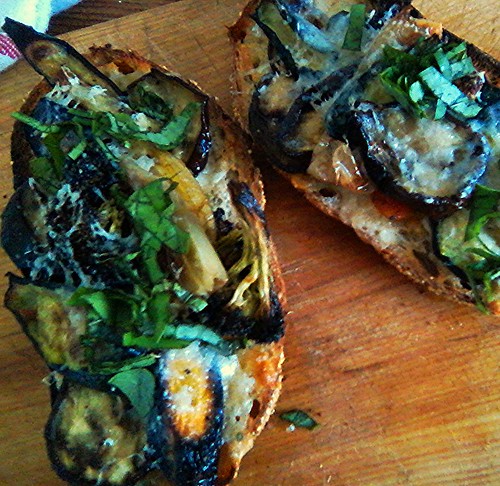
Roasted Vegetable Tartine


Roasted Vegetable Tartine, originally uploaded by michele wynne.
Well, clearly this will not be winning any beauty contests but I want to start the month focusing  on my commitment to vegetables and I was really thrilled with this impromptu tartine. This is a version of  Refrigerator Rescue. The roasted vegetable medley that sits atop slices of day old Semifreddi loaf toasts and gooey good Carmody cheese, began as small assortment of vegetables I collected the other day from the market where I work. I have come to refer to these particular hauls as Gifts from the Grey Box, culled produce that has been pulled from the market. I wish I'd gotten a picture of the box this day because it really was a sight to behold. A large grey plastic storage box, the kind with an interlocking flip lid, sits propped on its side on a small counter top next to the time clock. Bunny, one of our produce goddesses, had created a gorgeous still life contained within the stage set of the box. I felt a wee wave of guilt disturbing the scene, but I did so for the greater good.

My cast of characters included:

2 small Japanese eggplant
3 purple carrots
1 parsnip
a tiny bunch of broccoli
1 jimmy nardelo pepper (a sweet frying pepper)
2 small zucchini

As soon as I got in the front door I turned on the oven, ditched my coat, kicked off my shoes, grabbed my apron and unloaded my haul. I sliced everything up to about 3/8" thick slices and spread it all out onto 2 parchment lined baking sheets, drizzled and brushed it all with olive oil, sprinkled a bit of  sea salt  and a several grinds of pepper.
Now my roasting technique is a work in progress. I am more and more inclined to go low and slow, but have yet to employ this method with eggplant and carrots on the same baking sheet. This batch went into a 400 degree oven for 30 minutes. I tossed everything around, switched the baking sheets around and set the timer for another 15 minutes. Things got dark, but I absolutely loved the slightly crispy edge that it gave everything and the flavors were all pretty damned tasty.
I ended up with about 4 cups of roasted vegetables. The next morning, half  got chopped up and tossed into a fried rice & quinoa bowl topped with a poached egg and later on, lunch was this tartine.

Dijon mustard and shredded parmesan is stirred into soft butter and then spread onto the sliced bread, then placed butter side down into a hot skillet. Lay thin slices of cheese onto the bread. I found that I can control the cheese better when I use a vegetable peeler to shave the cheese and carefully place the shards onto the bread-I used to grate the cheese but no matter how hard I tried, I'd end up with melted cheese glued to my skillet. I've started using better cheeses and that just won't do anymore.
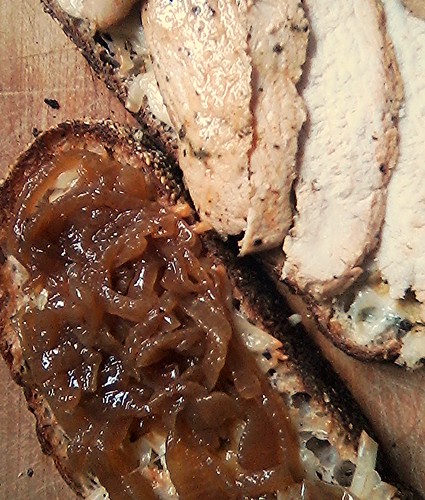
For this tartine, I used Bellewether Farms Carmody cheese, a semi-soft buttery table cheese. For my grilled cheese type sandwiches and tartines, I like to finish the melting in the broiler, so when the bread is all golden toasty on the bottom, move  the whole skillet (if it's oven-proof) into the oven/broiler or transfer the toasts onto a broiler proof baking pan. I like the cheese a little browned on top. This only takes about 2-4 minutes depending on your broiler so stand guard.
Remove it from the broiler and lay your vegetables on top, pressing a little so they sink into the cheese. Sprinkle with a little grated parmesan and place it back in the broiler for another minute to melt the parmesan.

Sunday, September 29, 2013

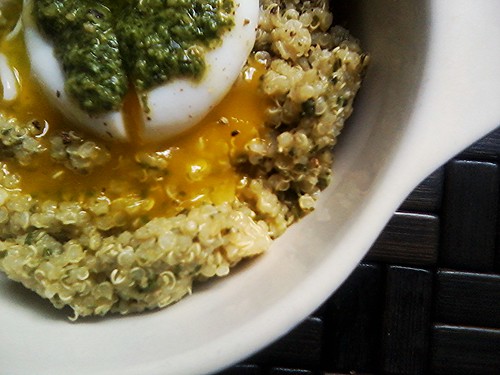
Quinoa


Quinoa, originally uploaded by michele wynne.
I had this paltry remnant of quinoa lingering in my pantry from a previous Rainbow bulk binge. It would still be there if I hadn't opened up my goop newsletter today. GP has a lot of good rice bowl concoctions in which she combines brown rice with quinoa and then tosses in or tops it with any number vegetables and what-not. Somehow I bounced myself around the blogosphere and ended up jotting down the steps for "How to Make Quinoa Without a Recipe" from a source I forgot to note. I thought it was Food52 but I couldn't find it anywhere.
It goes something like this:
First and super important: RINSE! I forgot to do this once and the result was  bitter.
Put the dried quinoa in a mesh strainer and blast well with water.
Whatever amount of quinoa you're cooking, you'll want to double that volume with water or stock (I love Better than Bouillion Low Sodium Chicken). One cup of dried quinoa yields 3 cups cooked.
I start by boiling a kettle of water and pouring it into a pyrex measuring cup. Stir in the bouillion,
Add a smashed but in tact garlic clove and a good pinch of salt. I drop in a sprig of rosemary and let it steep for about 10 minutes. Fish out the rosemary and pour the liquid into a pot. Bring it to a boil and then reduce the heat to low and simmer for 15 minutes, until the liquid is absorbed and the little white rings have popped up. Turn off the heat. Fish out the garlic (you can chop it up and add it back in) and stir in some finely chopped scallions (1 for each 1/4 cup of dried quinoa).
Add a couple of generous splashes of vinegar, about 1 tablespoon per 1/4 cup of  dried quinoa.
Fluff with a fork. Taste and add more salt if necessary.
Let it sit until cooled and the add in more finely chopped herbs, a drizzle of olive oil and some black pepper.
This is great on its own and left in the fridge to have on hand.
 
Combined with cooked brown rice, it's a great host for:

chopped roasted or grilled vegetables
corn kernals
chopped cherry or heirloom tomatoes
chopped cucumbers
avocado or peppers
marinated vegetables
toasted pine nuts or pepitas
crumbled feta or blue cheese
 
My favorite thing is to have cooked rice and quinoa on hand for any greens like kale and chard that I can rescue from the produce bin at work. I just cut up the greens and sauté then with garlic, olive oil, salt and red pepper flakes and I've got a meal in just minutes.
The next morning a poached egg and shaved parmesan make an awesome breakfast bowl. I made pesto thanks to a basil rescue a couple of days ago.

Saturday, September 28, 2013

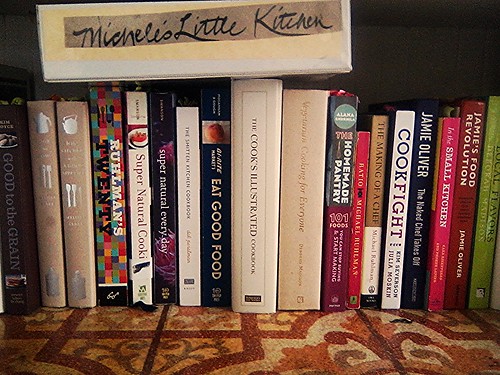
20 Cookbooks


20 Cookbooks, originally uploaded by michele wynne.
This is what it comes down to as I've attempted to tame the beast. It seems funny that 10+ years ago, when I first took over this little kitchen, I rarely cooked at all. I had five times as many cookbooks. Books I started collecting 25+ years ago, then paying the postage to ship them when I moved to New York, accumulating more and then U-hauling it all back across the country to end up here and onto a very tall Ikea bookshelf that I had shoved up next to my refrigerator, where they continued to grow.
Once I really started to cook, I realized the unwieldiness of it all, started  a very traumatic purge and a somewhat successful moratorium on the acquisition of new or used cookbooks. Fortunately, I live two blocks from my library and manage to get my mitts on as many new and amazing cookbooks as I can carry.
Now I ask myself: why did I hold onto the ones I did and what provoked me to bargain my way out of the moratorium ( promise to self : new one in an old one goes)  and purchase new cookbooks (there was the occasional Amazon browse after one too many margaritas)?
Only two cookbooks have survived all the purges. They came my way forever ago during my Cookbook Club phase some 20+ years ago when I wasn't even thinking about healthy cooking, much less vegetables. Both by Deborah Madison: Vegetarian Cooking for Everyone and Local Flavors.
What I find amazing, if not down-right ironic, is that the subject of both of these cookbooks are a huge part of my life now. A greater knowledge of vegetables and local produce are a central focus of my job.
So, I have only just decided that I will (when not just tossing together something from my own head)cook only from my shelf books starting with my Madisons. Stay tuned.

Wednesday, September 25, 2013

Not quite an old shoe...


roasted vegetable magic, originally uploaded by michele wynne.

...but close. Here is where I obsess over illustrate the amazing transforming powers of my favorite roasted vegetables.

I can't think of anything that brings me more joyful anticipation (well, besides Disneyland) than shopping at Rainbow, a not-so-nearby, ginormous, grocery co-op that features an impressively massive bulk foods area.

This is just way cool.


Once I get home with my bags of beans, lentils, flours, teas, spices and nuts, I have to go to town on the pantry. The afternoon is spent freeing up big jars, transferring remnants into smaller jars and making new labels. I love making new labels. Yes, I'm a geek.
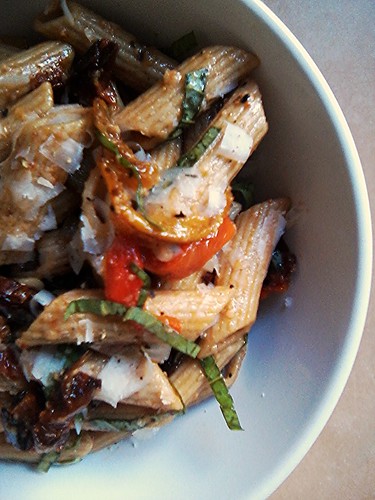
I'm also left to ponder the fates of questionable remnants.  You see, until today, I've neglected to date anything. So whilst scrounging for containers, I found a jar holding a mystery whole wheat ziti. First off, I have no idea what on earth even possessed me to buy whole wheat ziti to begin with. Perhaps it was back in the day before I thought that Whole Foods was the devil and found it on sale at the same fleeting moment I went on a healthy eating mini-tangent and thought whole wheat pasta was a good idea. I have no idea how long it's been sitting on my shelf. It wasn't even in the pantry, it was on a shelf by the window. Sitting out in broad daylight for what has to be at least a year. I think I put it there for decoration, although I can't imagine why I thought ziti, the color of wet cardboard, would be decorative. I almost tossed it, but thought better of that because I loathe throwing food away, so I cooked it. I had no plan for it when I threw it into the pot. I just wanted to see if it was palatable. It was. Just barely. It wasn't great but it didn't suck either. It wasn't quite an old shoe.
I hesitated this next move, sacrificing my dynamic duo, but what the hell. I chopped up and stirred in the last of my roasted peppers and tomatoes <sniff>, freshly grated Parmigiano Reggiano, a couple of pinches of salt, a few grinds of black pepper and fresh basil. It was pretty damned good.
This would just KILL on homemade pasta! Oh yeah, and at the risk of sounding like a broken record, the other great thing about these roasted vegetables is the olive oil that you use to store them in is super flavorful. It's already sauce.

Wednesday, September 18, 2013

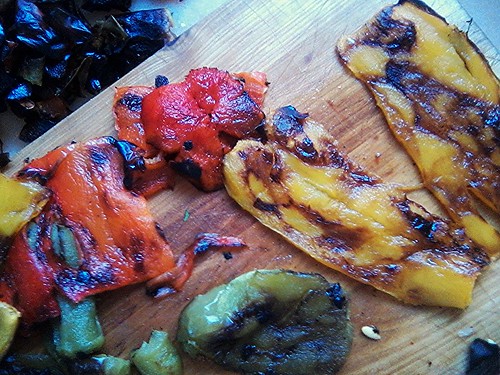
roasted pepper medley


roasted peppers, originally uploaded by michele wynne.
On the heels of my previous post, having used up The Three Amigos and feeling a little lonesome for any one of them, three sad peppers appeared before me.
The market where I work has a big grey plastic box of free, sad produce. It sits by the time clock, sometimes spilling over with produce past its prime, a final plea for a chance to be part of your dinner tonight. Occasionally it's odds and ends of produce that just didn't pass muster from the get-go,  technically fresh but not so pretty, the rest is pulled from the floor when it gets a little too funky for the gorgeous bountiful harvest in the market, but not funky enough for the compost bin. The best of the funky get nabbed by the produce peeps, the rest gets left for any staff willing to give it a go. I always snatch up the peppers, hoping to accumulate enough for a pepper roasting. This bunch almost got away from me, forgotten in the produce drawer and suddenly requiring CPR. I was pondering bedtime just prior to flipping on the broiler. 15 minutes later, these amazing roasted peppers began life anew. 
The very next day, as luck would have it, I was in the right place at the right time when my produce gal turned me onto a bunch of sad plum tomatoes.
This dynamic duo could make an old shoe taste good.
 

Wednesday, September 11, 2013

polenta with slow roasted tomatoes...

The upside to being broke is the surge of creativity poverty evokes. The work week pretty much takes care of itself but the days off are where the challenge lays. Typically on those days the little kitchen is a flurry of activity. First the big clean up, fridge and pantry are assessed, cookbooks tagged, foodie websites scoured and email newsletters are perused for more inspiration, and lists are made. 
In the lean times, The Three Amigos are a girls best friend in the kitchen.  This is an amazing trio of condiments that include slow roasted tomatoes, caramelized onions and roasted red peppers. They are cheap to produce and once the prep is done and the peppers are roasted, you can leave the rest alone and go do something else. So for all of about $6.00 I bought 4 pounds of cheap supermarket plum tomatoes (super low and slow roasting transforms cheap flavorless tomatoes), 5 large yellow onions and 3 red bell peppers.  
I like to roast peppers in the broiler. I cut the top and bottom off the pepper, slice the pepper open, remove the seeds and rib, and cut the pepper into 3 or 4 pieces so that they lay down flat in the broiler and will blacken evenly. Remove the green stem from the top piece and lay the two ends in the broiler as well. Keep an eye on them, checking them every 5 minutes. When the skins are all black, remove them and turn the oven down to 250 degrees. Put the peppers into a bowl and cover tightly with plastic wrap and let them steam for about 5 minutes. Lay the pieces on a cutting board and peel the skins off. I use a cheap serrated steak knife and scrape the skins off while using a fork to hold the piece in place.
To roast the tomatoes, slice them in half lengthwise, brush with olive oil and sprinkle a bit of salt on top.  Lay them on parchment  lined baking sheets and roast in a 250 degree oven for about 3 hours. This really depends on the size and quality of your tomatoes. The larger and more watery the tomato, the longer it will take. They will shrink significantly, but there should still be a little burst of super delicious, intense juice when you bite into it. I cooked this batch a little too long and many of the edges were tough. They wouldn't be so great on a sandwich, but were perfect cut up and mixed into this polenta.
The peppers and tomatoes can be stored in airtight jars covered with olive oil for up to a week. I love to use the flavored olive oil for scrambling eggs.
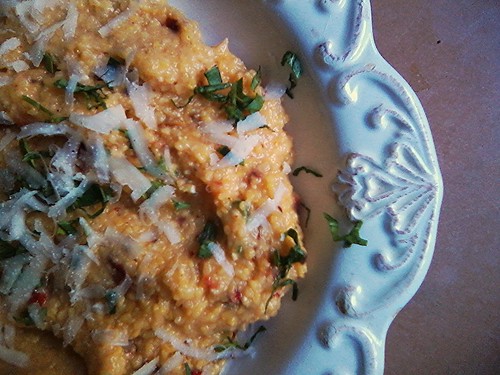
In a moment I can only attribute to serendipity, I opened up my weekly America's Test Kitchen newsletter the next morning to find a gorgeous Creamy Cheesy Polenta staring at me. Oh yes. I pictured the jar of polenta in my pantry, made a couple of notes and I high tailed it home. I took 2 tips from ATK. I used more water and added baking soda (this apparently works on polenta the way it does with beans). It wasn't until the polenta was done, that it occurred to me to add some chopped up roasted tomatoes. I didn't think polenta could get any better. 
I like to cook polenta in a broth made with Better Than Bouillion (low sodium) and a sprig of rosemary, both optional
 
Creamy Cheesy Tomatoey Polenta
adapted from America's Test Kitchen
 
7 1/2 cups water
 1 1/2 tablespoons Better Than Bouillion (optional)
sprig of fresh rosemary
1 1/2 cups dried polenta (don't use the quick cooking kind)
1 teaspoon sea salt
a couple of grinds of pepper
1/2 teaspoon baking soda
2 tablespoons butter
1/2 cup parmesano reggiano
5-6 roasted tomato halves, chopped
2 tablespoons chopped roasted peppers
a bit more salt to taste
a bit more pepper to taste
a poached egg perhaps 
finely slivered basil for garnish
a little shaved parmesan for garnish
 
Bring the water to a boil, stir in the bouillion to dissolve and toss in the rosemary sprig. If using store bought rosemary (which can be dry and prone to start shedding spindles), lower the heat to a simmer for about 10 minutes to extract some flavor  from the rosemary then remove it and any errant spindles before adding the polenta. If you've just snipped it from the garden it will stay in tact and you can fish the whole thing out later, there may be a few spindles, I turn up the heat and bring to a boil again, stir in the salt and baking soda. Slowly pour in the polenta while gently stirring with a flat edged wooden spoon. Turn the heat to low, cover the pot and leave it alone for 5 minutes.  Remove the cover and whisk out any lumps. Cover again and leave it for 20 minutes, or until the polenta has absorbed all the liquid and is tender.
Stir in the butter until it melts. Stir in the cheese. Taste. Add a few pinches of salt, stir and taste until the cheese really sings. You can stop right there...buuut if you're me, you toss in those tomatoes and roasted peppers. Stir, taste, salt, stir, taste until the tomatoes shine through and you've convinced yourself of your genius.
Try to resist just shoveling this into your gob straight from the pot while still standing over the stove.
Poach yourself an egg and slice up a little basil. Spoon the polenta into a bowl, top with the poached egg, crack some pepper on top, shave a little cheese over that and finish with a sprinkling of basil. Done. Done. And. Done.
Oh and purely pure coincidence, after this post was done, I Googled slow roasted tomatoes to get a fix on oven temps and lo and behold,  number one was Smitten Kitchen with this gorgeous post from her archives.

Saturday, September 7, 2013

a tale of two kitchens

a tale of two kitchens, originally uploaded by michele wynne.
I've endured months of construction as the old house outside my kitchen window was gutted and glammed up to it's current asking price of 2 million dollars. It's show-time, the weather is currently perfect and the realtor flings the patio doors wide open.
I spend a lot of time in the kitchen, especially on my days off. I can spend an entire day there. I crank up the music while I plan, create and eat and while I'm eating, I'm thinking about what I'm going to cook next. My kitchen is a disaster...most days. I can, and have, used every pot and bowl and mixing tool I own. The dishes, pots, and pans pile up precariously in and around the sink, on the stove top and around my cutting board. I'm like the Tazmanian Devil in the kitchen. When I run out of surface space I create new ones by putting a cutting board or baking sheet on the stove top or on top of my dutch oven. It's ridiculous. Of course, that means I spend a lot of time at the kitchen sink...looking out of this window...into a very  different kitchen.
A few feet away, is a mega-modern, brand spankin' new, Architectural Digest worthy kitchen. Along with it's fancy Thermador appliances, walnut cabinets, stone counters and track lighting, it's all tricked up for show- complete with a cookbook propped up in it's clear acrylic stand along side a tall, thin green bottle of olive oil in the middle of an expansive grey stone counter top. That kitchen is perfection with it's open plan and breakfast bar. It tries to mock me, but I won't let it.
The little kitchen is old...really, really old. It looks like a rustic little farm kitchen. Just to the right of the window, is my pantry cupboard. It's narrow and runs floor to ceiling. It used to be an ice-box. The little kitchen needs an industrial power clean and a paint job. The tiles are cracked, the grout is black and the cupboards either stick or slowly creak open. The windows don't close properly and the refrigerator puddles and generates loud rumbling farts in the middle of the night.
It's a crappy little kitchen but it suits me. I wonder how my Madonna sing-alongs will go over with new neighbors.


Wednesday, August 28, 2013

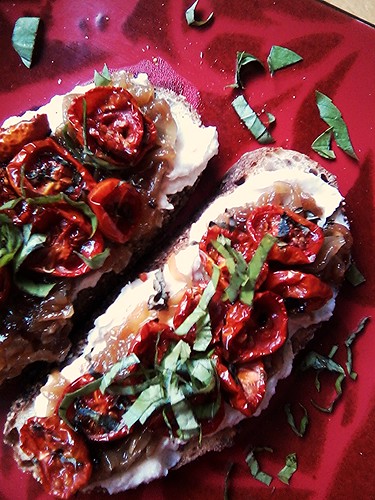
white bean, slow roasted tomato and caramelized onion tartine

I'm mad for tartines. I like the word tartine. It sounds posh but its not. Its nothing more than an open-faced sandwich,  a piece of toast with a pile of stuff on it. Essentially the components of a good tartine start with a nice slice or two of country loaf toasted and rubbed with a piece of garlic. Next I like some kind of spread, it needs something to anchor the other components. It can be a spreadable cheese, pesto, egg salad, hummus, nut butter or a mashed avocado.  Next would come a vegetable, fruit or deli sliced meat perhaps and then finished with something like balsamic vinegar, honey, sea salt, freshly cracked pepper and some freshly chopped herb. The possibilities are endless. Here's what I used today:

White bean spread (my favorite from Super Natural Every Day)
caramelized onions
roasted tomatoes
fresh basil
Maldon sea salt

I like to cook up big batch of caramelized onions because they are so freaking good and can turn the simplest omelet or sandwich into something amazing. This would have been fine with just the spread and the onions.
There are many different and conflicting approaches to caramelizing onions. I came across this article awhile back that really hit the nail on the head about how and why recipe writers mislead the reader into thinking that the process of caramelizing onions is quicker than it really is.  The articles conclusion states that "the best time to make caramelized onions is yesterday". Ina Garten's approach is "turn your back on them". Low and slow is the key.
I found this yesterday. It's a "How to" blog post with great process photos. I can't even begin to express the beauty of caramelized onions. They're inexpensive, you'll sharpen your knife skills in no time and they practically make themselves.
My next favorite fridge staple is the white bean spread I seem to always have on hand these days. In addition to it being super good, after work, late-night snackage with some baked pita chips, or just spread on my toast, it makes a perfectly awesome bed for holding onto those gooey good caramelized onions and sweet little slow roasted tomatoes. Topped off with some slivered basil and a sprinkle of maldon sea salt and this comes together in no time, providing you've already got your onions in the fridge.  I was finishing them off this morning and I noticed a box of cherry tomatoes I'd forgotten about and in need of urgent care.
To slow roast tomatoes, slice them in half and lay them, cut side up on a parchment lined baking sheet. Brush them with a little olive oil and sprinkle with Maldon sea salt. Roast them at 350 degrees for about 30 minutes. Again, a low and slow approach to roasted tomatoes has its merits too. In Gwyneth Paltrow's first book she roasts plum tomatoes at 200 degrees for 4 hours.  Slivered basil  and Maldon sea salt posh it up

Friday, August 23, 2013

The Ultimate Grilled Cheese Sandwich

I'm obsessed. I know it, but nothing makes me happier than the grilled cheese sandwich. Just thinking about it makes me all twitchy, especially when I know I've got all the goods in the little kitchen to get this going.  I really wanna go home and make this right now. So I'll make this quick.
After much R & D, I've come to the conclusion that I really like blue cheese in my UGCS along with a Gruyere. I bought a buttermilk blue cheese at work a couple of weeks ago that had just enough bite, it was juuuust right. Because it's not enough for me to dive into the blue cheese, I also love Dijon mustard on my UGCS.
 
So it goes like this:
1. turn on the broiler.
2. Pull out a skillet
3. Butter 2 slices of bread
4. grate and/or crumble your cheese(s)
5. Pull out that jar of caramelized onions you keep on hand-you do that right? nuke a pile of it.
6. Heat up the skillet and lay in the bread, butter side down and pile the cheeses on each half.
7. When the bread is all golden toasty, transfer the cheese covered slices onto an oven-broiler proof pan and place it under the broiler until the cheese is all melty and slightly browned on top. This only takes a minute or two.
8. If you have any sliced lunch meat or leftover grilled chicken or bacon, dump it in the still hot skillet and heat it up
9. When your cheese is melted and maybe even a little browned on top, remove it from the oven, place your sandwich halves on a cutting board and lay some onions on one half, meat on the other half and swipe some Dijon across your meat side and close the book on your sandwich. Slice in half and admire the layers for a second and dig in.
 

Friday, August 16, 2013

white bean spread and rosemary pita chips

Mission accomplished!...aaaannnnd several firsts. Busy baking pita chips and whizzing up this killer bean spread for the high school reunion picnic on Sunday. It was the first time I've been to one. 35 years! Yikes-I just hope it's not a bunch of old people sharing the deets of menopause and colonoscopies. Hmmmnnnn...was bean dip the best choice? I did soak them over night and cook them with kombu (a strip of kelp that's supposed to aid in bean digestion), another first.
It's the first time I've amped it up for what I'm told will be about 25 people.  I hijacked a little for my lunch. It's from from Heidi Swanson's (ms. 101 CookbooksSuper Natural Everyday. It's turned out to be such a crowd pleaser. Super simple. Super budget friendly and just plain good. This is a link to the recipe. Now I've got to figure out how to transport it all on my bike.

Class of '78

t
Class of '78, originally uploaded by michele wynne.
Behold the unsuspecting recipients of some little kitchen magic.
A day late for Throwback Thursday, but as usual, I'm a little late to the party. That's just how I roll. The party in question is my high school reunion picnic coming on Sunday. My initial reaction, when the reunion committee tracked me down a few weeks back, was "yeah...as if..." to just quietly pass. But, curiosity got the better of me and I have no reason not to go. I've got the day off and live a bike ride and short BART train away.  I was "The Quiet Girl". That phrase turns up a lot in my yearbook.
I started high school a stranger in a strange land.
At this moment, I'm sitting at my favorite table at Simple Pleasures blanketed in the comfort of San Francisco fog. "Lo....Ri....Der" plays on Pandora. Is it me? or has a 70's retro music demon possessed Pandora? I can't remember how many times I've heard "That's the Way of the World" in the last week. I took that as a sign that it would be foolish not to RSVP. Get. Out. Of.  My. Comfort Zone.
I finally got my mitts on David Sedaris' new book Let's Explore Diabetes With Owls, courtesy of my public library. My copy of Me Talk Pretty One Day is the most re-read book on my shelf. Whenever I see a copy at Goodwill, I buy it so I can give it to someone. I love his crazy twisted humor and the leaps his mind takes is completely off the rails yet entirely relatable. Whenever I'm into one of his books I tend to ask myself the question WWDSD? when pondering certain situations I find myself in. DS would be all over that HS reunion.
I've got a giant pot of beans in the slow cooker and a pile of pita bread to be baked before I pedal off to work this afternoon. I'm making bean spread. It only just occurs to me that serving beans to a bunch of 53 year olds has some DS humor/disaster written all over it. Good thing were gonna be outdoors.


Friday, July 19, 2013

lemony kale caesar salad and little kitchen inspiration


In the little kitchen, originally uploaded by michele wynne.
If anyone had told me, even a year ago (when my go-all-out new kitchen philosophy was transforming the little kitchen), that I would eat, much less purchase, and be happily fileting anchovies in my kitchen, I would have told you you were ca-raaazy.  But, as my palate evolves, so does the little kitchen. Remarkable things have occurred in recent months that continue to enlighten and confound the little kitchen almost daily.
I'm currently reading "The Omnivores Dilemma" and I'm trying to wrap my brain around the whole corn thing---eeek---and pondering the last 3 months that have been the speedy blur of information, education and inspiration as I close in on my first 90 days as an employee at the amazing Bi-Rite Market. Not only am I happily over-whelmed by a dazzle of wonderful food products, I'm inspired by a great bunch of people. The first being Sam, the owner. Sam took over the family business in  1996 and transformed it into a brilliant specialty food market. I've never met anyone so passionate about food and feeding people as Sam. Sam has about 275 employees and knows and greets everyone by name. He personally handed me a birthday card last week and thanked me for my work. That was unprecedented in any place I've ever worked.
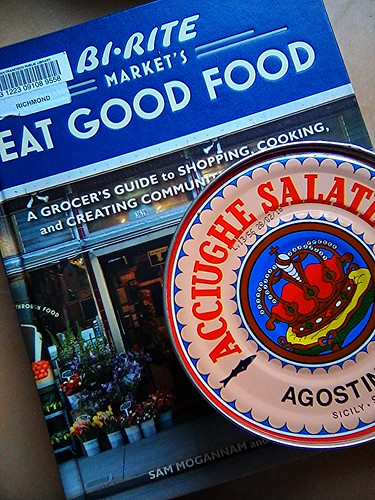
The card contained a gift card and I immediately knew what I was going to use it for...something I'd never remotely consider dropping $20 on. Ever. I bought a can of imported Italian anchovies. This didn't just come out of nowhere. A few weeks ago, I took a cooking class at 18 Reasons, Bi-Rites non-profit educational space.  It was a class on sauces. We made Bagna Cauda, an amazing sauce featuring anchovies lightly cooked with garlic and butter. The finished sauce is primarily used as a dipping sauce for vegetables, either raw or cooked. I was also informed about the goodness that anchovies bring to pasta sauces and salad dressings.
This is what I learned about anchovies: Salt packed anchovies have a more intense flavor (I found this true of capers as well) The big can in the picture contained about 20 whole anchovies. Once the can was opened I transferred everything into two airtight jars and packed in more coarse sea salt. When you're ready to use them, rinse the salt off and then place the anchovies in a bowl of warm water for about 20 minutes. This draws out more salt. Cut off the head and tail, then draw the tip of a sharp knife down the back of the anchovy just to make a shallow cut, carefully open the anchovy to reveal the skeleton and lift it out. I then scrape the silver skin off with the knife. Mince up the anchovy and it's ready to go in the sauce or dressing you're making.
I'm all about kale right now, so I made the Lemony Kale Caesar Salad from Eat Good Food which seemed like the perfect place to start with my anchovies and it happily surpassed my expectations. I made a very large bowl of it and the leftover salad was just as tasty as it was freshly made.  Coincidentally I got the latest Bon Appetit in the mail today which included a bit about the healthy veg benefits and kale is said to have more calcium than 6 ounces of milk and more fiber than 3 slices of whole wheat bread and raw kale has more vitamin C, anti-oxidants and phyto-nutrient than cooked.
So I'm off to make another kale salad.

Lemony Kale Caesar Salad
from Eat Good Food

1 medium bunch of dino kale
2 cloves garlic
kosher salt
2 anchovy fillets, minced (about 1 teaspoon)
1 large egg yolk
2 tablespoons freshly squeezed lemon juice, more to taste
1/2 teaspoon Dijon mustard
1/4 cup extra virgin olive oil
1/3 cup grated Parmesano Reggiano cheese, more for garnish
Freshly ground black pepper

Slice off and discard the stalks of the kale. Stack the leaves on top of each other and then slice the kale into 1/4 inch strips. If you're gonna eat this immediately, I might suggest a little massage at this point to tenderize the leaves a little. I tend to make these kale salads in advance to let the leaves self tenderize in the dressing. Set the bowl of prepared kale aside.
Coarsely chop the garlic, sprinkle with some sea salt and give the garlic a smash and smear with the side of your knife. Transfer into an airtight jam jar or a practically empty jar of Dijon. Add the anchovy, egg yolk, lemon juice, Dijon and olive oil . Seal the jar tightly and shake like crazy. Dip a leaf of kale into the dressing and taste it, adding more lemon juice or salt as desired.
Put the kale into a large bowl and drizzle about 1 1/2 tablespoons of dressing over the kale. Using your hands, gently toss until the leaves are evenly coated.  Sprinkle the cheese over the salad and toss again. Taste and add more dressing or salt as needed. Sprinkle a little cheese on top of each salad plate with a quick grind of fresh black pepper.
 

Tuesday, July 16, 2013

Chicken, Kale & Brown Rice


Chicken, Kale & Brown Rice, originally uploaded by michele wynne.
I am the anti-Gwyneth. I am inspired by her mission to spread healthy eating through-out the land. I truly do aspire to some teensy element of that, if it only be here. Someday? who knows? For now, in my solitary, Kitchen Aid-less little kitchen, I attempt to conjure up good, nutritious food at minimal expense.
So, whilst in temporary possession of GP's latest cookbook, It's All Good, I felt compelled to check out My Fathers Daughter again. I've had my mitts on this cookbook many times, yet this was the first time I zeroed in on the Kale and Brown Rice Bowl. It must have had something to do with  my current obsession with any and all manners of fried rice. So, in my own personal quest at healthier eating, I've put kale (collards and chard, oh my!) at the top of my list.
This is really good. I made a large pan of it and subsequently added  chicken to round out the meal-in-a-bowl concept and I've also topped it with a poached or fried egg and a little grated Parmesano Reggiano for a perfectly satisfying and quickie breakfast.
This is also a little bit of a mash-up of another Kale Brown Rice Bowl recipe I found over at 101 Cookbooks.

Kale and Brown Rice Bowl
adapted from My Father's Daughter
and 101 Cookbooks

1/2 pound lacinato or dino kale, stems removed and sliced into 1/4 inch ribbons
1 1/2 tablespoons olive oil
2 cloves garlic-peeled and minced
1 medium yellow onion, diced
2 1/2 cup brown rice, cooked
1 1/2 teaspoons soy sauce
2 tablespoons za'atar

optional add-ons:
red pepper flakes
cooked chicken
a poached or fried egg
parmesano reggiano
pan fried capers

1. Steam the kale for 7 minutes.

2. Meanwhile, in a large skillet, heat the olive oil over medium high heat and add the diced onions (add optional red chili flakes at this point), a couple of pinches of salt and a grind of black pepper. Cook until the onions are starting to brown and caramelize. Add the garlic and cook for another minute. Add he cooked chicken at this point, toss the pieces around in the pan to heat through, then add the brown rice and kale. Cook and toss until everything is heated through, adding the soy sauce midway through  to deglaze if the pan is getting dry. Finish with small additions of soy sauce to taste.
3. Dish up into a bowl and sprinkle the za'atar over the top.


Monday, July 15, 2013

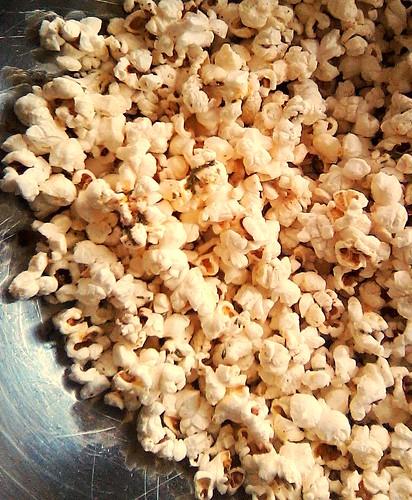
brown butter, rosemary & lemon zest popcorn

I am completely re-obsessed with this popcorn...I can't remember how I was originally introduced to this recipe. I seem to recall it appearing around Oscar time.
A few weeks ago I was looking for some home made movie theater snackage I could smuggle into the waaaay overpriced Kabuki when Sheena and I went to see Before Midnight (I'm obsessed with these films). 
Whoever you are, where ever you are, many thanks. You had me at brown butter. Last night I finished the giant bag of popcorn I bought those many weeks ago. The drill goes like this:
 
2 tablespoons butter
1 tablespoon well chopped fresh rosemary
zest of one lemon
 
2 tablespoons olive oil
1/3 cup popcorn kernals
salt
 
In a small saucepan, melt the butter over medium heat and cook it until it browns, about 5 minutes. Keep an eye on it because it only takes seconds for it to burn. You want to see little brown particles appear in the bottom of the pan. Once that has happened, remove the pan from the heat and add the rosemary and lemon zest. Stir it together and set it aside.
 In a large pot (that has a lid that fits), add the olive oil and 3 or 4 kernals of popcorn, cover, and turn on the heat to medium high. Once you hear those kernals pop, add the rest of the popcorn, cover, and remove the pot from the heat for 30 seconds while shaking the pot to coat and level all the kernals. Return the pot to the heat. The kernals should begin to pop right away. Once the popping subsides and there's about a 3 second interval between pops, remove from the heat and pour the butter mixture over the popcorn and toss to distribute the butter.
Transfer the popcorn to a large tossing bowl (I use my large salad bowl), sprinkle the salt and toss, taste, sprinkle and toss until the popcorn is salted to your liking
.
Of course, this is best when consumed immediately, but for the movie thing, I bagged it up in plastic bags I keep on hand for cookie gifting and sealed them with a twist ties. Way good! 

Friday, July 5, 2013

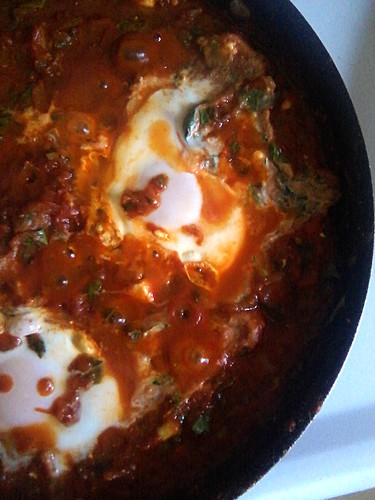
Shakshuka


Shakshuka, originally uploaded by michele wynne.
I saw a gorgeous photograph of this thing called Shakshuka when I finally got my mitts on Jerusalem last year. That was my inspiration to commit to my library cookery books by limiting my bookmarking by editing down to 10 recipes AND copying each recipe long-hand.  Then, as usual, I got side-tracked.
Some roundabout trip through the blogosphere landed me on Smitten Kitchens Shakshuka post and my OCD kicked in and I had to make Shakshuka. Now!  For my 4th of July birthday brunch. Nevermind that I had Ottolenghi's perfectly perfect recipe in my TO DO binder and Smitten Kitchen's also perfecty good recipe saved on my phone, true to form, I spent an entire morning googling a gazillion ways to make Shakshuka. I landed on David Lebovitz's adaption . It involved the least amount of shopping and it was adapted from both my original inspiration, Jerusalem, and Secrets of the Best Chefs (Amateur Gourmets Adam Roberts brilliant book).
The only shopping I needed to do was for the greens (I decided on spinach), chili peppers and caraway seeds. I work in a specialty market and I'm surrounded by foodies of all calibers. As I talked up my birthday/4th of July plans, I don't know what surprised me more: those who loved Shakshuka and those who'd never heard of it. 
Shakshuka is believed to be of Tunisian origin, a dish of eggs poached in a spicy tomato sauce. It's the North African version of Huevos Rancheros or what the Italians call Eggs in Purgatory. It's super simple, budget friendly and healthy to boot. It can be adapted and personalized in endless ways and best of all, the sauce can be made up in large batches and frozen in 2-cup freezer bags to make meals in minutes and its amazing for any meal of the day. Served with a salad and a big crusty hunk of bread, it's dinner...or spooned over a bowl of polenta...oh dear!
This is Smitten Kitchen's adaption which I kept bouncing back to. It's slightly simpler in that it doesn't include the toasting and grinding of whole spices.
 

Monday, July 1, 2013

Mr. Crispy

Lunchtime, originally uploaded by michele wynne.
I can noodle away hours and hours searching for that next best recipe, seeking inspiration and making list upon list of new ingredients to try, cook books to reserve and peruse, restaurants and food shops I want to check out. I hit up my favorite foodie blogs and make more lists. I love lists...making them and then crossing things off them.
A few weeks ago I came across Smitten Kitchen's post about her recent vacation in Italy and I've been thinking about it ever since. She posed this question:

"Where are you going this summer and what can't you wait to eat when you get there?"

I'm not going anywhere, sometimes I think I'll never go anywhere again. But I started a list anyway. Things I would eat in Paris which morphed into Places I would like to eat in Paris. I Googled and Google mapped my way through Paris' eateries.
I couldn't stop thinking of all the travelling I used to do and all the food I didn't eat. I was not an adventurous eater. I dug out the journal from a 1997 trip to Paris that I unearthed during my latest Feng Shui purge. 
I subsisted on a diet of baguettes, brie and beer. There was the occasional addition of  salami (if I came across something that resembled the super-thin slices found in a package of Gallo) when I felt like a splurge. The ultimate indulgence was the rare Omelette Fromage. It's embarassing now to think how delighted I was with myself and my travel saavy resourcefulness, when one day I wandered into a little bistro in the Bastille, later writing, "Where else can you get a sandwich and beer for $4.00!?!?!" Yes, part of it was frugality but I was also the pickiest eater ever. That was my biggest challenge when I travelled. In the Greek Islands, when all of my friends were gorging on calamari, I was eating French fries dipped in Tzatziki sauce.
 What I wouldn't give now to be able to eat my way through Paris. Trying as many classic dishes as I could.  As things stand now I'd have win the lottery or charm a wealthy patron. I have this ridiculous illusion that one of my moneyed chums would be so desirous of my personally tweeked guidance through the arrondisements of Paris that they would insist on our funding a gastronomic assault on its bistros and brasseries.
I would start simply. My current obsession with the Croque Monsieur would be my jumping off point.

#1 Croque Monsieur and Croque Madame: I wouldn't have touched either of these with a ten foot pole back then because I didn't like ham and the whole egg deal in the Croque Madame grossed me out...and the béchamel sauce? What the hell was that all about? Sheeesh!

#2 Boeuf Bourguignon: It was probably out of my budget range back then but even if it weren't I would have been afraid of biting into big fatty hunks of meat. That would have totally grossed me out.

#3 Coq au Vin: see #2
#4 Ratatouille-well...the eggplant.
#5 Yes! I would eat Escargot now! I've never eaten it but if I were ever to get to Paris again, I would do it.

I have been inspired to prepare some of these classic French dishes. First up:

Le Croque Monsieur
(this translates as the Crispy Mister)
It's still a work in progress (I've yet to attempt the béchamel version I've bookmarked in The Barefoot Contessa in Paris) so far, it goes a little bit like this:

2 slices of bread
butter
1/2 cup cheese (gruyere, emmentaler, gouda-anything flavorful that melts well) grated
2 slices of smoked ham-I've also used smoked turkey
caramelized onions
Dijon mustard
Turn on the broiler and on the stove top heat up a skillet on medium high heat. Butter  a couple of slices of bread and place the slices butter side down onto the hot skillet and pile on some grated cheese and cook until the underside of the bread is toasty and golden brown. Transfer the cheesy toasts onto a broiler proof pan and broil a few minutes until the cheese is all melty and bubbly.
Toss a couple slices of cooked Virginia ham into the still hot skillet to heat through then lay the slices on one side of the sandwich and caramelized onion on the other half, just as you remove the pan from the broiler. Spread a little or a lot of Dijon mustard on the ham side and sandwich your two melty slices together and slice in half and you're good to go.

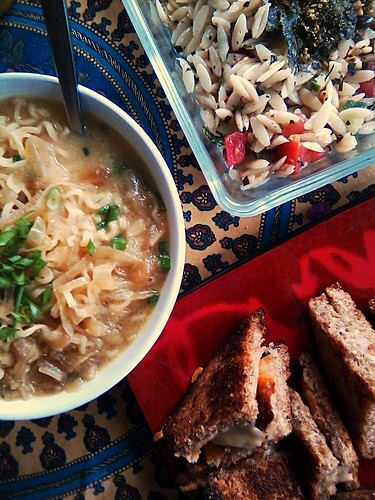
I've made this a couple of times now and it's off-the-hook good. So good I failed to get a decent picture of it. The meal in the photo is a simple grilled cheese sandwich. The Scallion Ramen soup was a concoction I came up with when cleaning my pantry and discovering 3 packages of Top Ramen. I tossed out the flavor packet and made my own starting with a base of Chicken Better Than Bouillion and adding miso, fish sauce, caramelized onions and scallions then tossing in the noodles to absorb all of those great flavors.
The Orzo Salad is topped with a brilliant Salad Booster from 101 Cookbooks.


Wednesday, June 12, 2013

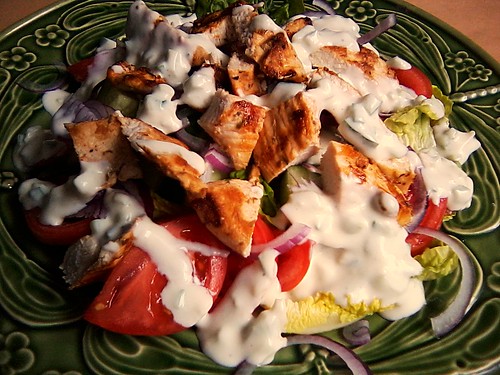
Chicken Gyro Salad


Chicken Gyro Salad, originally uploaded by michele wynne.
I suppose (were I such a person) I could have just as much of a reason as anyone to hate Gwyneth Paltrow, but I don't and any of you who read this blog knows I am not amongst those in the anti-GP camp. I am, however, the Anti-GP. I am GP's polar opposite- 10 years older, 20 pounds over-weight, solitary in a studio apartment,  broke, in a broke-down kitchen with zero counter space and perpetually overwhelmed by a sink full of dishes. I buy supermarket sale tuna, honey from The Dollar Store and t-shirts from Goodwill. There is not one element of her life and lifestyle that I can relate to or say I've ever had in common with her. Except food, and my growing desire to cook healthier food. I love her cookbooks. I subscribe to goop and enjoy reading it. Mostly. I really could care less about the clothing and merchandising. I do feel envious of the travel though. I used to travel all the time. Now? not at all.
Yet, when I think how close I was to deleting the recent goop newletter from my overflowing inbox the other day...well, I feel almost guilty and ashamed after having been so pro-Gwyneth in my admiration of her latest cookbook (which I currently have my mitts on thanks to my local library).  I wasn't going to open it. It was one of those days when I just wasn't up to it. I did it anyway and as luck would have it, it turned out to be the smartest and most remarkable thing I did that day. I unearthed  a wonderful new keeper recipe and that is to be celebrated.
In her post about street food, scrolling down a bit I found this  Chicken Gyro Salad  and I couldn't wait to make it. I immediately pulled 3 chicken breasts I had in the freezer to defrost and did a little grocery shopping at work that evening buying just enough for my solitary salad:
 
1 little gem (the perfect lettuce heads for single serving salads)
1 large heirloom tomato
1 mediteranean cucumber
1 red onion
1 lemon
1 8oz. container of greek yogurt
 
I prepared the chicken and marinade just before I went to bed and cooked it on a grill pan for lunch the next day.
I thought it only fitting to use the left-over chicken in her Brown Rice and Kale  bowl (from My Father's Daughter) when trying to find a quickie dinner later that night. I topped it with the leftover tzatziki dressing. If I'd thought to buy pita bread, I would have made gyros with the leftovers. Next time. There will be many next times. I already have another batch of chicken marinating in the fridge right this very minute.
Thanks GP!