Sunday, May 25, 2014

Mayonnaise

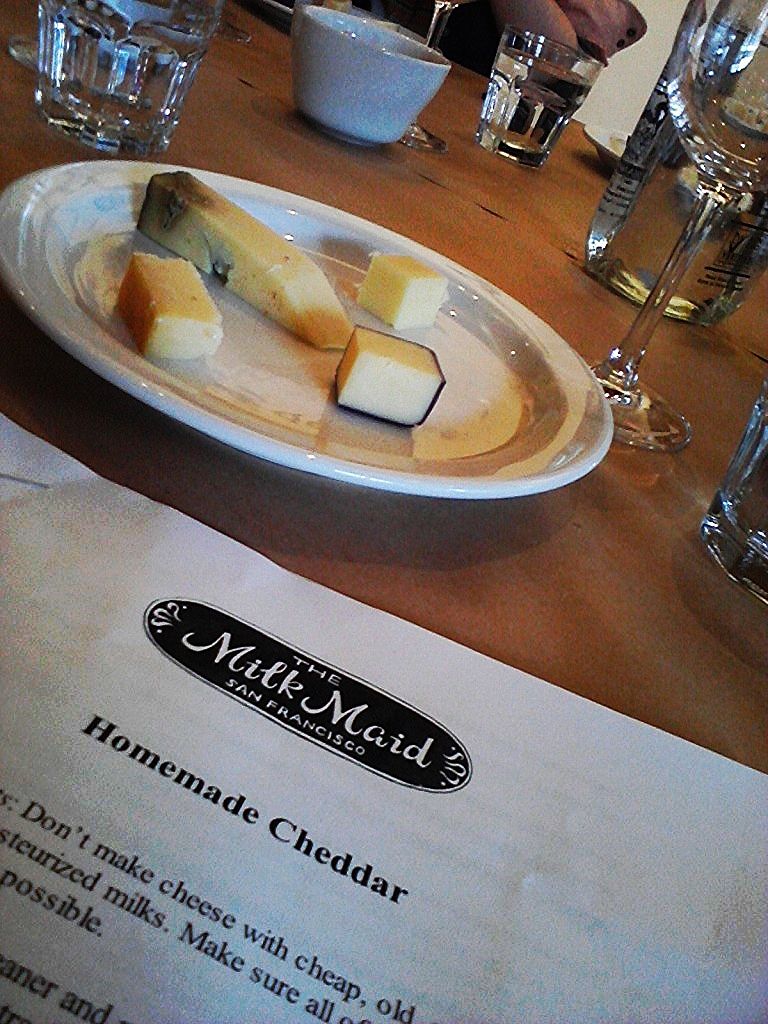
Mayonnaise has it's lovers & haters. I was neutral like Switzerland. Lovers are generally divided into Team Hellmans/Best Foods or Team Miracle Whip. Back when I used to purchase commercial mayo I would probably be on the bench for Best Foods, not my go to condiment but useful at times.
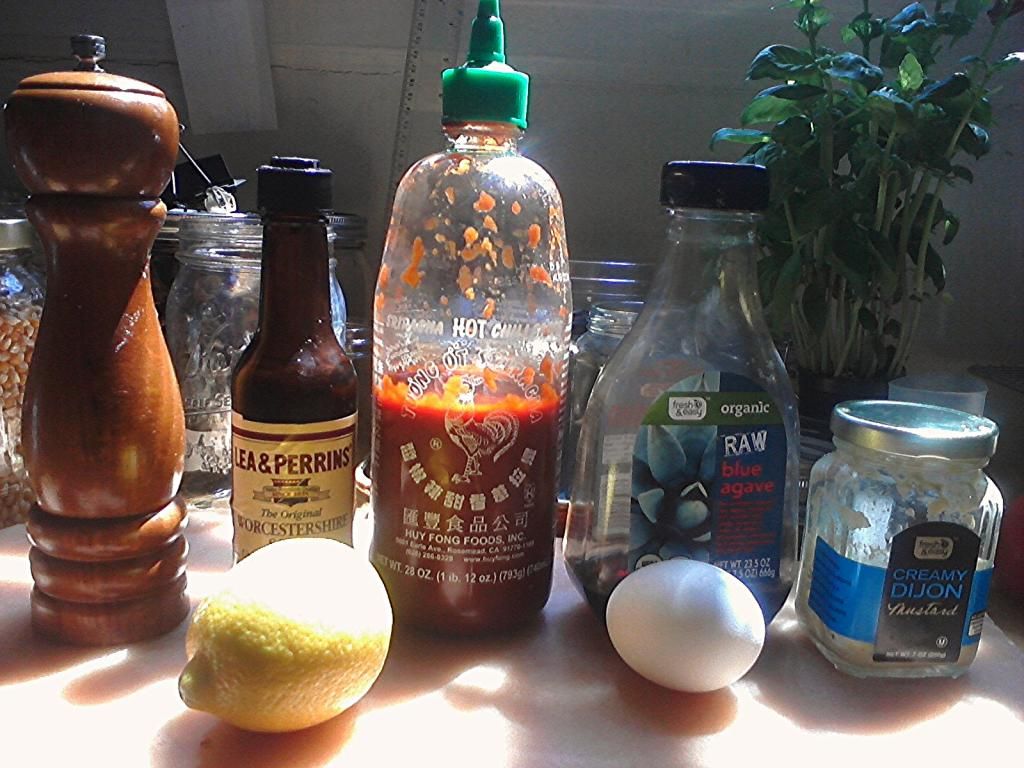
A couple of years ago I caught an episode of America's Test Kitchen where Julia was making mayonnaise to go into a potato salad. I thought, "how easy is that?" I had all the ingredients on hand and had just been pondering an egg salad for my morning bagel but had no mayo and I was seriously intrigued by ATK's choice of ingredients using Tabasco & Worchestershire. I subbed Sriracha since I had no Tabasco.
That serendipitous moment propelled the little kitchen to much greater things.
My tweaks to the original recipe continue to be Sriracha only because it'll take me 2 more years to finish that bottle, a squeeze or two of Agave Nectar added at the very end-I like the honey mustard flavors in my finished mayo. I also amp up the Dijon 'cuz I love it. The final steps: add a big pinch of salt & blitz. Taste. Repeat if necessary.
Some tips:
Use a neutral vegetable oil. Olive oil is fine but make sure to taste it first to make sure it's not bitter. My first few attempts at this were foiled by the inexpensive supermarket extra virgin olive oil that I didn't realize was so bitter. It's fine to cook with, but mayonnaise is something like 75% oil-Use something that tastes good on its own.
Use a good quality organic egg if you're freakish about Salmonella. I've made this in the past with cheap supermarket eggs and lived to tell the tale.

Homemade Mayonnaise
adapted from America's Test Kitchen

into your food processor/or mixing bowl:

1 whole large egg
salt & pepper
2 teaspoons lemon juice
dash of Tabasco sauce or Sriracha
dash of Worchestershire Sauce
1/4 teaspoon Dijon-I use a whole teaspoon because I love Dijon-stick with the original measure if you prefer a more neutral mayo. 

Process or madly whisk until it's light yellow.

Sloooowwwwly drizzle in 1 1/4 cup vegetable oil whilst continuing to whisk madly or: see that tiny hole in the middle of the feed tube pusher thingy in your food processor? That's what it's for. Fill that tube with the oil and continue until your measuring cup is empty while the food processor is going.
As soon as the oil is mixed in, taste it. This is where I like to drizzle in some Agave Nectar to give my mayo the honey mustard flavors.
Adjust the taste to your liking by adding pinches of salt, more lemon juice or more hot sauce.
This is great to play around with.


Thursday, May 8, 2014

savory layer cake

The sign of a successful new recipe, or more likely just my kitchen OCD, is when I'm already planning my next shopping list so I can immediately make it all over again-knowing full well that it will take me 2 or 3 days to finish the dish that's sitting right in front of me. I mean, you can never have too much of a good thing...can you? I tell myself "At least wait until day 3 and see how it holds up to the reheat".
I can attest to the fact that this just gets better. I heated a fat slice of it last night after getting home from a crazybusy day and working the closing shift at the market. I was famished by the time I pedaled my bike home and up that last hill that seemed to go on forever...grateful to have this ready to go and thankful to my wine buddy at the market for the remains of a bottle of Pinot Noir. I cracked open a new mystery I picked up from the library earlier in the afternoon and my evening was complete.
This savory layer cake comes from Jerusalem, one of my favorite cookery books.

The chef's behind this collection of recipes are Yotam Ottolenghi and Sami Tamimi, owners of the wildly successful Ottolenghi restaurants in London. They call this an Open Kibbeh, a non-traditional take on a classic Lebanese Kibbeh. There are versions of Kibbeh throughout the Middle Eastern culture, but basically a kibbeh is a meat filled croquet or deep-fried dumpling that includes bulgur wheat (cracked wheat), spicy ground meat with fresh herbs, pine nuts and tahini sauce for dipping.
In this version, each of the components are layered into a spring-form pan and baked, then left to cool to room temperature-at which point it's released from the pan, holding into wedges better and the flavors are at their peak.
This is really super simple to make. I'm fortunate to work in the place that I do with access to the best food in the city. I also have this great Armenian market out in my hood. It is a constant source of wonder when I peruse its aisles while I attempt to build my Ottolenghi pantry. My shopping list consisted of ground lamb (ground beef works too), bulgur wheat  & pine nuts. I've never used bulgur wheat so I neglected to write down specifically "fine" bulgur wheat. I was slightly overwhelmed by the vast array of bulgur wheat on the shelf- 2 brands each with 4 grades from fine to coarse ground. I guessed and chose medium-fine. It worked fine though, the fully hydrated grain was slightly bigger than couscous and a tad grainier in texture.
At the butcher counter, the ground lamb they offered was called "lamb lulu". The raw lamb was seasoned with herbs and spices (I can't remember what they were but it sounded good) and spread squarely and evenly onto a long, narrow white platter, indented with an angular cross-hatched pattern and covered tightly with plastic wrap. It looked so beautiful.

Open Kibbeh
Yotam Ottolenghi’s & Sami Tamimi’s Jerusalem: A Cookbook.

INGREDIENTS:
scant 1 cup (125g) fine bulgur wheat
scant 1 cup (200ml) water
6 tablespoons (90ml) olive oil
2 garlic cloves, crushed
2 medium onions, very finely chopped
1 medium jalepeno, very finely chopped
12 ounces (350g) ground lamb
1 teaspoon ground allspice
1 teaspoon ground cinnamon
1 teaspoon ground coriander
2 tablespoon roughly chopped coriander
1/2 cup (60g) pine nuts
3 tablespoons roughly chopped parsley
2 tablespoons self-rising flour (or 2 tablespoons all-purpose flour + 1/8 teaspoon baking powder + pinch of salt)
Salt and black pepper
3 1/2 tablespoons (50g) tahini paste
3 1/2 tablespoons (50ml) water
2 teaspoons lemon juice
1 teaspoon sumac

METHOD:
Heat the oven to 400 degrees. Brush an 8 inch springform pan with olive oil and line with parchment paper. Put the bulgur wheat into a bowl, add water to cover the bulgur, and set aside for 30 minutes.
Heat four tablespoons of oil in a large skillet. Sauté the garlic, onion and jalepeno on medium-high heat until soft, remove from the pan, return it to high heat and add the lamb. Cook for five minutes, stirring, until brown. Return the onion mix to the pan, along with the spices, coriander leaves, salt, pepper and most of the pine nuts and parsley (saving a bit for the finish). Cook for a couple of minutes, remove from the heat, taste and adjust the seasoning.
Check the bulgur to see if all the water has been absorbed (strain if not). Add the flour, a tablespoon of oil, a quarter-teaspoon of salt and a pinch of black pepper and, with your hands, work into a pliable mixture that just holds together. Press firmly into the base of the springform pan  so that it is compact and level, I use the flat bottom of a pint glass. Spread the lamb mix evenly on top and press down. Bake for 20 minutes, or until the meat browns further and is very hot.
Whisk together the tahini, lemon juice, water and a pinch of salt for a very thick, yet pourable sauce. Remove the kibbeh from the oven, spread the sauce on top, sprinkle with pine nuts and parsley, and return to the oven. Bake for 10-15 minutes, until the tahini is just set and the pine nuts are golden. Remove and leave to cool down to room temperature.
Before serving, sprinkle with the sumac and a drizzle of olive oil. Remove the ring of the pan and carefully cut the kibbeh into slices.
This is great for leftovers too. I just microwave for one minute to take off the chill.


Tuesday, May 6, 2014

Chevre and Roasted Tomato Toasts with Fresh Za'atar

A while back, I spent a rainy "weekend" in the little kitchen cooking up my favorite condiments -The Three Amigos - slooowww roasted tomatoes, caramelized onions, & roasted red peppers. I then cooked up big batches of barley and white beans for the freezer,  hard boiled some eggs, and made a batch of fresh za'atar, (a Middle Eastern herb & spice blend of thyme, oregano, toasted sesame seeds, salt & sumac),
A day in the little kitchen makes the work week meals a breeze.
Simple omelets and grilled cheese sandwiches take on a whole new level of flavor, a quick blitz of  white beans and roasted peppers or slow roasted tomatoes (along with olive oil & lemon juice) in the food processor make up a lovely spread - the perfect snack with some toasted pita chips. Spread all over a big flour tortilla + egg salad + fresh herbs, or sliced lunch meat + caramelized onion + a generous sprinkle of za'atar, roll it up and you're good to go or slice it into pretty pinwheels.
My favorite quickie meal is a tartine or open-faced, loaded toasts. This one consists of slices of crusty country loaf which were brushed with olive oil and toasted in the oven, then rubbed with garlic, next spread with a mixture of chevre & za'atar, topped with slow roasted tomatoes and another sprinkle of za'atar.

Thursday, May 1, 2014

a stop-you-in-your-tracks grilled cheese sandwich

It's nice to have a leisurely morning, slowly awakening the little grey cells with a couple of pints of coffee. While sitting at my usual window table at my neighborhood cafe on a very, very warm & sunny morning, I was noodling around the blogosphere and working on the cheddar & jalepeno scone post. Suddenly I got very hungry even though I'd just eaten 2 of the afore mentioned scones with my coffee.
I decided that I needed to run home and drop off the computer and then dash up to the market and pick up some eggs and blue cheese, thinking I'd mix up a batch of blue cheese & caramelized onion scone dough before work. I was almost at the door when suddenly I was stopped in my tracks by two little words-grilled cheese.
Not so wise to go to the grocery store hungry...was my next thought...in fact, that would be down-right idiotic. Best grab a nosh first. Simply sliced bread and cheddar cheese. It'll only take a couple of minutes. At the refrigerator door, I pondered the last tiny bit of Pt. Reyes Original Blue cheese and those slow-roasted tomatoes and I was pretty darned pleased with myself.  Oh and how's that basil looking?  still perky green after a week. Excellent.
Ten minutes later I sat down to this:
 ...well that's a lie because I had to take 20 pictures of it first. Never made it to the store.

Monday, April 28, 2014

Lessons from the Big Kitchen


Every now and again I'll venture out of my comfort zone and out of the little kitchen. One of the great perks of working at Bi-Rite is the opportunity to take classes at 18 Reasons, our non-profit educational and event space. I love the hands-on cooking classes where I get the opportunity to cook in a professional kitchen, socialize with fellow enthusiasts, chat with professionals and learn something new. By day, the big kitchen behind the event space functions as the bake shop for the Bi-Rite Creamery.
The warm cozy storefront is an inviting communal dining room, classroom, art gallery, library & event space with a little bit of retail. This evening, the long table is set for 16 with water glasses, wine glasses and milk bottles filled with water. There are stacks of sturdy white plates and big mason jars filled with utensils and napkins. There's nothing fancy, yet it's elegant in it's simplicity. People strolling by can't help but be intrigued by what's going on.
What's going on this evening is a class called Flavors of the Middle East. We will be led through the evenings menu by Risa Lichtman, a local foodie and mastermind behind this wonderful and much anticipated event called Sunday Supperings, a communal dining experience and underground supper club, she hosts in her backyard several times a year. Risa lived in Israel for many years and will share some of her favorite dishes tonight.
Prior to class we  are emailed instructions to bring a knife, an apron and to wear closed- toed shoes. The menu along with the recipes are included.


On the menu:
herbed falafel balls over tahini sauce with homemade za'atar
fresh pita bread
chard & feta filo rolls with currants and pine nuts
spring greens with fresh herbs and citrus
cardamom-scented poached pears.


I could not have been more thrilled when I read that. Ever since I got my mitts on Ottolenghi's Plenty and Jerusalem and started cooking from them, I'm a little cuckoo for middle eastern foods. I love falafel but I've never made it. I didn't actually get to make it tonight either, though I did get to stand over the hot fat and deep fry them.


The way a class like this usually works is the counter space is divided into mise-en-place(d) stations, that's the french culinary term for ingredients/tools/bowls in place- and we break off into groups after being given some demo and basic instructions...dicing onions, smashing garlic etc. Here she's demo-ing the filo wrapped goat cheese and chard logs.


I can't remember the last time I used filo. It overwhelms me with it's (my imagined) high maintenance: freezing and thawing and keeping it moist while working quickly so as not to dry it out and keeping it from cracking...sheeesh! There's too much of it for any little dish I want to fool around with and it doesn't seem like it would hold up well to left-overs and it's a little too pricey. Those are all my excuses for not making anything with filo. Yet...I love filo! Greek Cheese Pies and Spanakopita and baklava. Now this Sweet & Savory Chard & Feta Tart is definitely on the To Do list. Lesson learned: place a sheet of dry paper towel between the damp dish towel and the sheets of filo while you work and if the sheet tears it doesn't matter. But did I jump into the filo group? uhm no.
I wanted to make the za'atar, a middle eastern herbal spice blend that, similar to a curry in that it can consist of variations of components, but generally includes thyme, oregano, marjoram, sesame seeds and salt. Less common is to find a blend that includes sumac, a spice made from dried and crushed sumac berries. Sumac is tangy & citrusy. It's a great way to add the tang of citrus without the acidity. In the Middle East, there is a true za'atar shrub which is somewhat similar to thyme.  I had been introduced to za'atar when I started cooking from Plenty and then Jerusalem (which I'm currently revisiting).
I see za'atar as an ingredient in many, many middle eastern recipes and it just seemed like the best place to start:
Next to the cutting board sat a bundle of fresh oregano, thyme, a couple of jars of white sesame seeds, salt and a bowl of sumac.
Two of us commenced to chopping the fresh herbs. I love thyme but I always haaaate chopping it, well actually it's the stripping the leaves off the stem part that becomes tedious after the first two or three stems. Fresh herbs stripped and chopped, I moved on to tossing & toasting the sesame seeds in a dry skillet (being a type A overachiever, I was secretly thrilled when Risa complimented me on my tossing skills)  Once I mixed the hot seeds into the rest of the herbs the smell was just incredible, but the entire kitchen just smelled heavenly.

The entire experience is fun and engaging. I fried some falafel, plated some tahini and topped the platter with my fresh za'atar. Top photo is za'atar topped labneh, a middle eastern yogurt that is very similar to greek yogurt but more firm, almost the consistency of  cream cheese. We spread that on the hot pita bread. Amazing.

The highlight of the evening, for me, is NO CLEAN UP! Kudos and thanks to the amazing volunteers who are truly the kitchen fairies we all dream about when we're home trashing our own kitchens. They're on hand for any manner of kitchen assistance, magically appearing with tools and bowls when we need them, removing the empties and dirties, washing as we basically trash the place and when the assembly and cooking is done, the pita bread and filo tarts have gone into the oven, we head into the dining room and take our seats at the table, the kitchen fairies start bringing out serving bowls of labneh topped with za'atar and whole wheat pita bread fresh from the oven, crispy on the outside, soft and bready inside. We help ourselves and pass the bowls around. Wine is served, water bottles refilled and the platters of za'atar topped tahini and falafel follow. Happy chattering and eager consumption. Everyone loves talking about the food we had a hand in creating. When the rolls of filo tart are placed before us we're almost full...and finally the poached pears.
This is creating community through food.

Friday, April 25, 2014

Roasted Red Pepper Grilled Cheese Sandwich

I can't even begin to describe how much I love a grilled cheese sandwich with a fried egg. This was the last of my treasured roasted red peppers. I'm crazy about roasted red peppers and ridicoulously try to hang on to them too long. On the average I roast about 4 red peppers and use them a number of ways to use in omelettes, on toasts, in quesadillas, in spreads and of course, grilled cheese sandwiches.  which I'd covered with olive oil and stored in an airtight jar. I scraped everything into a 1 cup pyrex prep bowl and microwaved for about 30 seconds just to completely liquify the oil. I pressed back the peppers with a fork and drained the oil into a skillet until I was ready to cook the egg.
Here's how this went down:

2 tablespoons butter, softened
2 tablespoons grated parmigiano reggiano
1 teaspoon Dijon mustard
2 slices of multi grain bread
aged gouda grated
sharp cheddar, grated~ I used my fave, Cabot Vintage Cheddar
chopped roasted red peppers
oil from the jar of roasted peppers
1 egg
za'atar

Turn on the broiler.
In a small bowl, mix butter, Parmigiano Reggiano, & Dijon mustard then spread completely over two slices of bread. Heat a non-stick skillet to medium-high heat and lay the bread, butter side down into the pan. Cook until the underside is nice and golden toasty.
Transfer the bread (toasty side down) onto a broiler proof pan and top each slice with cheese, getting the cheese right up to the corners of the bread so it doesn't burn like mine did. Set aside for a moment. Wipe any stuck cheese out of the non stick skillet you toasted the bread in, with a paper towel and add the roasted pepper infused olive oil to the pan over medium heat. Crack the egg into a small bowl or teacup, when the oil is hot tip the egg into the pan. Sprinkle a little salt and pepper over the egg. While the egg is cooking, place the cheese topped bread under the broiler until the cheese melts, 1-2 minutes.  Remove from the broiler, spread one slice with roasted pepper and set aside until the egg is finished cooking. Lay the cooked egg on the second cheesy toast.
Sprinkle with generous pinches of za'atar, or some freshly chopped herbs. Close the book on your sandwich, place it on a plate and using a sharp serrated knife, cut the sandwich in half. Take a moment to enjoy the sight of yolky yellow saucy goodness oozing over the plate. Consume immediately.

Sunday, April 20, 2014

I made Cheese!

I was super excited when this class appeared on the 18 Reasons calender~Homemade Cheddar!  How cool is that? Cheese is my favorite food.
The class was taught by Louella Hill, The Milkmaid.
So here's what went down:

Getting ready to make cheddar. First we taste~on the plate at 1:00: Fresh Tillamook cheddar, moist and buttery. Mild. Supermarket shrink wrap. @4:00 Cabot Vintage Cheddar-one of my favorites-still fairly moist and buttery, much tangier than the Tillamook. This has been my go-to everyday cheese for the last year. It's a wax coated cheese. Aged ??? @8:00 Cabot Clothbound Cheddar or what is also called bandage wrapped. The flavor is so much more intense than the previous cheeses. Finally @10:00 Keen's Cheddar from England. It's got a big moldy veins. YUM! Drier and even more intense than the Cabot. Saltier, savorier. good stuff.
Raw milk is gently heated to 91 degrees, cultured buttermilk is added, then rennet (the enzyme that creates curdling). About 30 minutes later you have a pot of what basically feels like custard. With a knife you start slicing through the custard in straight line cuts a half inch apart, turn the pot 45 degrees and cut again forming 1/2 " grid cuts. Moisture is releasing and here comes the whey.
Then with a flat straining ladle, start making horizontal cuts and gently stir.
After 30 minutes of stirring the curds, and maintaining the 91 degree temperature, break up smaller and smaller until you end up with something that looks like loose cottage cheese, temp increases to 105 and stirred for another 15 minutes.
Drain and place the curd, which has clumped into a large mass, in a large bowl and break apart and crumble with your fingers. The thing that surprised me the most was the sweetness of the whey. It made me very sad to see it go down the sink. Traditional ricotta is made from cooked whey.
The curd is still releasing moisture. The curds are scooped up and put in the straining basket and then pressed.
We got cheese...well sorta. This round was only lightly pressed to form it into a wheel that we could all take a picture of. What really happens is that the curd is left in the press overnight with 50 pounds of weight on it to extract all of the moisture. Aged cheddar has to be super dry so as not to mildew while it ages.
Once the wheel has been compressed overnight, it's left to sit out for a day or two in order to dry out and form a skin.
At this point in the class we were each given a small wheel which had been previously made, so that we could commence with the wrapping. We cut up strips and circles of clean white cotton, dipped the "bandages" in bacon fat and wrapped the cheese to protect the cheese while it ages.
We were given little plastic mesh mats and instructed to age our cheese in a zip lock bag in the vegetable drawer of the refrigerator or better yet- in our wine refrigerator <snort>. The cheese needs to be turned every day.
This is called affinage, the care and aging of cheese.Stay tuned.