The latest from Jerusalem, the best cookbook I've never owned.
I
have problems cooking rice. Seems so simple “follow package directions”. Never
fails, it’s usually undercooked and burning to the bottom of the pan before
it’s done…just a whisper of a flame and I still end up with scorched rice.
Add more water and I end up with clumpy moist rice. Not good either. Then I
came across Jamie Oliver’s method of boiling, draining & steaming rice, now
this is how I cook all my grains. This requires a little more attention & the use of a couple of tools but it results in more control and a grain that ideally suits it's final purpose.
The Jamie Oliver Method of cooking white rice:
Get a large pot of salted water boiling.
Add 1 1/2 cups of well-rinsed rice (in a mesh strainer-run it under cold water for about a minute-until the water runs clear)_
when the rice starts dancing around, boil for 5 minutes** from that point on.
Strain the rice in a colander and cover with aluminum foil, pressing it down onto the surface of the rice. Add an inch of water back into your original pot and bring that back to a boil.
Reduce the heat to a simmer and place your colander of foil-covered rice back into the pot and place the pot cover back on as well.
Let it simmer and steam for 10** minutes.
**These times will vary depending on the grain-white rice being the quickest cook and farro taking the longest. At the first point, you're looking for the grain to be chewy but still slightly underdone. The grain is finished when you think it's finished-the simmer & steam time can take up to 30 minutes depending on the grain. Taste it every 10 minutes & check that the water hasn't boiled away.
This dish has two different types of rice which require preparation separately. You can choose to go with one type if you want but what works here is the two different textures that are going on. Basmati is lighter & fluffier while the wild rice is firmer.
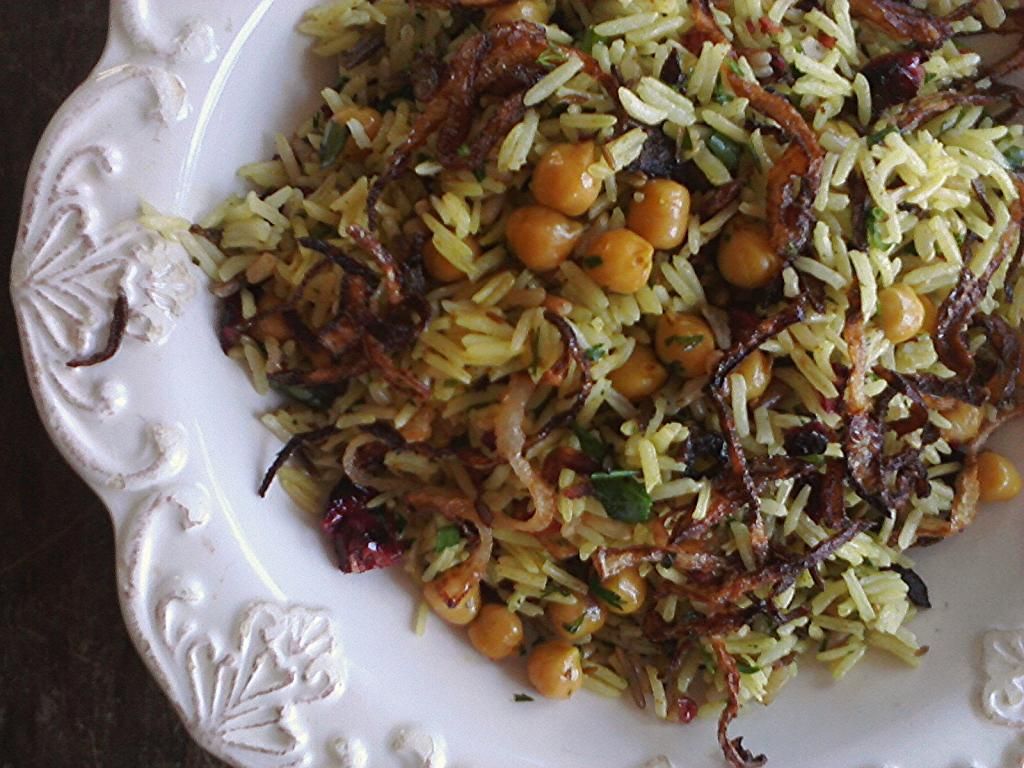
As I sit here and eat this I’m struck by two
things: It’s beautiful to look at, I hope my pictures do it justice. The rice is yellowed from the curry and
flecked with loads of fresh bright green herbs and the deep red from the dried
cranberries and finally the crispy brown of the fried onions. Ottolenghi loves
his fried onions for good reason. They add a level of crispiness and savory
complexity. I added a bunch of chives I’d just trimmed the flower off. They
were teetering on the edge of the compost bin.
Basmati & Wild Rice with Chickpeas, Herbs & Fried Onions
adapted from Jerusalem the Cookbook by Yotam Ottolenghi & Sami Tamimi
⅓
cup wild rice
2
½ tablespoons olive oil
2
¼ cups basmati rice
boiling water
2
teaspoon cumin seeds
1½ teaspoons curry powder
1
½ cups cooked and drained chickpeas (canned are good)
¾
cup sunflower oil
1
medium onion, thinly sliced
1
½ teaspoon all-purpose flour
⅔
cup currants
2
tablespoons chopped flat leaf parsley
1
tablespoons chopped cilantro
1
tablespoons chopped dill
I added about 2 tablespoons fresh chives-just what I had on hand
and not be wasteful=)
Salt
and freshly ground pepper
Method
Rinse the wild rice in a mesh strainer and place in small sauce pan. Fill with water and bring to a boil. Continue to boil until the rice is chewy then transfer to a mesh strainer or small colander and steam it (as directed above) to it's finish.
To cook the basmati rice, pour 1 tablespoon
of the olive oil into a medium saucepan with a tightly fitting lid and place
over high heat. Add the rice and ¼ teaspoon salt and stir as you warm up the
rice. Carefully add the boiling water filling the saucepan about 3/4 full, once the rice is boiling and dancing around, continue to boil for 5 minutes, then transfer into a colander and simmer & steam to it's finish. Turn off the heat, remove the foil and place a clean tea towel over the pot and place the lid back on. Let it sit for 10 minutes.
While the rice is cooking, prepare the
chickpeas. Heat the remaining 1 ½ tablespoons of olive oil in a small saucepan over high
heat. Add the cumin seeds and curry powder. Wait for a couple of seconds, and
then add the chickpeas and ¼ teaspoon salt; make sure you do this quickly or
the spices may burn in the oil. Stir over the heat for a minute or two, just
heat the chickpeas then transfer to a large mixing bowl.
Wipe the saucepan clean, pour in the
sunflower oil, and place over high heat. Make sure the oil is hot by throwing a
small piece of onion; it should sizzle vigorously. Use your hands to mix the
onion with the flour to coat it slightly. Take some of the onion and carefully
(it may split) place it in the oil. Fry for 2 to 3 minutes, until golden brown,
then transfer to paper towels to drain and sprinkle with salt. Repeat in
batches until all the onion is fried.
Finally,
add both types of rice to the chickpeas and then add the currants, herbs, and
fried onion. Stir, taste and add salt and pepper as you like. Serve warm or at
room temperature.
This
makes a lot of rice. Perfect for leftovers and cookin’ up for a morning fried
rice.
This
is really, really good.