Thursday, March 20, 2014

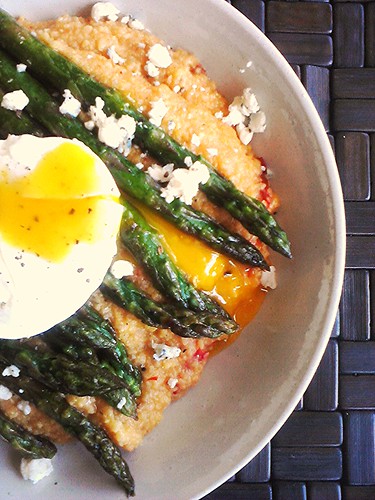
Polenta with Pan Roasted Asparagus

Yaaayyy asparagus! Love it. Almost as much as I love polenta. Add a flowing stream of warm runny egg yolk and my meal in a bowl is a gorgeous feast.
Asparagus came into the market a few weeks ago and I've been jonesing to make this ever since, but I sort of got side tracked by my current obsession with cauliflower soup and roasting cauliflower and tossing it around in gratins and grain bowls.
I like to buy polenta in bulk when I can, the coarse ground, not the quick cooking type. I'll cook a fairly large batch because I love the leftovers. My basic recipe goes something like this:

4 1/2 cups water
4 teaspoons Better Than Bouillion low-sodium chicken broth base (optional)
1 teaspoon sea salt
1 1/2 cups polenta
2 tablespoons butter
1/2 cup grated Parmigiano Reggiano

Bring the water to a boil in a large pot (that has a lid to fit). Whisk in the broth base if you're using it. Add the salt. Whisk in the polenta. Using a flat edged wooden paddle, continue to stir the polenta until it starts to thicken a little. Turn the heat down to medium and cover the pot. Stir it every ten minutes for a total cooking time of 30 minutes. It may seem like it's done earlier, but it'll be less grainy and sweeter if it continues to cook the full 30 minutes.
Stir in the butter and cheese. If you prefer it creamier add some milk or more water/broth.

This is my favorite way to prepare asparagus:
Snap off the tough ends of the asparagus spears. Heat about a tablespoon of olive oil in a skillet on medium-high heat, when the oil starts to shimmer, add the asparagus spears to the pan so they line up side by side. Add few pinches of large grain sea salt and crushed red pepper flakes. Move the pan back and forth so the oil coats the spears and to allow the seasonings to distribute. Cover and cook for 5-7 minutes, shaking the pan occasionally, until the asparagus starts to brown and is cooked through.
Within my polenta I like to stir in any or all of my favorite flavor enhancers like roasted red peppers, slow-roasted grape tomatoes or caramelized onions. This batch includes all three. Over-kill? Perhaps, but that's just how I roll. Oh yeah...and I crumbled on the last bit of my Pt. Reyes Original Blue Cheese. Oh yeah.
Thursday, March 13, 2014

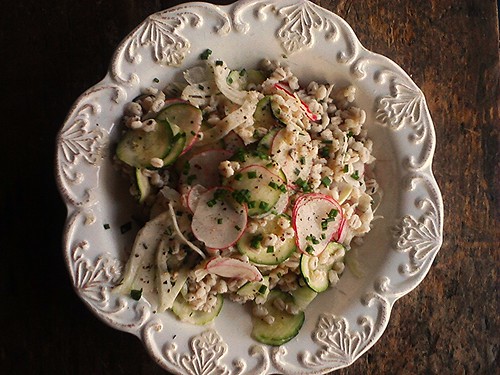
Buttermilk Farro Salad


buttermilk farro salad, originally uploaded by michele wynne.


I went to a party last week. I rarely go to shindigs that require dress-up so I was quite distressed to discover that my favorite dress pants were alarmingly snug, you know that unfortunate midriff tightening that turns your pants pockets into gaping mouths, giving the appearance of 18th century panniers (think Marie Antoinette). After my initial horror, I was forced to switch tactics, I yanked off the sparkly t-shirt and replaced it with a dress, that oh-so-chic, 70's revival style of  dress and pants at the same time. I immediately followed that with a very firm commitment to amp up the veggies in my day-to-day kitchen/break-room strategy. Then I went to the party and ate stacks of herbed chicken on focaccia sandwiches, food truck gourmet pizza, and kettle chips (love 'em), rounding it all out with many glasses of white wine and salted lavender cookies.
The very next day...
...enter this really luscious Buttermilk Farro Salad I found over at 101 Cookbooks.
I was bitten with the grain bug when I first made this California Barley Bowl a couple of weeks ago. The addition of a plump nutty grain to any combination of greens and/or vegetables, then tossed with a tangy dressing is an amazingly filling and satisfying meal in a bowl. Toasted nuts, seeds, dried fruit, crumbly cheese, shaved cheese and avocado can be tossed in for more complexity, but that's not necessary in this salad. I had to rein in the urge to prematurely tweak, so I didn't crumble the remnants of my Pt. Reyes Original Blue Cheese over this or fan out some thinly sliced avocado to top things off.
Nope. I stuck to my guns, and followed the recipe as directed because I trust that Heidi knows when enough is enough. Besides, I've got a freezer full of grains to play around with now and as it turned out, this was exactly all that it needed to be.
Two things that make me very happy in a salad are shaved vegetables and buttermilk. I love the word "buttermilk". There's just something warm and fuzzy about it that brings to mind a kindly, apron-clad grandmother in a cotton print dress, baking biscuits in a big country farm kitchen.
Anyhoo, it is time, once again, for the millionth time, to revive the veggie challenge. Except it's not really a challenge anymore. I just need to focus and ignore those diversions that lead me to places like this and this and this.
I also want to share two of my favorite cooking tips:
The first, is strategy for fool-proof cooking of your chosen grain. This is the boil and steam method I got from Jamie Oliver's Food Revolution. It takes some attention, but it you don't have a rice cooker, it turns out a grain to exactly your preference.
The second tip, from 101 Cookbooks (of course), is to cook up a big batches of various grains and freeze in 2 cup portions. I do this with beans too. I use the smaller freezer bags and then insert the filled bags in larger freezer bags.

TO PREPARE THE GRAIN:

  • start with a large pot that either has a steaming insert or will fit a colander inside
  • rinse the grain well in a mesh strainer with lots of cold water
  • put on a kettle of water to boil
  • fill the pot with cold water to about the halfway point or at least twice the volume of grain and bring to a boil
  • add a generous amount of salt and/or bouillion seasoning (if desired)
  • add your rinsed grain
  • boil your chosen grain just until it's chewy
  • drain the grain in a colander
  • cover with aluminum foil pressed down onto the surface of the grain
  • pour some of the boiling kettle water into the pot-about an inch in depth- make sure the water  is not  going to touch the bottom of the colander
  • Turn up the heat to high for a minute or so, until it boils, then lower to a simmer and set the colander into the pot and cover with a lid.
  • Steam for 10 minutes, fluff with a fork and taste. Repeat until it reaches your desired texture of chewiness-just don't let it get soft.


TO FREEZE:


The idea behind this method, rather than rinsing with cold water to quick cool the grain, is not to introduce more water, which will crystalize in the freezer.
  • place a baking sheet in the freezer (or 2 if you have the space)  about the same time you've transferred the colander into the pot to steam.
  • when the grain is ready, remove the colander from the pot and set it on the counter to cool, giving it a toss every now and again to let off steam.
  • remove the baking sheet from the freezer and transfer the grain, spreading it over the entire surface of the baking sheet.
  • let the grain sit for a few more minutes until it stops steaming.
  • place the baking sheet in the freezer for 10 minutes.
  • remove the baking sheet from the freezer and transfer the grain into freezer bags and/or storage containers, depending on the amount you plan to use within the next two days.
TO THAW:
  • Remove the bag of grain from the freezer, open the bag and let it thaw at room temperature for about 15 minutes.
  • Over a mesh strainer, break apart the still frozen pieces to get them out of the bag and tumble the grain into the strainer.
  • Rinse with cold water to break apart the grain, then shake away the excess water (the remaining water will be enough to steam and moisten the grain)
  • Place the grain into a glass bowl and microwave for a minute, remove, stir, taste, then microwave again for a minute, just until the chill is off.


Monday, March 10, 2014

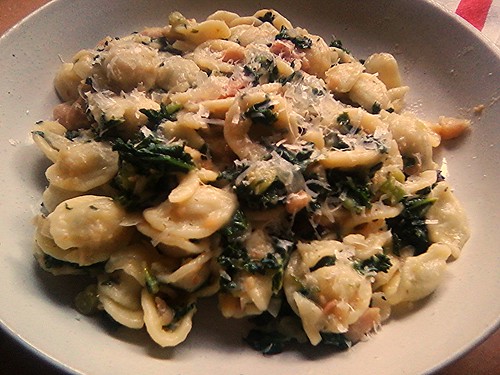
Orecchiette, kale & white beans

There is one cookbook in my small collection that I value more and more each time I peruse it & use it- Eat Good Food -the so-much-more-than-just-a-cookery-book written by a man I truly admire, Sam Mogannam. Not only does it contain a collection of  inspiring recipes, it's brilliance is that it's a guide to shopping for fresh, quality ingredients whilst getting a better understanding for supporting traditional and local food makers and suppliers. It's one of the most consumer friendly books around and an inspiring source for food education.
I first picked up the book from my local library after reading an article in the San Francisco Chronicle about Sam and Bi-Rite Market. My next day off, pedaling across town to the Mission for some work related thrift shopping, I made the turn and headed down 18th St.  At street level, the one block between Delores and Guerrero tips the scale slightly toward residential, but is as bustling as any commercial city street with both foot and vehicle traffic.  I walked my bike and spied the tiers of fresh flowers a half block away and made my way into the tiny, over-flowing market after locking up the bike. I was instantly transported back to my NYC/NYU  days. I didn't do a lot of cooking back then but I loved wandering the narrow aisles and perusing the artfully abundant wire rack shelves of grocery and over-flowing wooden crates of produce. These were the gourmet markets, short on square footage and high in alluring vertical abundance. The Garden of Eden on 14th Street and Balducci's in the West Village were my favorites. Dean & Deluca? not so much. There was something intimidating about that store.
The moment I first walked into Bi-Rite Market I was impressed by the staff, so knowledgeable and friendly, there when you needed them  and giving you the freedom to browse as long a you wanted. I loved the artististic hand lettered signs and personal informative descriptors of wines and cheese. I remember thinking "I just want to live here!". That was about 3 years ago. Next month will mark my 1 year anniversary as part of the Bi-Rite Family. Every day I learn something new.
Oddly enough, this is the first time I've cooked orecchiette pasta. I love it. They're tiny bowls of creamy goodness. I used green curly kale instead of chard as we only had the rainbow chard in the store. The recipe notes that red chard pigment will bleed into the dish and can become bitter. I wasn't sure if that applied to rainbow as well so I decided to go with the kale. I like to use the curly kale when cooking and Lacinato kale in salads. Spinach is good here too.


Orecchiette, White Beans & Chard
from Eat Good Food


1 large bunch chard, about 14 ounces
kosher salt
1 pound dried orecchiette
1/2 cup (about 2 ounces) finely diced pancetta
1/4 cup extra virgin olive oil
1 medium yellow onion, finely diced
3 large cloves garlic, chopped
1 1/2 cups cooked white beans (one 15-ounce can, rinsed & drained)
2 teaspoons chopped thyme or sage, or a combination
1 tablespoon freshly squeezed lemon juice, more as needed
1/2 cup grated Parmigiano-Reggiano


To prepare the chard, strip the leaves off the stems. Dice up the stems and slice the leaves into thin strips, keeping them separate.
Bring a large pot of water to a boil, then salt generously. Add the pasta and cook until it's almost al dente, a couple of minutes less than the package instructions. Using a large slotted spoon or mesh strainer, scoop out the pasta into a colander and let it drain well. Reserve 2 cups of pasta water, and empty the pot. Return the pot to the burner and set the heat to medium-high. When the pot is dry and hot, add the pancetta and 1 tablespoon olive oil and cook, stirring frequently until the pancetta is golden and most of the fat is rendered out, about 2 minutes. Add the onion and 1/2 teaspoon of salt and continue to cook until the onion is translucent, about 4 more minutes. Add the chopped chard stems and cook until softened, then add the garlic and cook, stirring for another minute.
Add the beans and using a potato masher, crush about half of them. Breaking down of some of the beans thickens the sauce. Add the thyme or sage, 1/2 teaspoon salt, and 1 cup of the pasta water and stir to combine. Cover the pot and cook, stirring occasionally, for 5 minutes to blend the flavors. Stir in the chard leaves, cover and cook until the chard is tender, 2-3 more minutes.
Add the drained pasta and stir to combine. Cook, stirring constantly, until the pasta is just al dente and the liquid has reduced to a creamy coating of sauce, 1 to 2 minutes longer. Add more pasta water if its too dry.
Remove from heat and stir in remaining 3 tablespoons olive oil, the lemon juice and 1/4 of Parmigiano-Reggiano. Taste and add more lemon juice or salt as needed. Garnish with the remaining Parmigiano-Reggiano.


This made good leftovers, especially the next morning, topped with a poached egg.


Wednesday, March 5, 2014

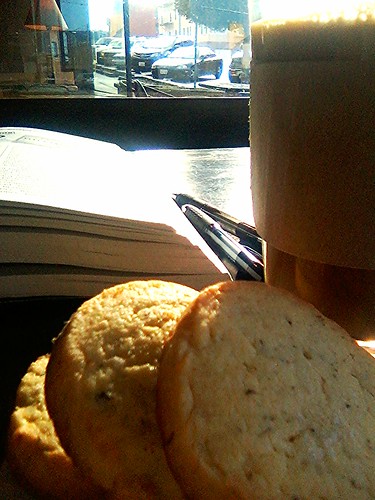
Salted Lavender Cookies


Salted Lavender Cookies, originally uploaded by michele wynne.
I love that feeling when I wake up early on a rainy morning and realize that I don't have to go to work...even better when there is nothing on the To Do list that involves me having to get out of my jammies and leave the apartment. Yesterday was such a day. I popped season 2 of Downton Abbey into the DVD player and noodled away the day in the kitchen. I started with waffles. I still can't get those Black Bear Diner Sweet Cream Pancakes out of my head. I've been making & tweaking various recipes  amping up the sugar in a variety of ways: subbing in vanilla sugar, infusing warm cream with vanilla sugar, adding more vanilla, adding more sugar,  a couple of squirts of agave nectar...and on and on...the little test kitchen is hard at work as is my sad little waffle iron. Coincidentally, there's a giveaway going on over at The Pioneer Woman Cooks. Fingers crossed.
This morning the sun has been teasing in and out whilst I chill at Simple Pleasures enjoying a pint of java and these Salted Lavender Cookies I made yesterday. Unlike the waffles, this recipe seems to have found it's balance. They've been a work-in-progress since my first crack at them back around Thanksgiving. Now, thanks to my Christmas Kitchen Aid, there's an added churn power that gives the dough a fluffy lift and slightly more tender texture.
Dorie Greenspan's recipe for Sables has been a little kitchen go-to for years without fail (using a $10 hand mixer). It's the basis of my salt & lavender ratio tweaks over the course of several test runs. The last tweak is to the method, inspired by Christina Tosi's book Momofuku Milkbar, the insider revelations behind Milkbar, Momofuku's bakery in NYC.


Salted Lavender Cookies
adapted from Dorie Greenspan's Sables


1 cup butter - 2 sticks - room temperature
1/2 cup sugar
1/4 cup powdered sugar - sifted
1 teaspoon fine sea salt
2 large egg yolks - room temperature
2 teaspoons vanilla extract
2 cups all-purpose flour
1 tablespoon finely crushed, dried, lavender buds*
Maldon sea salt for finishing


In the bowl of an electric mixer, paddle the butter at medium speed until smooth and creamy -    about 3 minutes. Add both sugars and salt. Beat until well blended - 3 more minutes. Add eggs, one at a time, waiting for each egg to incorporate before adding the next. Add the vanilla. Paddle on high for 7 minutes, occasionally scraping down the side of the bowl.
Stir the lavender into the flour. Add the flour mixture into the butter and mix it in using a the lowest speed just until the flour has been incorporated. The dough will be soft and slightly sticky. Scrape the dough out onto a lightly floured work surface and form into a roughly rectangular mass. Divide it in half lengthwise so you have two logs. Place one log onto a piece of plastic wrap rolling the dough into a compact, uniform roll about 9 inches long, by twisting and tightening the ends of the plastic wrap. Repeat with the second log.
Refrigerate for a minimum of 2 hours or overnight. The dough can be frozen at this point as well. Put the wrapped logs into a freezer bag and press out as much air as you can.


Arrange a rack in the center of the oven and pre-heat the oven to 350 degrees.
Line two baking sheets with parchment paper. Remove the dough from the refrigerator and slice the logs into 1/2 inch rounds, slicing uniform pieces from each end first, then slice the remaining log into 1/2 thick rounds. Lay each round an inch apart. Sprinkle each round with a light pinch of Maldon sea salt and press the flakes lightly into the dough.
Bake one sheet at a time for 16 minutes, rotating the baking sheet at the 8 minute mark. Remove when the edges turn golden brown. The top of the cookie should still be pale.
Let the cookies cool on the baking sheet for 1-2 minutes and then transfer them onto a wire rack to continue cooling.


*I forage lavender from my neighborhood and let it dry out on my window sill. Scrape the buds off the stem and onto a cutting board and chop, chop, chop and chop some more or use a mortar and pestle crushing & pounding until you have a variation of powder and bigger bits.