Every now and again I'll venture out of my comfort zone and out of the little kitchen. One of the great perks of working at Bi-Rite is the opportunity to take classes at 18 Reasons, our non-profit educational and event space. I love the hands-on cooking classes where I get the opportunity to cook in a professional kitchen, socialize with fellow enthusiasts, chat with professionals and learn something new. By day, the big kitchen behind the event space functions as the bake shop for the Bi-Rite Creamery.
The warm cozy storefront is an inviting communal dining room, classroom, art gallery, library & event space with a little bit of retail. This evening, the long table is set for 16 with water glasses, wine glasses and milk bottles filled with water. There are stacks of sturdy white plates and big mason jars filled with utensils and napkins. There's nothing fancy, yet it's elegant in it's simplicity. People strolling by can't help but be intrigued by what's going on.
What's going on this evening is a class called Flavors of the Middle East. We will be led through the evenings menu by Risa Lichtman, a local foodie and mastermind behind this wonderful and much anticipated event called Sunday Supperings, a communal dining experience and underground supper club, she hosts in her backyard several times a year. Risa lived in Israel for many years and will share some of her favorite dishes tonight.
What's going on this evening is a class called Flavors of the Middle East. We will be led through the evenings menu by Risa Lichtman, a local foodie and mastermind behind this wonderful and much anticipated event called Sunday Supperings, a communal dining experience and underground supper club, she hosts in her backyard several times a year. Risa lived in Israel for many years and will share some of her favorite dishes tonight.
Prior to class we are emailed instructions to bring a knife, an apron and to wear closed- toed shoes. The menu along with the recipes are included.
On the menu:
herbed falafel balls over tahini sauce with homemade za'atar
fresh pita bread
chard & feta filo rolls with currants and pine nuts
spring greens with fresh herbs and citrus
cardamom-scented poached pears.
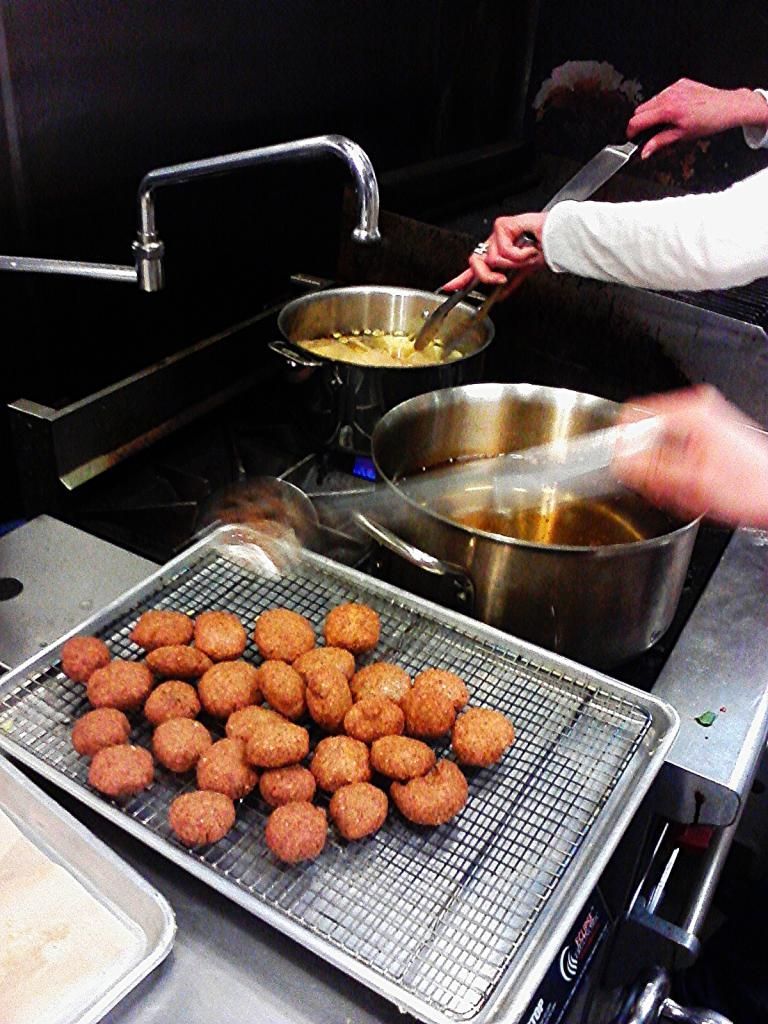
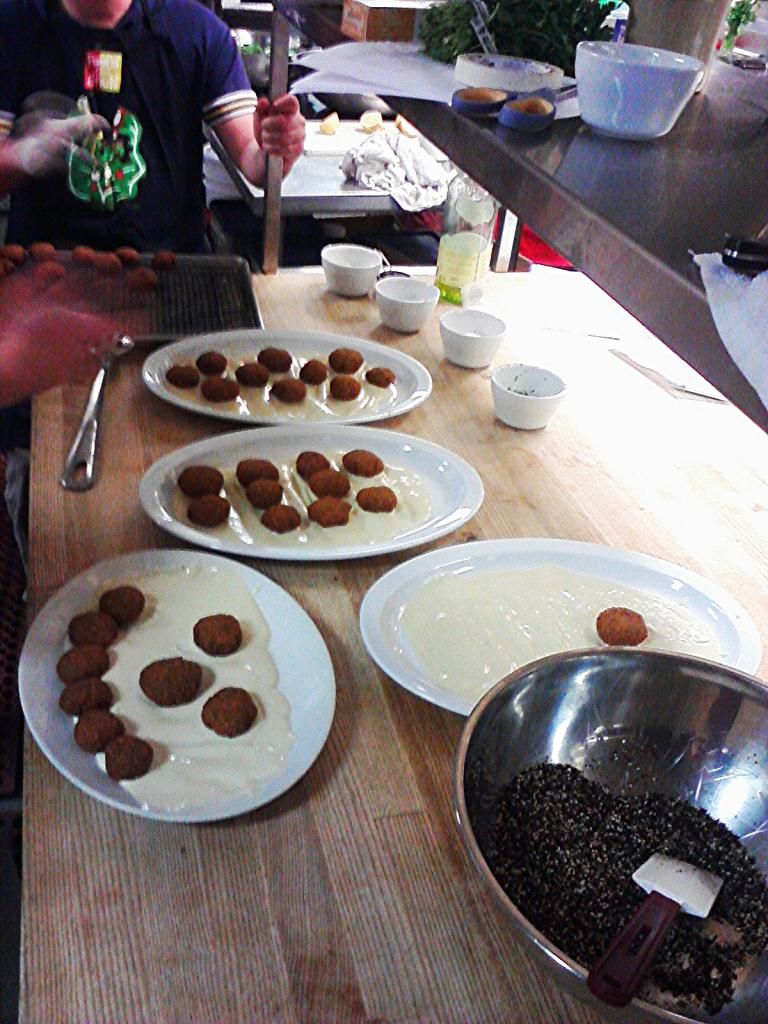
I could not have been more thrilled when I read that. Ever since I got my mitts on Ottolenghi's Plenty and Jerusalem and started cooking from them, I'm a little cuckoo for middle eastern foods. I love falafel but I've never made it. I didn't actually get to make it tonight either, though I did get to stand over the hot fat and deep fry them.
The way a class like this usually works is the counter space is divided into mise-en-place(d) stations, that's the french culinary term for ingredients/tools/bowls in place- and we break off into groups after being given some demo and basic instructions...dicing onions, smashing garlic etc. Here she's demo-ing the filo wrapped goat cheese and chard logs.
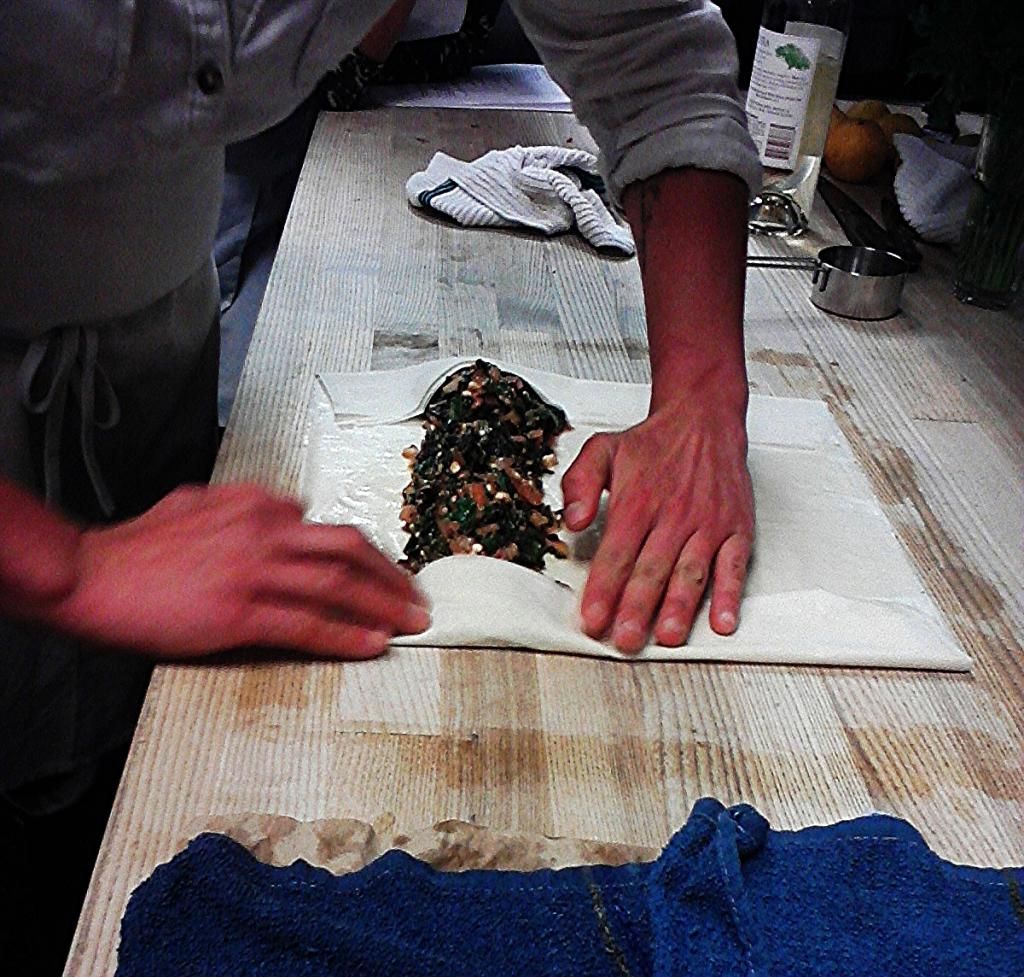
I can't remember the last time I used filo. It overwhelms me with it's (my imagined) high maintenance: freezing and thawing and keeping it moist while working quickly so as not to dry it out and keeping it from cracking...sheeesh! There's too much of it for any little dish I want to fool around with and it doesn't seem like it would hold up well to left-overs and it's a little too pricey. Those are all my excuses for not making anything with filo. Yet...I love filo! Greek Cheese Pies and Spanakopita and baklava. Now this Sweet & Savory Chard & Feta Tart is definitely on the To Do list. Lesson learned: place a sheet of dry paper towel between the damp dish towel and the sheets of filo while you work and if the sheet tears it doesn't matter. But did I jump into the filo group? uhm no.
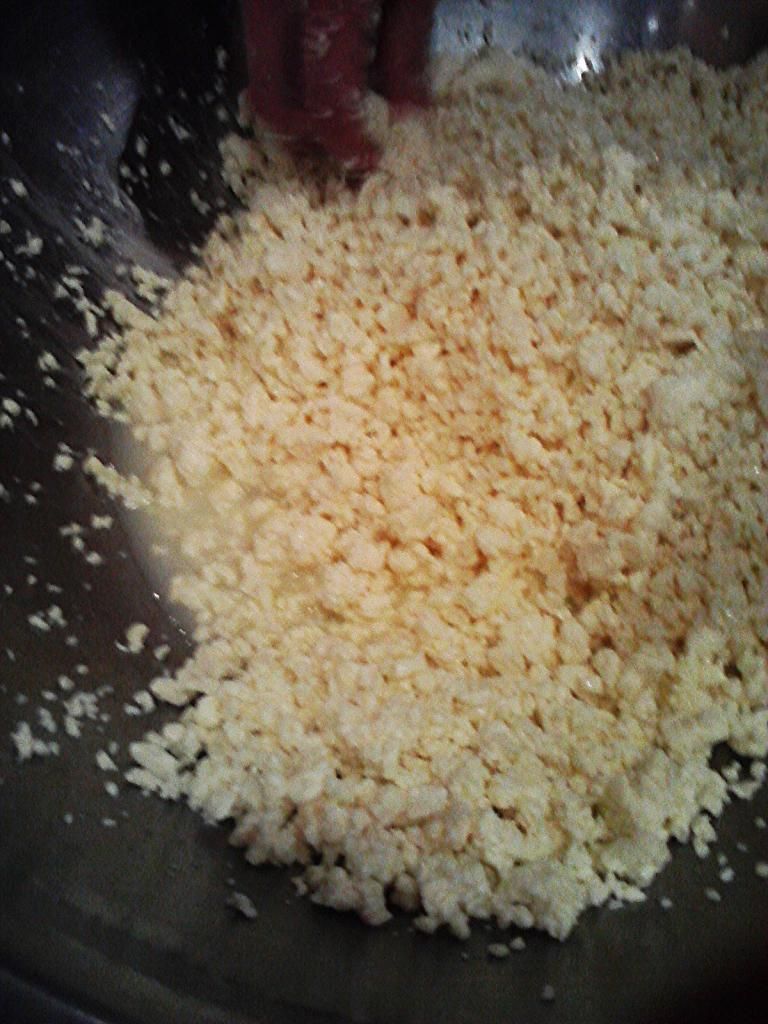
I wanted to make the za'atar, a middle eastern herbal spice blend that, similar to a curry in that it can consist of variations of components, but generally includes thyme, oregano, marjoram, sesame seeds and salt. Less common is to find a blend that includes sumac, a spice made from dried and crushed sumac berries. Sumac is tangy & citrusy. It's a great way to add the tang of citrus without the acidity. In the Middle East, there is a true za'atar shrub which is somewhat similar to thyme. I had been introduced to za'atar when I started cooking from Plenty and then Jerusalem (which I'm currently revisiting).
I see za'atar as an ingredient in many, many middle eastern recipes and it just seemed like the best place to start:
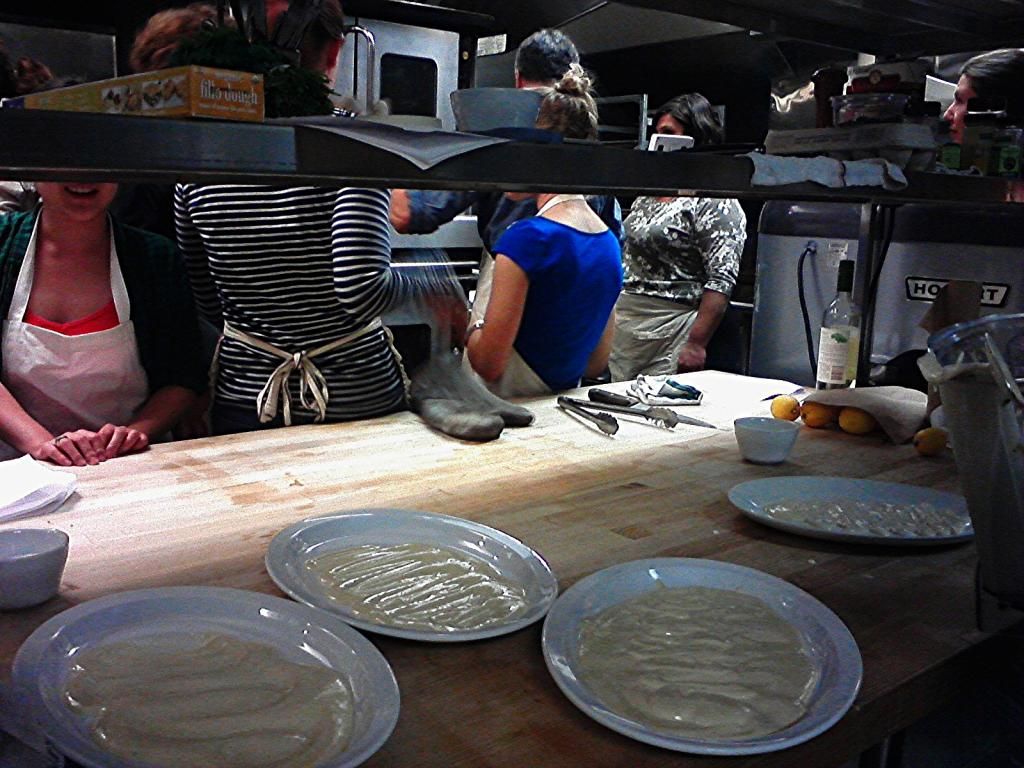
Next to the cutting board sat a bundle of fresh oregano, thyme, a couple of jars of white sesame seeds, salt and a bowl of sumac.
Two of us commenced to chopping the fresh herbs. I love thyme but I always haaaate chopping it, well actually it's the stripping the leaves off the stem part that becomes tedious after the first two or three stems. Fresh herbs stripped and chopped, I moved on to tossing & toasting the sesame seeds in a dry skillet (being a type A overachiever, I was secretly thrilled when Risa complimented me on my tossing skills) Once I mixed the hot seeds into the rest of the herbs the smell was just incredible, but the entire kitchen just smelled heavenly.
I can't remember the last time I used filo. It overwhelms me with it's (my imagined) high maintenance: freezing and thawing and keeping it moist while working quickly so as not to dry it out and keeping it from cracking...sheeesh! There's too much of it for any little dish I want to fool around with and it doesn't seem like it would hold up well to left-overs and it's a little too pricey. Those are all my excuses for not making anything with filo. Yet...I love filo! Greek Cheese Pies and Spanakopita and baklava. Now this Sweet & Savory Chard & Feta Tart is definitely on the To Do list. Lesson learned: place a sheet of dry paper towel between the damp dish towel and the sheets of filo while you work and if the sheet tears it doesn't matter. But did I jump into the filo group? uhm no.
I wanted to make the za'atar, a middle eastern herbal spice blend that, similar to a curry in that it can consist of variations of components, but generally includes thyme, oregano, marjoram, sesame seeds and salt. Less common is to find a blend that includes sumac, a spice made from dried and crushed sumac berries. Sumac is tangy & citrusy. It's a great way to add the tang of citrus without the acidity. In the Middle East, there is a true za'atar shrub which is somewhat similar to thyme. I had been introduced to za'atar when I started cooking from Plenty and then Jerusalem (which I'm currently revisiting).
I see za'atar as an ingredient in many, many middle eastern recipes and it just seemed like the best place to start:
Next to the cutting board sat a bundle of fresh oregano, thyme, a couple of jars of white sesame seeds, salt and a bowl of sumac.
Two of us commenced to chopping the fresh herbs. I love thyme but I always haaaate chopping it, well actually it's the stripping the leaves off the stem part that becomes tedious after the first two or three stems. Fresh herbs stripped and chopped, I moved on to tossing & toasting the sesame seeds in a dry skillet (being a type A overachiever, I was secretly thrilled when Risa complimented me on my tossing skills) Once I mixed the hot seeds into the rest of the herbs the smell was just incredible, but the entire kitchen just smelled heavenly.
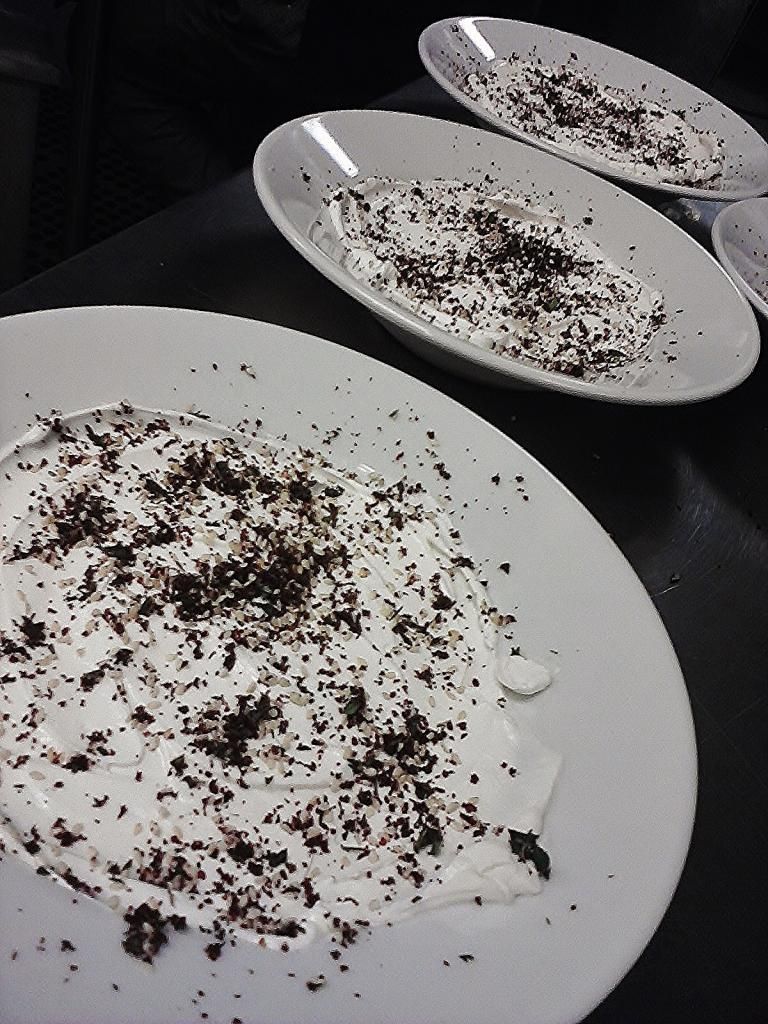
The entire experience is fun and engaging. I fried some falafel, plated some tahini and topped the platter with my fresh za'atar. Top photo is za'atar topped labneh, a middle eastern yogurt that is very similar to greek yogurt but more firm, almost the consistency of cream cheese. We spread that on the hot pita bread. Amazing.
 The highlight of the evening, for me, is NO CLEAN UP! Kudos and thanks to the amazing volunteers who are truly the kitchen fairies we all dream about when we're home trashing our own kitchens. They're on hand for any manner of kitchen assistance, magically appearing with tools and bowls when we need them, removing the empties and dirties, washing as we basically trash the place and when the assembly and cooking is done, the pita bread and filo tarts have gone into the oven, we head into the dining room and take our seats at the table, the kitchen fairies start bringing out serving bowls of labneh topped with za'atar and whole wheat pita bread fresh from the oven, crispy on the outside, soft and bready inside. We help ourselves and pass the bowls around. Wine is served, water bottles refilled and the platters of za'atar topped tahini and falafel follow. Happy chattering and eager consumption. Everyone loves talking about the food we had a hand in creating. When the rolls of filo tart are placed before us we're almost full...and finally the poached pears.
This is creating community through food.
This is creating community through food.